

Blanka
One day long ago, a young boy named Jimmy was aboard a plane, on his way to visit his uncle. Unfortunately some government officials who were also on the plane were the targets of an assassination attempt by Shadaloo, and the plane crashed into the Brazilian Jungle. However, Jimmy survived the crash and began to live amongst the animals in the jungle. One day, he unwittingly hitched a ride on a poacher's car. Curious and excited, Blanka began to venture into the outside world. It was probably during this time that he met Dan as well as Dan's 'student', Sakura, before he went back to the jungle. He later resurfaced again to compete in the World Warrior tounament, where his mother happened to be a spectator. There is a tearful reunion as mother and son were finally reunited. Blanka probably now lives a happy (ab)normal life with his mother.
In a nutshell
Blanka is a powerful character with excellent jumping attacks, useful special moves and some great normals. Able to keep offensive pressure on as well as play a defensive role,gains a Vertical Roll useful fro crossup games. A very solid character in Hyper Fighting.
Character Specific Information
Color Options
| Default | Start |
 |

|
Moves List
Note: All frame data gathered by using the method described at http://code.google.com/p/macrolua/wiki/FrameDataExamples. Some differs from TAkiba's, and is noted by a *.
Normal Moves
- Standing Normal Moves (st.)
- Close Standing Normal Moves (cl.)
- Crouching Normal Moves (cr.)
- Jumping Normal Moves (nj.)
- Diagonal Jumping Normal Moves (j.)
Unique Moves
Throws
Special Moves
Requires 5 button presses }}
Requires 5 button presses }}
Requires 5 button presses }}
The Basics
He is a rushdown and/or turtle character with throw mix ups,and had the best low attacks in the game, also it had good medium range jumping normals, diagonal jumping Rondhouse still a good answers against projectile spammers but now with Vertical Roll he can cross up those opponents easily.
Electricity Attack is effective for corner and meaty traps and a good late anti air, also you can combo with with a jumping Strong with piano inputs.
Horizontal Roll is still a good surprise tool for long distance combat but don't abuse it ,try to use it as a cross up tool after a sweep instead.
Blanka main strategy is about sweep and mixups with Vertical Roll or Electricity, but commonly depends if you are fighting a projectile special character, a common problem with them was the lack of counter options but Vertical Roll was designed for that in medium and short distance for crossup traps.
Pros
- Vertical Roll Fall useful against projectiles
- Longest Sweep
Cons
- Horizontal Roll had new special counters
- Vertical Roll recovery unsafe
Advanced Strategy
From Jeff Schaefer:
Blanka is real tough primarily because of the confusion and speed.
Take this for example....
His j.LK LOOKS the same as j.MK.
you jump on somebodies head or straight up with j.LK, you can bite them SUPER fast. You push j.MK sometimes, then bite a split second later, it looks the same but it throws off their "counter" timing and distance perception.
Its complicated, but trust me, it works real good.
The Blanka train is a mixup of the following that I used back in 1992ish.
It is preceded by a BITE (HP throw). Then:
- Roll
- s.MP or cr.MK...
- BITE
---
You can repeat that or you can do these variations...
- Roll
- j.HP right away. It hits every character if they are standing and push anything, like if they are trying to counter, etc, and some characters it hits them if they are crouching...
- Then you land and BITE.
OR when you land on other side, you jump OVER them AGAIN with HP right away, stunning them.
- Roll
- cr.MK
- nj.LK
- Vertical ball behind head
- cr.MK
then either bite, ball again, or nj.LK, bite, repeat.
- Roll
- Electricity for split second....
- Vertical ball behind their neck out of electricity then you can do what I listed.
You can mix up a variety of about 6 things from the bite, to throw them off badly, keep them guessing, and just dominate people.
Against some characters, just roll, s.MP, bite was UNCOUNTERABLE game over.
From Decoy:
"Spacers" are blocked moves that position Blanka perfectly for a ball into throw attempt. They work best when setup with a c.HP or a c.HK at the end of a blocked attack string.
For example:
I jump-in with a standard j.HP, s.MP, c.HK. If you're like me, you charge at every opportunity. I have a charge ready after the c.HK and I go into an LP horizontal ball into throw. It's almost free every time.
And let's not forget about the double-charge method. You can do horizontal ball attacks right into vertical ball attacks seamlessly (by ending the horizontal ball motion in down-forward you maintain down charge for the vertical ball). This is great for closing the gap on someone who is across the screen and jumping in the corner. Or a surprise cross-up with the ball hitting on the way down on the opposite side. Then the fun begins.
http://www.youtube.com/watch?feature=player_embedded&v=A0wCzcs32lw
http://www.youtube.com/watch?feature=player_embedded&v=DAXCxVF2EjE
Combos
-j.MP, Piano Input LP/MP Electricity
-j.HK,s.MP,cr.MK/cr.HK
-Cross up j.HP,s.MP,s.MP,cr.HK
-V.Roll (falling),cr.MP,R.Attack
Match-ups
Vs. Balrog (boxer)
From Decoy: Blanka's options if Balrog does any rush punch:
1. A well timed c.HK for a knockdown into an early LP horizontal ball for a cross-up meaty electricity.
2. Trade hits with a well timed surprise electricity then do the follow-up moves as above because Blanka's get-up speed is faster than anyone else in the game.
Blanka can also sneak in horizontal ball into throw. If there is one thing that Rog players like to do, it's counter attack after a horizontal ball. You can pretty much pencil this to work at least once per round against Rog.
Vs. Blanka (self)
The Best Blanka its the one who its a good jumper and mixer with Electricity or hold, or at least can Vertical Roll wisely.
Vs. Chun-Li
One of his best match ups in close combat with throw mixups,anyway Chun Li standing attacks are better than Blanka.
Kikoken can be answered easily with Vertical Rolling Attack, because she doesn't have a decent anti air, you can punish Spinning Bird Kick with Electricty easily.
Air Spinnig Bird Kick is easier to punish, try to answer with a Horizontal Roll or Electricity, avoid to jump in for a Kikoken answer due to her air throw.
Vs. Dhalsim
Dhalsim pokes are so effectives against Blanka,jump on him and use your Electricty for a meaty Teleport.
It's a better match up than Champion Edition, you have an equality because Vertical Roll is useful against Yoga Fire and Flame...
Vs. E. Honda
Blanka's crouching hitbox is low enough that Honda's standing lp and mp will whiff over Blanka's head.
This is a decent match up, because both have an anti air to overhead special, a rush one and mash button one....You have better anti air and jumping moves, try it.
Blanka's objective will be keepaway E.Honda with ground pokes and jumping mind games...use Electricity only if E.Honda jumps for trade hits or anti air strategies.
Try to knock down E.Honda with sweeps to Vertical Roll mind games but beware if you fall near to him instead of crossup or receive a Sumo Headbutt/Torpedo.
Vs. Guile
Its still a problematic matchup, Blanka air game can still punished with Sommersaul Kick, but Sonic Boom can be punished with Crouching Roundhouse, try to be more offensive than Champion Edition.
Blanka's gameplan its still focused in approach and sweep, but Vertical Roll its now the Sonic Boom punish due to the nerfed startup of it.
Both are charge characters but remember that you had Electricity traps, main risk can be if Blanka its cornered can be the dead end but with Vertical Roll its a good solution for escape.
Vs. Ken
Be careful of his Shoryuken, use your sweep against his weak Hadoken, its similar to Ryu,but Vertical Roll its better against him, event it had a better anti air a trade hit match its a hit or miss.
Vs. M. Bison (dictator)
Its still a good matchup, now approach to use Vertical roll to punish Headstomp, but beware with his nerfed cheap damage but buffed Psycho Crusher recovery ,punish it with standing Short,Dictador can poke Blanka easily as Dhalsim.
Now try to be more focused in sweeping and Electricity corner trap, so remember it, try to start the round with a Roll to see what kind of Dictador player are you fighting if is a turtling or jumper.
Bite mixups are useful against him and now with a meaty Vertical Roll in corner its a good death trap for him.
Vs. Ryu
Its still a fair matchup in favour of Ryu but there is a bit of changes for Blanka, you can use a Short or Forward Vertical Roll in mid distance to punish an Hadouken but in the downfall will be the hit or miss, still punish his Shoryuken with crouch Roundhouse to Horizontal Roll mixups, Huricane Kick it still punishable with crouching attack or Electrity.
Vs. Sagat
Blanka has an advantage against Sagat that most characters don't: he can dizzy him with a full range jump-in against a low tiger shot. The combo is simply j.HK, c.HP. Massive range. Jump straight up, HK on the way down can beat tiger uppercut clean, or make it whiff. And j.MP can beat it clean once the uppercut is in the air. Keep up the normal ground pressure, trade c.HP/c.HK with low tiger shots, crouch under high tiger shots, and then (if you're close enough) whack his outstretched hands with s.MP.
From Decoy: I walk Sagat down till I'm just outside of his extended HP range. Then I like to do c.HP on the ground or jump straight up into HP. This beats his Tiger uppercut clean.
I also do LK vertical ball all over low tiger shots to bait him into taking a step forward to counter, then I land and do c.HK for a knockdown. After that, I use Blanka's getup speed to get-in on Sagat and finish him off.
Vs. Vega (claw)
A great fair jumping matchup, Claw had better pokes but you can use Electricity for Barcelona Punish, also at close distance you had better mixups and resets with your hold, Rolling Attack its a bad idea because he can punish you easily with claw standing attacks or crouching Roundhouse, Backdash its punishable with a hold.
Vs. Zangief
One of the most easiset matchups, stay grounded and just within reach of a crouching fierce punch, but if he is using Lariat mixups try to trade hits with your Roll, and also mixups Electricity after a Knockdown, Vertical Roll its a great idea for Lariat escape , anyway, don't stay close too much.
Hitboxes
Standing Normals
- Standing LP:
| Damage | 14 |  |
 |
 |
 |
 |

|
| Stun | 1~7 | ||||||
| Stun Timer | 40 | ||||||
| Chain Cancel | No | ||||||
| Special Cancel | No | ||||||
| Frame Advantage | +0 | ||||||
| Frame Count | 2 | 3 | 4 | 3 | 3 | 1 | |
| Simplified | 3+2 | 3 | 11* | ||||
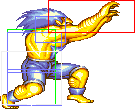
- Standing MP:
| Damage | 18 |  |
 |
 |
 |

|
| Stun | 5~11 | |||||
| Stun Timer | 60 | |||||
| Chain Cancel | No | |||||
| Special Cancel | No | |||||
| Frame Advantage | +10 | |||||
| Frame Count | 2 | 2 | 3 | 3 | 1 | |
| Simplified | 4+2 | 2 | 7* | |||
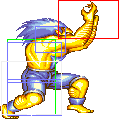
- Standing HP:
| Damage | 22 |  |
 |
 |
 |
 |

|
| Stun | 11~17 | ||||||
| Stun Timer | 80 | ||||||
| Chain Cancel | No | ||||||
| Special Cancel | No | ||||||
| Frame Advantage | -5 | ||||||
| Frame Count | 3 | 4 | 6 | 10 | 7 | 1 | |
| Frame Count | 3+3 | 10 | 18* | ||||
- Standing LK:
| Damage | 14 |  |
 |
 |
 |
 |

|
| Stun | 1~7 | ||||||
| Stun Timer | 40 | ||||||
| Chain Cancel | No | ||||||
| Special Cancel | No | ||||||
| Frame Advantage | +3 | ||||||
| Frame Count | 2 | 2 | 4 | 3 | 3 | 1 | |
| Simplified | 3+4 | 4 | 7* | ||||
- Standing MK:
| Damage | 18 |  |
 |
 |
 |
 |

|
| Stun | 5~11 | ||||||
| Stun Timer | 60 | ||||||
| Chain Cancel | No | ||||||
| Special Cancel | No | ||||||
| Frame Advantage | +1 | ||||||
| Frame Count | 2 | 2 | 4 | 3 | 3 | 1 | |
| Simplified | 3+4 | 4 | 7* | ||||
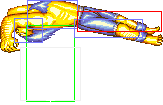
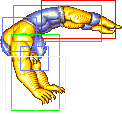
- Standing HK:
| Damage | 22 | 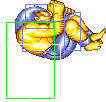 |
 |
 |
 |
 |
 |
 |

|
| Stun | 11~17 | ||||||||
| Stun Timer | 80 | ||||||||
| Chain Cancel | No | ||||||||
| Special Cancel | No | ||||||||
| Frame Advantage | -9 | ||||||||
| Frame Count | 3 | 6 | 5 | 5 | 5 | 5 | 5 | 1 | |
| Simplified | 4+3 | 11 | 21* | ||||||
Close Standing Normals
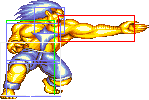
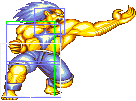
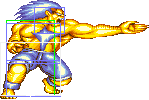
- Close Standing LP:
| Damage | 16 |  |
 |
 |
 |
 |
 |

|
| Stun | 1~7 | |||||||
| Stun Timer | 40 | |||||||
| Chain Cancel | No | |||||||
| Special Cancel | No | |||||||
| Frame Advantage | +6 | |||||||
| Frame Count | 3 | 2 | 2 | 2 | 4 | 2 | 1 | |
| Simplified | 1+5 | 2 | 9* | |||||
- Close Standing MP:
| Damage | 16 |  |
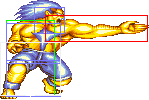 |
 |

|
| Stun | 1~7 | ||||
| Stun Timer | 40 | ||||
| Chain Cancel | No | ||||
| Special Cancel | Yes | ||||
| Frame Advantage | +6 | ||||
| Frame Count | 2 | 4 | 2 | 1 | |
| Simplified | 1+2 | 4 | 3* | ||
- Close Standing LK:
| Damage | 16 |  |
 |
 |
 |
 |
 |
 |
 |
 |
 |

|
| Stun | 1~7 | |||||||||||
| Stun Timer | 40 | |||||||||||
| Chain Cancel | No | |||||||||||
| Special Cancel | No | |||||||||||
| Frame Advantage | +6 | |||||||||||
| Frame Count | 3 | 3 | 3 | 2 | 2 | 4 | 3 | 3 | 3 | 3 | 1 | |
| Simplified | 1+13 | 4 | 13* | |||||||||
- Close Standing MK:
| Damage | 20,20 |  |
 |
 |
 |
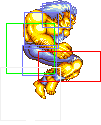 |
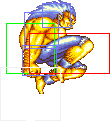 |
 |
 |
 |
 |

|
| Stun | 1~7 | |||||||||||
| Stun Timer | 40 | |||||||||||
| Chain Cancel | No | |||||||||||
| Special Cancel | No | |||||||||||
| Frame Advantage | +8 | |||||||||||
| Frame Count | 3 | 3 | 3 | 2 | 2 | 4 | 3 | 3 | 3 | 3 | 1 | |
| Simplified | 1+11 | 6 | 13* | |||||||||
Crouching Normals
- Crouching LP:
| Damage | 14 |  |
 |
 |
 |
 |

|
| Stun | 1~7 | ||||||
| Stun Timer | 40 | ||||||
| Chain Cancel | No | ||||||
| Special Cancel | Yes | ||||||
| Frame Advantage | +4 | ||||||
| Frame Count | 2 | 4 | 3 | 3 | 3 | 1 | |
| Simplified | 3+6 | 3 | 7* | ||||
- Crouching MP:
| Damage | 18 |  |
 |
 |
 |
 |
 |
 |

|
| Stun | 5~11 | ||||||||
| Stun Timer | 60 | ||||||||
| Chain Cancel | No | ||||||||
| Special Cancel | No | ||||||||
| Frame Advantage | -1 | ||||||||
| Frame Count | 3 | 3 | 3 | 7 | 3 | 3 | 3 | 1 | |
| Simplified | 1+6 | 3 | 17* | ||||||
- Crouching HP:
| Damage | 22 |  |
 |
 |
 |
 |

|
| Stun | 11~17 | ||||||
| Stun Timer | 80 | ||||||
| Chain Cancel | No | ||||||
| Special Cancel | No | ||||||
| Frame Advantage | -1 | ||||||
| Frame Count | 3 | 4 | 6 | 10 | 7 | 1 | |
| Simplified | 1+7 | 6 | 18* | ||||
- Crouching LK:
| Damage | 14 |  |
 |
 |
 |
 |

|
| Stun | 1~7 | ||||||
| Stun Timer | 40 | ||||||
| Chain Cancel | No | ||||||
| Special Cancel | No | ||||||
| Frame Advantage | +3 | ||||||
| Frame Count | 2 | 2 | 4 | 3 | 3 | 1 | |
| Simplified | 1+4 | 4 | 7* | ||||
- Crouching MK:
| Damage | 18 |  |
 |
 |
 |
 |

|
| Stun | 5~11 | ||||||
| Stun Timer | 60 | ||||||
| Chain Cancel | No | ||||||
| Special Cancel | No | ||||||
| Frame Advantage | +8 | ||||||
| Frame Count | 2 | 2 | 4 | 3 | 3 | 1 | |
| Simplified | 1+4 | 4 | 7* | ||||
- Crouching HK:
| Damage | 22 |  |
 |
 |
 |
 |

|
| Stun | 11~17 | ||||||
| Stun Timer | 80 | ||||||
| Chain Cancel | No | ||||||
| Special Cancel | No | ||||||
| Frame Advantage | +1 | ||||||
| Frame Count | 2 | 3 | 4 | 10 | 7 | 1 | |
| Simplified | 1+7 | 4 | 18* | ||||
Aerial Normals
- Neutral/Diagonal Jumping LP:
| Damage | 16 |  |
 |
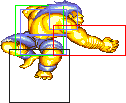 |
 |

|
| Stun | 1~7 | |||||
| Stun Timer | 40 | |||||
| Frame Count | 2 | 3 | 20 | 3 | ∞ | |
| Simplified | 5 | 20 | ∞ | |||
- Neutral/Diagonal Jumping MP:
| Damage | 20 |  |
 |
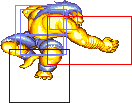 |
 |

|
| Stun | 5~11 | |||||
| Stun Timer | 50 | |||||
| Frame Count | 2 | 3 | 12 | 3 | ∞ | |
| Simplified | 5 | 12 | ∞ | |||
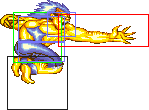
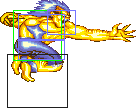
- Neutral Jumping HP:
| Damage | 24 | 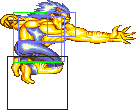 |
 |
 |
 |
 |
 |

|
| Stun | 11~17 | |||||||
| Stun Timer | 60 | |||||||
| Frame Count | 1 | 3 | 3 | 6 | 3 | 3 | ∞ | |
| Simplified | 1* | 3* | ∞ | |||||
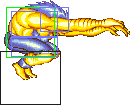
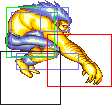
- Diagonal Jumping HP:
| Damage | 22 |  |
 |
 |

|
| Stun | 11~17 | ||||
| Stun Timer | 60 | ||||
| Frame Count | 2 | 3 | 6 | ∞ | |
| Simplified | 5 | 6 | ∞ | ||
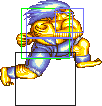
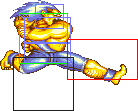
- Neutral Jumping LK:
| Damage | 16 |  |
 |
 |
 |

|
| Stun | 1~7 | |||||
| Stun Timer | 40 | |||||
| Frame Count | 2 | 3 | 20 | 3 | ∞ | |
| Simplified | 5 | 20 | ∞ | |||
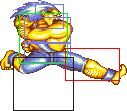
- Diagonal Jumping LK:
| Damage | 14 |  |
 |
 |
 |

|
| Stun | 1~7 | |||||
| Stun Timer | 40 | |||||
| Frame Count | 2 | 3 | 20 | 3 | ∞ | |
| Simplified | 5 | 20 | ∞ | |||
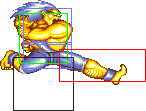
- Neutral Jumping MK:
| Damage | 20 |  |
 |
 |
 |

|
| Stun | 5~11 | |||||
| Stun Timer | 50 | |||||
| Frame Count | 2 | 3 | 12 | 3 | ∞ | |
| Simplified | 5 | 12 | ∞ | |||
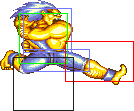
- Diagonal Jumping MK:
| Damage | 18 |  |
 |
 |
 |

|
| Stun | 5~11 | |||||
| Stun Timer | 50 | |||||
| Frame Count | 2 | 3 | 12 | 3 | ∞ | |
| Simplified | 5 | 12 | ∞ | |||
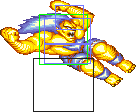
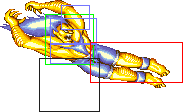
- Neutral Jumping HK:
| Damage | 24 |  |
 |
 |
 |

|
| Stun | 11~17 | |||||
| Stun Timer | 60 | |||||
| Frame Count | 2 | 3 | 6 | 3 | ∞ | |
| Simplified | 5 | 6 | ∞ | |||
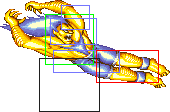
- Diagonal Jumping HK:
| Damage | 22 |  |
 |
 |
 |

|
| Stun | 11~17 | |||||
| Stun Timer | 60 | |||||
| Frame Count | 2 | 3 | 6 | 3 | ∞ | |
| Simplified | 5 | 6 | ∞ | |||
Unique Moves
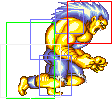
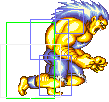
- Rock Crush a.k.a. Headbutt: (On ground and close, ←/→ + MP)
| Damage | 18,18 |  |
 |
 |
 |
 |
 |
 |
 |

|
| Stun | 5~11 | |||||||||
| Stun Timer | 60 | |||||||||
| Chain Cancel | No | |||||||||
| Special Cancel | No | |||||||||
| Frame Advantage | +3/+4 | |||||||||
| Frame Count | 5 | 4 | 4 | 3 | 2 | 5 | 4 | 3 | 1 | |
| Simplified | 9 | 7 | 2 | 13 | ||||||
Throws
- Wild Fang a.k.a. Bite: (←/→ + HP)
| Damage | 20+(4*n) | 
| |
| Duration | 130 | ||
| Stun | - | ||
| Stun Timer | - | ||
| Range (from axis) | 64 | ||
| Range advantage | 35 | ||
Special Moves
- Electric Thunder: press any single Punch repeatedly
LP version:
| Damage | 28 |  |

|
| Stun | 13~19 | ||
| Stun Timer | 120 | ||
| Frame Advantage | -23 | ||
| Frame Count | 3 | 52+ | |
MP version:
| Damage | 32 |  |

|
| Stun | 13~19 | ||
| Stun Timer | 120 | ||
| Frame Advantage | KD/-4 | ||
| Frame Count | 5 | 34+ | |
HP version:
| Damage | 36 |  |

|
| Stun | 13~19 | ||
| Stun Timer | 120 | ||
| Frame Advantage | +9 | ||
| Frame Count | 7 | 25+ | |
+9 on block if is blocked 3 times (point blank). +4 for 2 blocks.
Not changed so much about Champion Edition,but beware with some new special moves like yourself with Vertical Roll or Sumo Splash or Kikoken...can destroy your basic game plan in damage trade or medium distance
- Rolling Attack: charge ←, → + Punch (charge 60f)
LP/MP versions (whiff):
| Damage | 22/24 | 
|
| Stun | 13~19 | |
| Stun Timer | 120 | |
| Frame Advantage | -17 | |
| Frame Count | 25 | |
HP version (whiff):
| Damage | 26 | 
|
| Stun | 13~19 | |
| Stun Timer | 120 | |
| Frame Advantage | -17 | |
| Frame Count | ∞ | |
Same properties at Champion Edition and still useful against non projectile characters.
- Vertical Rolling Attack: charge ↓, ↑ + Kick (charge 60f)
LK version (whiff):
| Damage | 16 |  |
 |

|
| Stun | 13~19 | |||
| Stun Timer | 120 | |||
| Frame Advantage | -27 | |||
| Frame Count | 45 | 6 | 1 | |
| Simplified | 45 | 7 | ||
Recovery is unthrowable except for the final frame.
MK version (whiff):
| Damage | 18 |  |
 |

|
| Stun | 13~19 | |||
| Stun Timer | 120 | |||
| Frame Advantage | -32 | |||
| Frame Count | 50 | 6 | 1 | |
| Simplified | 50 | 7 | ||
Recovery is unthrowable except for the final frame.
HK version (whiff):
| Damage | 20 |  |
 |

|
| Stun | 13~19 | |||
| Stun Timer | 120 | |||
| Frame Advantage | -38 | |||
| Frame Count | 56 | 6 | 1 | |
| Simplified | 56 | 7 | ||
Recovery is unthrowable except for the final frame.
This wil be your special against projectile spamming characters, use it at medium or short distance and also a decent crouch character cross up one, but the main disadvantage can be the recovery because is worse than Horizontal Roll and lead you to a punish with throws or 2-in-1.
Misc Animations
| Walk back | Neutral | Walk Fwd | Crouch |
 |
 |
 |

|
- Standing reel:
 |
 |
 |

|
- Standing gut reel:
 |
 |
 |

|
- Crouching reel:
 |
 |

|
- Dizzy:
 |
 |
 |
 |

|
