Introduction
Released in late 1992, Street Fighter 2 Hyper Fighting (known as Street Fighter 2 Turbo in Japan) is Capcom's final Street Fighter release on the CPS1 arcade hardware, and a response to bootleg versions of Street Fighter 2' Champion Edition which often had faster gameplay and allowed special moves to be performed in the air.
Hyper Fighting introduced an overall game sped up, fixed SF2CE bugs (But not all of them!) and balanced the characters in various ways, including additional moves for several of them and even nerfing some top tiers. Examples of this are:
• Air hurricane kicks with Ken and Ryu
• Chun-li Fireball
• Blanka Vertical Ball ("Upball")
• E. Honda Sumo Splash
• No more infinite combos for M.Bison (Dictator)
• And tons more...
Characters
| Ryu | E.Honda | Blanka | Guile | Balrog | Vega |
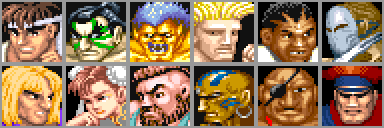 | |||||
| Ken | Chun-Li | Zangief | Dhalsim | Sagat | M.Bison |
Terminology
Game Elements
Hyper Fighting is a very bare-bones fighting game these days, and is very simple to comprehend, with only one visible meter and only very simple gameplay abilities. This is not to say it's an easy game to play or master however!
Basic Elements
- Life Meter
Life meters for both characters are displayed at the top of the screen. Every character initially has the same amount of life, which is 144 "hit points". Once this is depleted through being hit, thrown, or taking block damage, the character with 0 life loses the round. Both characters may be reduced to 0 life at the same time, in which case the round is a draw.
- Stun/Dizzy
If a character is hit or thrown too often in quick succession, they are "stunned" or "dizzied". This results in a knockdown, followed by a considerable period of time where the character is unable to perform any actions and is at the mercy of their opponent. The state of characters' stun is not displayed.
- Timer
Hyper Fighting is a timed game, and once time runs out the round is awarded to whichever character has more health. If health is even, the round is a draw.
The timer starts at 99 and counts down faster than a real-world second.
Universal Abilities
- Basic Movement: Walk, Jump, and Crouch
- Blocking
- Normal Attacks
- Special Attacks
- Throws
- Reversals / Meaty Attacks
Movement
SF2 has very simple movement controls, with no dashes, rolls, or anything more complicated than a jump.
Pressing left or right on the controller while nothing else is happening moves the character left or right on the screen. Your character's backwards walking speed is slower than their forward speed. Some characters are faster than others.
Holding down on the controller causes your character to crouch. This lowers your character's body and can evade some moves, and is also important for blocking and some special moves.
Pressing up on the controller will make your character jump into the air. New attack options are available in the air, but no defensive options are present so it is dangerous to jump too much. Pressing up+left or up+right on the controller will jump left or jump right. Jumping is very useful for avoiding projectiles.
Blocking
Holding away from your opponent on the controller while they are attacking results in your character defending their attack (blocking), and will take little to no damage. However, there are two blocking states, one standing, and one crouching.
Standing block (high block) will block your opponent's high attacks (including jumping attacks), while crouching block (low block) will block your opponent's low attacks (including sweeps, and some other crouching kicks). All attacks which are not specifically 'high' or 'low' attacks can be blocked either standing or crouching.
While blocking you cannot move or perform attacks, you must wait until the block has completed.
Normal Attacks
Pressing a button on the control panel results in a normal move. Punches are the top 3 buttons, kicks the bottom 3. Weaker normals are to the left, stronger to the right.
Normal attacks are your most basic offensive tools, and you should familiarise yourself with your character's normals as thoroughly as possible.
Some normal attacks only are available when holding particular directions on the stick, these are known as 'unique moves' or 'command normals'. An example is E.Honda's 'Hiza Geri' which is performed by holding left or right on the controller and pressing the Medium Kick button.
Special Attacks
Every character has 'special' attacks, which involve a series of controller movements and/or button presses. These will take some practice to get used to, but are very important tools. Generally, performing special moves using the weaker punch or kick buttons will do less damage or travel shorter distances, but be less punishable by your opponent.
Special moves inflict a small amount of damage to your opponent even when blocked.
Throws
If your opponent is blocking your attacks, Throws allow you to grab your opponent anyway and deal damage. Depending on your character, while near your opponent, holding left or right on the stick while pressing particular punch or kick buttons (usually hard punch) will perform a throw. Holding left results in the opponent being throw towards the left, and holding right will throw them to the right.
Some characters have holds rather than throws, they fill the same role but result in multiple smaller hits rather than one big throw.
Familiarise yourself with the ranges your throws/holds will work at, and how far away your opponent ends up afterwards.
System Info
Damage
Damage comes from 2 sources: Hits, and Throws. Each are handled separately for randomness, scaling, and special other factors.
- Hit damage
The basic formula for any hit's damage is
(base + rnd) * char_scaling * life-scaling
Any hit has a predefined "base" damage level. This is the raw amount of damage that would be dealt, were there no other random factors or scaling. A random value (which may be positive or negative) is added to this base level, which varies by both the hit and how much life the opponent has left. After this, each character has a 'defense rating' which decreases damage dealt to that character by an amount specific to that character (shown in the table below). Finally, the amount of life an opponent has determines a final scaling factor.
| Damage Scaling | Characters |
| 27/32 | Ryu, Guile, Ken, Chun Li, Dhalsim, Vega (Claw) |
| 25/32 | E.Honda, Blanka, Boxer, Sagat, Dictator |
| 22/32 | Zangief |
Every character takes less than full damage, but Zangief takes the least damage.
- Throw damage
Throws are unaffected by a character's 'defense' scaling. This means a throw will do the same damage to Zangief as it will to Chun Li. They are however affected by Lifebar scaling, and also are given a boost if the thrower is behind in rounds won.
Damage randomness tables are documented at HF Random Damage
Dizzy (a.k.a. Stun)
- About dizzy
Once a character has accumulated 32 points of dizzy, they become dizzied. To reach this value, they must be hit or thrown several times in quick succession.
Along with a counter tracking how many dizzy points a character has accumulated, there is a separate 'dizzy timeout' counter, which tracks how long until their dizzy point tracker is reset to 0. Dizzy timeout is decremented with every game tick, regardless of whether the character is blocking an attack, in hitstun, being thrown, or knocked down.
Note that generally a throw which does not dizzy is a net loss of dizzy timeout.
- Dizzy properties of attacks
Any hit or throw has a predefined base dizzy amount. To this is added a random value (which may be negative), consistent across all attacks.
The lookup table for dizzy randomness is as follows:
| Modifier | -3 | -2 | -1 | 0 | 1 | 2 | 3 |
| Likelihood | 3.125% | 12.5% | 15.625% | 37.5% | 15.625% | 12.5% | 3.125% |
For example, Vega's crouching Strong has a base dizzy value of 8, to which a random value between -3 and +3 is added, resulting in a 5~11 possible dizzy range, with 8 being the most likely value and 5 or 11 being very unlikely. His throw has a base dizzy value of 10, resulting in a 7~13 possible dizzy range.
As well as raw dizzy value, each move has a predefined dizzy timeout value, which is added to the character's dizzy timeout counter. This means that successive hits increase the length of time until a character's dizzy is reset.
A move hitting an airbourne opponent tends to result in less stun and stun timeout when compared to the same move hitting a grounded opponent. For example, Blanka's horizontal rolling ball special attack does 16 points of stun damage and adds 120 to the stun timer if connected on a grounded opponent, but only 14 stun points and adds only 80 to the stun timer if the opponent is airbourne.
- Escaping dizzy
Upon becoming dizzy, a randomly selected value is chosen determining the difficulty of escaping dizzy. These values are represented by a dizzy icon which circle above the dizzied character's head, either Stars (easier) or Ducks (harder). Each game tick, the value chosen is decremented by 1 until it reaches 0, whereupon the character leaves the dizzy state.
| Icon | Values |
| Stars | 60, 90, 120 |
| Ducks | 150, 180, 210 |
Entering commands (joystick directions, button presses) decreases the counter faster, so it's in your best interest to mash.
- Being hit while dizzy
A character being hit out of dizzy is afforded 60 game ticks as a "grace period" before more dizzy will be accumulated.
Impact Freeze
Impact freeze is a period of time where the game freezes momentarily when an attack hits or is blocked. It is why a move on hit seems to show on the screen for much longer than the same move when it whiffs. Impact freeze allows special move cancels such as Ryu's cr.mk XX fireball to be much easier than the number of active frames would suggest. See [1] and [2] for much more information.
In HF, normal game ticks still occur during impact freeze, so timers such as the Dizzy Timer still decrease.
In HF, Impact freeze lasts for 14 frames, regardless of attack strength.
Negative Edge
Negative Edge refers to events which occur upon the release of a button (or buttons) as opposed to the press of a button. An example is Balrog (Boxer)'s Turn Around Punch, which is performed by holding all 3 punch or kick buttons for a few seconds, then releasing.
More specifically, the ability for all special moves to be performed by button releases rather than presses can be called Negative Edge. For example, it is possible to perform a Ryu Fireball by holding a punch button, performing the QCF joystick motion, and then releasing the punch button.
Hit Stun and Block stun
After any attack has hit or has been blocked, and after impact freeze, the attackee enters a state of hit stun or block stun. Depending on the attack, hitstun or block stun may end before or after the attack has finished, putting the attackee in advantage or disadvantage (known as "Frame advantage").
During hitstun, the character is unable to perform any action, and is also unthrowable. They may however buffer special moves during hitstun.
During blockstun the character is additionally allowed to switch block states (e.g. from high blocking to low blocking).
For normal moves, the strength of the move determines the amount of hitstun. Special moves usually have the same hitstun regardless of strength used.
In general, block stun is one frame longer than hit stun. That is, if your opponent blocks an attack, they recover one frame LATER than they would if they had been hit by the attack. Any frame data given in terms of "Frame advantage on block" can be converted to "Frame advantage on hit" by subtracting one.
Additionally, hitstun is reduced by a frame after the first hit in a combo. This explains why Ryu can combo cr.LK xx Fireball, but j.HK, cr.LK xx Fireball can be blocked.
See [3] for more info.
| Strength | Jab/Short | Strong/Forward | Fierce/Roundhouse |
| Hitstun (in frames) | 14 | 19 | 23 |
Special moves may have their own specific hitstun values, but often are 23f (like a fierce/roundhouse).
Combos
A Combo results when any attack is followed by a subsequent attack without the opponent being able to block inbetween. This is an interaction between the Hitstun on an opponent from the attack, the attack's recovery, and the next attack's startup. As long as the hitstun is greater than the attack's recovery time plus the startup of the next attack, the next attack will successfully combo and the opponent will be unable to stop it. Other gameplay mechanics allow combos in different ways, such as Special Cancelling, Chain Cancelling, and Kara Cancelling (explained below).
Block strings
Essentially a Block string is a combo which is blocked. Due to block stun and hitstun generally being the same in HF, attack strings which would normally combo will form a block string when blocked. This means the opponent will be similarly unable to perform any actions except those allowed during blocking, i.e. switching from crouch block to stand block, for the duration of the combo. They will however not be taking damage (except from moves which cause block damage). For example, Ryu's cr.Strong, cr.Forward XX Fireball attack string can combo, and will also form a block string if blocked, but the opponent will only take block damage from the Fireball.
Kara Cancelling
Kara (meaning 'empty') cancelling is an allowance the SF2 engine makes for easier input of special moves. When a normal attack is performed, a 5 frame timer ticks down, during which the input of a special move will result in the normal move being interrupted and the special move will be performed. This means if you press the attack button slightly before the special move motion is completed, the normal move which has started animating can be kara cancelled into the special move when the button is released.
One use for this technique is to use a crouching normal move (usually a kick) cancelled into a special such as a Dragon Punch. This can result in a lower hurtbox for your character, which may allow for avoiding certain jumpins.
Special Cancelling
A possible error in the handling of the kara cancel code in the SF2 series means that the kara cancel timer is NOT decremented during impact freeze. The result is that any normal attack which hits or is blocked by the opponent before the timer runs out retains the ability to kara cancel into a special move for the 14 extra frames of impact freeze. This is typically known as special cancelling. When impact freeze ends, the normal move is cancelled and the special move is performed. This allows combos such as Ryu's cr.Forward XX Fireball and Guile's cr.Strong XX Flash Kick. Note that this does NOT necessarily mean the special move will combo after the normal attack, although many will.
Chain Cancelling
Some characters have at least one Jab or Short attack which may be cancelled by another of the same strength. This allows repeated presses of the same button to easily combo even up to 4 or 5 times. An example is Dictator's Jab, which may be continued with further Jabs. Note that any attacks in a chain past the initial attack lose any special cancelling ability they may have had, due to the kara-cancel timer expiring between the first and second hits.
Randomness
Frame skipping
Damage
Dizzy dealt
Time spent in dizzy (difficulty of mashing out)
Throw invincibility upon wakeup
Winner of a same-frame throw vs throw exchange
When Vega's claw will fall off
See SF2 randomness for more details.
Basic Strategy
Movement and Positioning
Due to Hyper Fighting's limited system with no dashes, super jumps, or other movement options, it is vitally important to be as proactive as possible with regards to movement and positioning. If your character has normal moves (such as Dhalsim's slides) or special moves (Sagat's Tiger Knee, Ryu's Hurricane Kick) which are capable of quick movement, find their ranges and how to use them. Fast characters such as Chun Li and Vega should take advantage of their walk speed by darting in and out of the opponent's range, tempting them to perform moves which you can punish.
Being in the right places at the right times is key to becoming a better player!
Advanced Strategy
Chain Cancelling into special moves
Chain cancelled normal attack strings cannot normally be comboed into special moves. For example, Boxer's cr.Jab XX Straight Rush will normally special cancel, but cr.Jab, cr.Jab will not. However, alternating between standing and crouching can reset the "chain state" and re-allow special cancelling. Continuing the previous example, Boxer's crouching Jab can be chained into standing Jab, thus allowing cr.Jab, cr.Jab, s.Jab XX Straight Rush to connect.
Strangely, even though Boxer's s.Short is not chain cancellable, it is possible to perform cr.Short, cr.Short, s.Short XX Straight Rush too (as a chain, not a link combo).
CPS1 Chains
Utilizing the CPS1 gaming engine to your advantage:
The first three editions of Street Fighter II (WW,CE,HF aka Turbo) were programmed with the CPS1 engine. There was an old glitch that was fixed in Super and Super Turbo that allowed for a number of rapid fire kicks to be linked into a punch and then further cancelled into your favorite special.
EX. Ken: 3x c.lk-> s.hp xx Hadoken (qcf+p)
How this works is beyond me, but I do know how to utilize the CPS1 chains, and here's how:
After hitting with the first three rapid fire kicks, let the pad, stick, whatever go back to neutral (so you are standing) and input lk+whichever punch you want with the same timing as the initial lk's. In the example above you would input c.lk..c.lk..c.lk.(neutral).s.lk+hp then just cancel into hadoken.
This is the just one of the ways to use CPS1 chains. You can use these to get high punches in when all you had time for was a low kick.
One more note, you can go from standing lk's to crouching punches; or from crouching lk's to standing punches. But curiously enough not vice versa, punches don't go to kicks, and standing kicks do not go to standing punches.
--Danthrasher
Here's a video description of CPS1 chains (Big thanks to Rakurai)
https://www.youtube.com/watch?v=CsjgPB9iYLc
Tier List
The tier listing is never exact but it can give a strong indication on what would happen in a match between two players at the same capability level. Below is the general listing for HF.
Hyper Fighting wasn't popular as his predecessor because of Rainbow Editions but there is a lot of old and recent information that can bring us an average one
1992 Tier lists
Gamepro Guide
1) Guile
2) Ryu, Sagat
4) Zangief, Ken, Chun-Li
7) E. Honda
8) Blanka
9) Vega
10) Balrog
11) Dhalsim
12) M. Bison
Tomo Ohira
1) Guile
2) Ryu
3) Sagat
4) Blanka
5) Ken
6) Dhalsim
7) Chun-Li
8) Zangief
9) Balrog
10) E. Honda
11) Vega
12) M. Bison
T-Akiba
This was an early 2000's one
1) E. Honda
2) Balrog
3) Ryu, Ken
5) Blanka
6) Guile
7) Sagat
8) Zangief
9) Vega
10) Chun-Li
11) Dhalsim
12) M. Bison
Average Tier List
| Top Tier | Upper Mid Tier | Lower Mid Tier | Low Tier |
|---|---|---|---|
|
Ryu Guile Sagat
|
Ken Blanka Zangief
|
Chun-li E. Honda Dhalsim Balrog (Boxer) |
Vega (Claw) Bison (Dictator)
|
Buffs and Nerfs In a nutshell
Top Tiers:
Ryu,Guile and Sagat had the basic specials and best poking normals for the meta game about projectile zoning and anti air mixups.
Ryu is the best character for beginners ,casual ones and expert tourney ones because his Air Tatsumaki buff and heavy hitter projectile and anti air
Sagat and Guile even if they had nerfed their projectile recovery frames, but had their anti air special buffed compared to CE
Upper Mid Tiers
Ken doesn't have a good projectile compared to the top 3 but is the one with the best anti air special in the game and his Air Tatsumaki buff is better approached for escaping.
Blanka gains an overhead special that is the best counter for projectile spammers and gives him great cross up mix ups that approach better his CE buffs fof Electricty.
Zangief had a great buff with his Quick Lariat that can approach projectile spammers along its invulnerable for sweeping,
Low Mid Tiers
Chun Li gains a projectile and a aerial special version, but these there more used for hit and run than zoning, and has her CE buff intact
E.Honda gains a anti air to overhead special, but compared to Blanka one its effective only for medium distance but had his CE stuff intact
Dhalsim had a new teleport move, but it makes him vulnerable to throw mixups if you don't had a good timing for the warp zone, and still had a bad projectile special,but had the best poking normals in the game
Boxer now its invulnerable to sweep and projectiles with his Turn Punch, but if you had played Japanese CE version you know that its a coin flip trade hit, and still bad in long distance
Low Tiers
Claw had now Rolling Attack variations but its a Japanese CE buff and now it's more vulnerable for the new aerial specials,but its a good poking character as Dhalsim
Dictador loss a lot of the Psycho Crushers block damage and don't Double Knee Press corner traps anymore, but can combo a sweep after a Head Stomp follow up and had better throw damage, that reduces him to a Hit and Run meta
Game Versions
CPS1 (arcade)
This the original release of Hyper Fighting.
Variations of combinations of the A and B CPS1 board can result in the game running at different speeds. [4]. Usually you'll run into to one of two versions of HF, converted Champion Edition CPS1 PCBs (running at 10mhz) and actual Hyper Fighting CPS1 PCBs (running at 12mhz). Converted CE cabs run slower.
Super Nintendo
The initial home release. Derezzed sprites/simpler graphics (very little parallax scrolling) and much weaker sound effects than the arcade release. Also some nitpicky game engine changes - CPS1 combos don't work, and the game certainly 'feels' different - probably some frame data and timing changes. Check out E.Honda's LP headbutt for instance.
Also, no intro movie! OMG!
Sega Genesis/Mega Drive
Titled "Street Fighter 2' Special Champion Edition" in the West, and "Street Fighter 2' Plus" in the East.
Quite similar to the Super Nintendo release, although the Genesis version has an extra tournament mode and match play over the Super Nintendo release. Also, more speed options are available by default. Worse sound though (especially the voices), and slightly poorer colours. It does have the original intro movie though. Also, CPS1 chains work - which make this probably a more accurate port!
Amusing to note that these ancient 16-bit ports even have the 'good' button configs - thanks, 90s Capcom!
Playstation
Playstation 2
Xbox
Xbox 360
Fairly similar to arcade version, feels like there are some timing changes though. Irritating user interface.
Regional Differences
Please note that the Japanese versions are not the same as the American versions:
| Boxer character = Balrog | Boxer character = M.Bison |
| Claw character = Vega | Claw character = Balrog |
| Dictator character = M.Bison | Dictator character = Vega |
Miscellaneous
-After getting up from being knocked down, you are unthrowable for a number of frames, randomly selected from 1 to 29 inclusive.
-When hitting a dizzied player, they are immune to dizzy for 60 game ticks. This means any combo after a dizzy will only start causing more dizzy after 60 frames of the first hit. This is important to take into account for redizzy combos.
Other HF links
General
Technical Details
SF2 Dizzies
Dizzy durations and limits and update
SF2 Hitboxes
SF2 Throwboxes
SF2 Random damage
Cheat codes & findings


