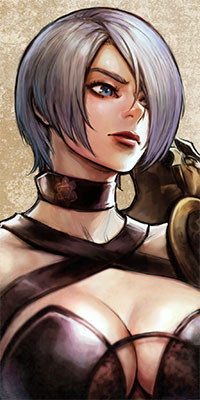
Soulcalibur VI/Ivy

From SuperCombo Wiki

Introduction

Ivy is the staple long-range specialist of Soulcalibur. Her sword can transform into a bladed whip, giving her more range than any other character - barring projectiles. Despite her incredible advantage at middle to long range, she remains a threat at point-blank range with some of the best command grabs in the game.

Strengths Weaknesses
  • Massive range
  • Excellent combo damage
  • Highest damaging throws in the game
  • High execution
  • Weaker close range options
  • Regularly unsafe on block

Unique Mechanic

Valentine

While not particularly a unique mechanic, the signature of Ivy's fighting style involves altering the input of her attacks to change them from close-range sword attacks to long-range whip attacks. For example, 66A sees Ivy whipping her sword diagonally in front of her, covering a short range. But 66[A] loosens the sword into a whip, which curls all the way around her to strike a second time at a longer range than the initial sword swipe.

Ivy
#SCVI_IVY
SCVI Ivy Face.jpg
Daughter of the English aristocratic family the Valentines, Ivy was raised in a loving environment. Unfortunately, it was not to last. Her father's insanity and excessive spending drove him to an early grave, followed shortly afterwards by her mother. While mourning, Ivy discovered her father was an alchemist obsessed with finding Soul Edge, which he believed was the key to immortality. She understood why Soul Edge was referred to as the cursed sword, and vowed to destroy the blade that had driven her father to madness.

Key Moves

A

Sc 33.pngSc 5.pngSc 66.pngSc 5.pngSc 99.pngSc AA.png (3)_(6)_(9)(A) - Attack Level: Sc M.pngSc M.png
Impact Damage Block Hit Counter Guard Burst
20 44 -12 -4 -4 10%
Sc LH.png

Very large range horizontal; on normal hit it pushes the opponent out considerably (to a distance where your options are, most likely, better than theirs), and if the second hit counter-hits by itself (including on run counter), you can get a very damaging Lethal Hit combo out of it. This restricts your opponent's movement at range considerably, leaving them more vulnerable to being hit by 2A+G and 3A+G.


Sc 1.pngSc A.png 1A - Attack Level: Sc L.png
Impact Damage Block Hit Counter Guard Burst
26 12 -18 -4 -4 1%
Tech Crouch [10-RC]
Sc 1.pngSc A.pngSc A.png 1AA - Attack Level: Sc L.pngSc L.png
Impact Damage Block Hit Counter Guard Burst
26 12,12 -14 -2 -2 3%
Counter Hit Combo. Tech Crouch [0-RC]

Catches people who are attempting to careful take small steps to inch their way close to you while standing. Although the full 1AA sequence is NCC, it provides a sort of mix-up: if they stop and crouch to block the second hit, you can go for WR K or WR B+K to hit mid, and if they attempt to step, attack, or guard standing to stop this, then they'll be hit by 1AA anyway. If they wait and block the entire 1AA sequence, it's safer on block than 1A alone and pushes them further out.


Sc 22.pngSc 5.pngSc 88.pngSc A.png (2)_(8)A - Attack Level: Sc H.png
Impact Damage Block Hit Counter Guard Burst
26 18 -12 0 0 4%
Sc LH.png

A sidestep move that grants Ivy a Lethal Hit whenever she strikes the opponent after they whiff a move; in essence, rewarding you with a big, damaging combo for using sidesteps correctly. Get in the habit of using this when your opponent uses predictable verticals (so long as they don't tech crouch; use 22/88[B] instead in that case). See the Combos page for 22/88A LH combos.

B

Sc b.pngSc 6.png b6 - Attack Level: Sc M.png
Impact Damage Block Hit Counter Guard Burst
20 20 -8 4 4 3%
Stun on tip hit

A safe mid-hitting poke with good range, this is a great option for opponents who run up to around 2/3A+G range and crouch guard some in order to avoid getting grabbed. When it hits at tip range, it can be converted into a full combo, and you have many options for how specifically to do this. See the Combos page for more information.

Multi

Sc 9.pngSc B.pngSc +.pngSc K.png 9B+K - Attack Level: Sc M.pngSc M.png
Impact Damage Block Hit Counter Guard Burst
28 26 10 KND KND 9%
Sc BA.png. Tech Crouch [11-16]

Also known as "the fishing rod," this is one of the longest-reaching moves in the entire game, it's plus on block, and leads to damaging combos on hit. Beware whiffing this, as its massive recovery will both lose your grip on your opponent's spacing and get you punished. On the other hand, it allows you to whiff punish moves others can't, or ones they can but from further away than is typically expected. Has two ranges, the closer being input via 7_8B+K and the longer being 9B+K.


Throws

Sc 2.pngSc A.pngSc +.pngSc G.png 2A+G - Attack Level: Sc L.png
Impact Damage Block Hit Counter Guard Burst
28 50 -14 KND KND -
Sc TH.png. Tech Crouch [18-49]

A low hit-throw that deals good damage and pushes your opponent out very far away from you. This is useful for catching people who have paused their movement for too long for fear of being hit by 33_66_99[A]. It also has great ring-out potential and can wall-splat (though the wall-splat merely gives you additional damage and knockdown time, no combo follow-ups). The knockdown without a wall-splat in play is too brief to push any kind of okizeme, OTGs, ukemi traps, or anything of the like, but the distance created more than suits Ivy's gameplan. This move can be very useful for ukemi traps at the right range.


Sc 3.pngSc A.pngSc +.pngSc G.png 3A+G - Attack Level: Sc L.png
Impact Damage Block Hit Counter Guard Burst
28 30 -14 16 16 -
Sc TH.png. Tech Crouch [18-49]

A low hit-throw that targets a distance slightly further from Ivy than 2A+G that pulls your opponent in at +16 and leaves you crouching. This leaves you with multiple strong options, including comboing into 66BB to leave them at mid-range standing at +14, after which you can go for another 3A+G. This move can also be useful for ukemi traps at the right range.


Sc 3.pngSc 7.pngSc 4.pngSc 6.pngSc 9.pngSc 1.pngSc 6.pngSc A.pngSc +.pngSc G.png 3746916A+G - Attack Level: Sc H.png
Impact Damage Block Hit Counter Guard Burst
16 70 KND KND KND -
Sc TH.png

One of Ivy's two scary command grabs, this has some of the best reach for a command grab in the game, as well as some of the highest damage. You are allowed a considerable length of time between each input before the game fails to recognize the move, meaning you can hold the final 6 for a while before hitting A+G to run up first and extend the range even further. It is breakable, though (unless it grabs an opponent other than Astaroth or Voldo from behind). The just frame version only adds a little bit of extra damage.


Sc 3.pngSc 7.pngSc 6.pngSc 2.pngSc 3.pngSc 1.pngSc A.pngSc +.pngSc G.png 376231A+G - Attack Level: Sc H.png
Impact Damage Block Hit Counter Guard Burst
20 60 KND KND KND -
Sc TH.png

The other of Ivy's two scary command grabs. Less damage and reach than Calamity Symphony, but still more of both than a normal grab. This also comes with the benefit of it being unbreakable; the opponent must crouch or jump to avoid it. It also causes a hard knockdown, unlike Calamity Symphony, but further away from Ivy. The just frame version only adds a little bit of extra damage.


SCVI Navigation

General
Controls & Notation
HUD
Glossary
System
Stages
Resources
Characters
2B
Amy
Astaroth
Azwel
Cassandra
Cervantes
Geralt
Groh
Haohmaru
Hilde
Hwang
Ivy
Kilik
Maxi
Mitsurugi
Nightmare
Raphael
Seong Mi-na
Setsuka
Siegfried
Sophitia
Taki
Talim
Tira
Voldo
Xianghua
Yoshimitsu
Zasalamel
Inferno