< SSBU
Template:Character Subnav SSBU
Introduction
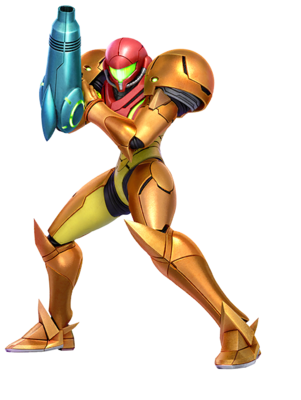
Samus is a character
| Strengths | Weaknesses |
|---|---|
|
|
| Startup | Active | Recovery | Total | Damage | Block |
|---|---|---|---|---|---|
| 6 | 4 | 20 | 29 | 8.0% | -15 |
| Startup | Active | Recovery | Total | Damage | Block | |
|---|---|---|---|---|---|---|
| 8 | 3 | 23 | 33 | 8.0/9.0/10.0% | -17/-16/-15 | |
| ||||||
| Startup | Active | Recovery | Total | Damage | Block | |
|---|---|---|---|---|---|---|
| 15 | 4 | 21 | 39 | 13.0/12.0% | -12 | |
| ||||||
| Startup | Active | Recovery | Total | Damage | Block |
|---|---|---|---|---|---|
| 6 | 3 | 36 | 44 | 12.0% | -27 |
| Startup | Active | Recovery | Total | Damage | Block | |
|---|---|---|---|---|---|---|
| 8 | 6/5 | 23 | 41 | 1.0/6.0% | -26 | |
| ||||||
Smash Attacks
| Startup | Active | Recovery | Total | Damage | Block | |
|---|---|---|---|---|---|---|
| 3+7 | 2 | 37 | 48 | 12.0/14.0 | -30/-28 | |
| ||||||
| Startup | Active | Recovery | Total | Damage | Block | |
|---|---|---|---|---|---|---|
| 6+5/15/19/23/27 | 2/2/2/2/2 | 28 | 56 | 3.0/6.0% | -24 | |
| ||||||
| Startup | Active | Recovery | Total | Damage | Block | |
|---|---|---|---|---|---|---|
| 3+6/17 | 2/2 | 26 | 44 | 10.0/12.0% | -28/-19 | |
| ||||||
Aerial Attacks
| Startup | Active | Recovery | Total | Damage | Landing | |
|---|---|---|---|---|---|---|
| 8/14 | 4/8 | 23 | 45 | 10.0/9.0/8.0% | 9 | |
| ||||||
| Startup | Active | Recovery | Total | Damage | Landing | |
|---|---|---|---|---|---|---|
| 6/12/18/24/30 | 2/2/2/2/2 | 28 | 59 | 3.0/1.6/5.0% | 14 | |
| ||||||
| Startup | Active | Recovery | Total | Damage | Landing | |
|---|---|---|---|---|---|---|
| 5/7/16 | 1/8/2 | 22 | 39 | 3.0/1.2/4.0% | 18 | |
| ||||||
| Startup | Active | Recovery | Total | Damage | Landing | |
|---|---|---|---|---|---|---|
| 17 | 2/3/2 | 25 | 48 | 10.0/14.0% | 12 | |
| ||||||
| Startup | Active | Recovery | Total | Damage | Landing | |
|---|---|---|---|---|---|---|
| 9 | 6 | 27 | 41 | 12.0/14.0/9.0% | 14 | |
| ||||||
| Startup | Active | Recovery | Total | Damage | Landing | |
|---|---|---|---|---|---|---|
| 8/16 | 8/4 | 40 | 59 | 2.5/4.0% | 8 | |
| ||||||
