
-Select from below to jump to each section-
| Easy | Medium | Difficult | Advanced | Unrecorded |
About "Textbook" Combos:
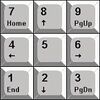
Project Justice features a "Textbook" Combo system- also known as "Nekketsu" (Hot-Blooded) Combos in the Japanese version. Textbook Combos function similarly to Chain Combos or Magic-Series Combos present in games like Marvel vs Capcom 2 and Vampire Savior, where combos can be easily executed by inputting attacks in order from weakest to strongest:
(Light Normal ![]() Heavy Normal
Heavy Normal ![]() Heavy Command Normal)
Heavy Command Normal)
(![]() or
or ![]()
![]()
![]() or
or ![]()
![]() 6
6![]() / 3
/ 3![]() / Etc.)
/ Etc.)
However! Combos in Project Justice can be more intricate and complex- extending beyond the simple built-in strings provided by Textbook Combos. Most combos will begin with Textbook combos, however, so it's good to be familiar with the concept beforehand! Study up below!
| PJ Frame Data Glossary | |
|---|---|
| Damage |
Attack damage on hit in terms of life points. Each attack/move may deal a specific amount of damage per interaction. |
| Startup |
After inputting a command: The total number of frames of animation a move must first cycle through before it can begin dealing damage- i.e. "become Active". |
| Active |
After Startup: The total number of frames a move is able to hit an opponent if it collides with them. The window where an attack, on hit, will deal damage. |
| Recovery |
After Active: The total number of frames that must complete before a character reverts to their default/neutral stance. |
| Guard |
The direction in which the Attack/Move must be blocked.
|
| Special Properties |
Denotes any Special Properties that an Attack/Move applies to the opponent on-hit.
|
| Launcher Type |
Denotes the type of Launch:
|
| Hit Advantage |
Upon successfully connecting an Attack: The difference in the number of frames between when both characters will return to neutral stance after an attack has successfully hit.
|
| Guard Advantage |
Upon blocking an Attack: The difference in the number of frames between when both characters will return to neutral stance after an attack has successfully been blocked
|
| PJ Acronym Glossary | |
|---|---|
| BV |
"Burning Vigor" Attacks. Project Justices' nickname for traditional "Super" moves. |
| JS | |
| WBO |
While Behind Opponent. |
| WBT |
While Back Turned. (Turned around/Not facing the opponent) |
| WR |
While Running. |
| OTG |
"Off the Ground". i.e: An attack or technique that lifts the opponent up and out of a Knockdown state. May be used in or to make true combos, even if the combo-counter/hit-count reads otherwise. |
| Letter & Number Notation |
(
|
Easy
| Notation | |||||
|---|---|---|---|---|---|
| Damage | Hits | Meter Use | Stun | ||
| 30 | 4 | 0 | - | ||
|
Basic hitconfirm into sweep followed up with her | |||||
| Notation | |||||
|---|---|---|---|---|---|
| Damage | Hits | Meter Use | Stun | ||
| 46 | 6 | 0 | - | ||
|
A low starter ending with Akira's Senshubu rekka. Best to stick to the basics first to get a grasp on Akira's playstyle. | |||||
| Notation | |||||
|---|---|---|---|---|---|
| Damage | Hits | Meter Use | Stun | ||
| 60 | 10 | 1 | - | ||
|
Let's end with a super this time! Learning to switch between mids and lows are crucial, especially for a character like Akira. If you don't have the meter or you're simply not willing to use it, replace the super with the rekka ender like in the video above. | |||||
Medium
| Notation | |||||
|---|---|---|---|---|---|
| Damage | Hits | Meter Use | Stun | ||
| 74 | 11 | 1 | - | ||
|
Time to learn the launcher combos! All of your light normals will link with any of your launchers ( | |||||
| Notation | |||||
|---|---|---|---|---|---|
| Damage | Hits | Meter Use | Stun | ||
| 45 | 9 | 0 | - | ||
|
Since the Mini Rival Launchers doesn't go as high as the regular one, the air combo has to be slightly different or it will drop. | |||||
| Notation | |||||
|---|---|---|---|---|---|
| Damage | Hits | Meter Use | Stun | ||
| 61 | 6 | 0 | - | ||
|
Another launcher!? This is your ideal choice as a Tardy Cancel since the grab has better range than her launchers. | |||||
Difficult
| Notation | |||||
|---|---|---|---|---|---|
| Damage | Hits | Meter Use | Stun | ||
| 86 | 17 | 1 | - | ||
|
Time to put your knowledge in the basics and air combos to the true test. This is Akira's most important combo to learn, but also quite difficult to land consistently. Delay the jump after the launcher long enough to get yourself slightly higher than your opponent but not so high where your Slightly delay the (Air) Another important thing to know is that the timing of the first delay is affected by your opponent's size (Momo being the hardest one to do this on due to how small she is). | |||||
Advanced
| Notation | |||||
|---|---|---|---|---|---|
| (Air) | |||||
| Damage | Hits | Meter Use | Stun | ||
| 112 | 21 | 2 | - | ||
|
Now this is what you might call an "extracurricular lesson". | |||||
Unrecorded


