Introduction
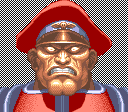
Picking Old M.Bison
To select O.M.Bison, choose M.Bison and then press ↓ ↑ ↑ ↓ Jab or Fierce, pressing Short simultaneously with the punch button for the alternate color.
| Normal | Secondary |
 |

|
--Born2SPD
Strengths & Weaknesses
Strengths
- Long range moves;
- Dizzy potential;
- Good throw range;
- Extremely fast walk speed;
- Good air mobility with jumps, Devil's Reverse and Head Stomp;
- Outstanding combo potential;
- Has many tricks under his sleeve;
Weaknesses
- No dedicated anti-air;
- Short range on most crouching normals;
- Has no reversals to escape throws/meaty attacks.
- Has great trouble with fireball traps at the corner.
- His far mk/hk have bad priority, definitely a big loss from n.Dictator.
New & Old Versions Comparison
Here is the list of differences:
- Obvious stuff: O.M.Bison can not tech throws and does not have a Super;
- O.M.Bison has some differences in some of his normals:
- Close Standing Forward has much worse priority;
- Far Standing Forward has worse priority as a poke, but is less vulnerable to low normals (overall, N.M.Bison's better);
- Far Standing Roundhouse has same changes as the far forward;
- Diagonal Jump Strong is a 1-hit normal that does not have juggle properties;
- Devil's Reverse special move was reworked, and O.M.Bison's has a reversal bug similar to those of T.Hawk's Rising Hawk and the supers of Sagat, Ken, and Dhalsim (executing the last special you did instead);
O.M.Bison is a waste of time. His standing kicks are straight up worse (they're a downgrade at most interactions, except for very rare ones like vs Boxer's crouching low kicks or vs Cammy's Crouching Strong punch, but the priority on it is so bad that these characters have even better ways to deal with it). Another very serious problem is the lack of the powerful Diagonal Jump Strong that juggles, since that gives Dictator so many opportunities to go for his TOD combos, as well as for the spacing advantage. The Old character version of that move has exactly one situation in which it shines though: you can use it to escape Blanka's Jumping Short kick after bite, since you can get a granted trade on that situation. Another move that is way worse is his Devil's Reverse since it provides no air control whatsoever, making Dictator's air trajectory very obvious and telegraphed... plus the move is often unsafe on block as well. Finally, he obviously can't tech throws (which is huge for Dictator) and he also does not have his Super, which, besides its faults, can be very useful in escaping certain situations.
Moves Analysis
Disclaimer: To better understand the diagrams, read this.
Normal Moves
Ground Normals
- Close/Far Standing Jab:
| Damage | 4[1] |  |
 |

|
| Stun | 0~5 | |||
| Stun Timer | 40 | |||
| Chain Cancel | Yes | |||
| Special Cancel | Yes | |||
| Frame Advantage | +5 | |||
| Frame Count | 3 | 4 | 4 | |
| Simplified | 1 + 3 | 4 | 4 | |
Bison does a quick standing jab, can be rapid fired to stop Honda's Torpedos and Blanka's Ball though it's not entirely reliable, useful in some anti-air situations.
- Crouching Jab:
| Damage | 4[1] |  |
 |

|
| Stun | 0~5 | |||
| Stun Timer | 40 | |||
| Chain Cancel | Yes | |||
| Special Cancel | Yes | |||
| Frame Advantage | +5 | |||
| Frame Count | 3 | 4 | 4 | |
| Simplified | 1 + 3 | 4 | 4 | |
This is a rapid-fire move that is used in combos and ticks. The priority is hideous, so it has mostly no use anywhere else.
- Close Standing Strong: (Base max activation range: 29)
| Damage | 22[1] |  |
 |
 |

|
| Stun | 5~11 | ||||
| Stun Timer | 60 | ||||
| Chain Cancel | No | ||||
| Special Cancel | Yes / No | ||||
| Frame Advantage | +2 / +6 | ||||
| Frame Count | 2 | 4 | 4 | 8 | |
| Simplified | 1 + 2 | 8 | 8 | ||
Bison does a body shot that can be used in ticks, also doubles as a throw command, can favorably trade with Dhalsim.
- Far Standing Strong:
| Damage | 22[1] |  |
 |
 |

|
| Stun | 5~11 | ||||
| Stun Timer | 60 | ||||
| Chain Cancel | No | ||||
| Special Cancel | No | ||||
| Frame Advantage | +6 | ||||
| Frame Count | 2 | 4 | 4 | 8 | |
| Simplified | 1 + 6 | 4 | 8 | ||
Mostly goes unused, not terrible priority, but is generally outclassed by other moves.
- Crouching Strong:
| Damage | 22[1] |  |
 |
 |

|
| Stun | 5~11 | ||||
| Stun Timer | 60 | ||||
| Chain Cancel | No | ||||
| Special Cancel | Yes* | ||||
| Frame Advantage | +6 | ||||
| Frame Count | 2 | 2 | 4 | 8 | |
| Simplified | 1 + 4 | 4 | 8 | ||
Viable in combos, but cr mk is usually favoured for better damage, and hitting low if they block. It also can be used to set up one of the Dhalsim corner infinites.
- Close Standing Fierce: (Base max activation range: 53)
| Damage | 28[1] |  |
 |
 |

|
| Stun | 10~16 | ||||
| Stun Timer | 80 | ||||
| Chain Cancel | No | ||||
| Special Cancel | No | ||||
| Frame Advantage | -3 | ||||
| Frame Count | 4 | 4 | 6 | 19 | |
| Simplified | 1 + 8 | 6 | 19 | ||
Pretty awful move, avoid it.
- Far Standing Fierce:
| Damage | 28[1] |  |
 |
 |

|
| Stun | 10~16 | ||||
| Stun Timer | 80 | ||||
| Chain Cancel | No | ||||
| Special Cancel | No | ||||
| Frame Advantage | -3 | ||||
| Frame Count | 4 | 4 | 6 | 19 | |
| Simplified | 1 + 8 | 6 | 19 | ||
Bison's main ground to air defense in lieu of a Knee Press Nightmare, also doubles as a throw command, can favorably trade with Dhalsim.
- Crouching Fierce:
| Damage | 28[2] |  |
 |
 |

|
| Stun | 10~16 | ||||
| Stun Timer | 80 | ||||
| Chain Cancel | No | ||||
| Special Cancel | No | ||||
| Frame Advantage | -3 | ||||
| Frame Count | 4 | 4 | 6 | 19 | |
| Simplified | 1 + 8 | 6 | 19 | ||
Bison does a slow punch while crouching, with correct timing it can be used to beat T.Hawk's splash, as well as other moves when used as an anti-air.
- Close Standing Short: (Base max activation range: 24)
| Damage | 14[0] |  |
 |
|
| Stun | 0~5 | |||
| Stun Timer | 40 | |||
| Chain Cancel | No | |||
| Special Cancel | Yes | |||
| Frame Advantage | +10 | |||
| Frame Count | 2 | 2 | 1 | |
| Simplified | 1 + 2 | 2 | 1 | |
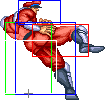
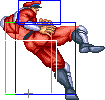
Bison does a quick knee that is used mainly in combos and ticking.
- Far Standing Short:
| Damage | 14[0] |  |
 |
 |

|
| Stun | 0~5 | ||||
| Stun Timer | 40 | ||||
| Chain Cancel | No | ||||
| Special Cancel | Yes* | ||||
| Frame Advantage | +6 | ||||
| Frame Count | 2 | 2 | 4 | 3 | |
| Simplified | 1 + 4 | 4 | 3 | ||
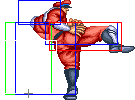
It is similar to close standing Short, but the recovery is worse.
- Crouching Short:
| Damage | 14[1] |  |
 |

|
| Stun | 0~5 | |||
| Stun Timer | 40 | |||
| Chain Cancel | No | |||
| Special Cancel | Yes* | |||
| Frame Advantage | +4 | |||
| Frame Count | 4 | 4 | 5 | |
| Simplified | 1 + 4 | 4 | 5 | |
Has use in combos, but is outclassed, can be cancelled into from close st lk, and is an alright tick on occasion. Not much use in neutral due to the poor reach and priority, one nice trick however, is to whiff it before they get up when close, acts as a fake meaty cr mk since they share a sprite, this can discourage them from trying reversal throw, or bait reversals.
- Close Standing Forward: (Base max activation range: 16)
| Damage | 22[1] |  |
 |
 |
 |

|
| Stun | 5~11 | |||||
| Stun Timer | 60 | |||||
| Chain Cancel | No | |||||
| Special Cancel | No | |||||
| Frame Advantage | +4 | |||||
| Frame Count | 3 | 3 | 5 | 8 | 1 | |
| Simplified | 1 + 6 | 5 | 9 | |||
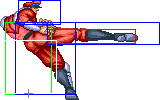
Very similar to far st mk, the worse priority rarely matters when you are this close. This move has no special use individually.
- Far Standing Forward:
| Damage | 24[1] |  |
 |
 |
 |

|
| Stun | 5~11 | |||||
| Stun Timer | 60 | |||||
| Chain Cancel | No | |||||
| Special Cancel | No | |||||
| Frame Advantage | +4 | |||||
| Frame Count | 3 | 3 | 5 | 8 | 1 | |
| Simplified | 1 + 6 | 5 | 9 | |||
Bison's main "harassment" move. It is safe, beats fireballs, controls a large amount of space, and can be whiffed while charging to start a pindown.
- Crouching Forward:
| Damage | 24[1] |  |
 |

|
| Stun | 5~11 | |||
| Stun Timer | 60 | |||
| Chain Cancel | No | |||
| Special Cancel | Yes* | |||
| Frame Advantage | +5 | |||
| Frame Count | 4 | 8 | 5 | |
| Simplified | 1 + 4 | 8 | 5 | |
This move is great as a meaty on wakeup because it can stuff even Shoryus with proper timing. Bufferable, on block can safely be used to setup an lk Scissor Kick for a pindown.
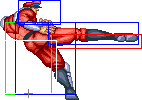
- Close Standing Roundhouse: (Base max activation range: 53)
| Damage | 30[2] |  |
 |
 |
 |

|
| Stun | 10~16 | |||||
| Stun Timer | 80 | |||||
| Chain Cancel | No | |||||
| Special Cancel | No | |||||
| Frame Advantage | -2 | |||||
| Frame Count | 3 | 3 | 6 | 17 | 1 | |
| Simplified | 1 + 6 | 6 | 18 | |||
This is not really useful, but by comboing after a Skull Diver attack.
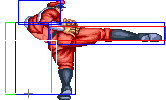
- Far Standing Roundhouse:
| Damage | 30[2] |  |
 |
 |
 |

|
| Stun | 10~16 | |||||
| Stun Timer | 80 | |||||
| Chain Cancel | No | |||||
| Special Cancel | No | |||||
| Frame Advantage | -2 | |||||
| Frame Count | 3 | 3 | 6 | 17 | 1 | |
| Simplified | 1 + 6 | 6 | 18 | |||
A slower version of MK. Deals really solid damage and stun and has some of the same uses as MK. It is great as a whiff punisher for things such as OG Ken Jab Shoryuken.
- Crouching Roundhouse:
| Damage | 30[2] |  |
 |

|
| Stun | 5~11 | |||
| Stun Timer | 130 | |||
| Chain Cancel | No | |||
| Special Cancel | No | |||
| Frame Advantage | -24 | |||
| Frame Count | 6 | 29 | 17 | |
| Simplified | 1 + 6 | 29 | 17 | |
Slide trip. It is useful if opponent techs your tick throw, and also great for positioning with a knockdown. This is quite unsafe on block, from most distances. It also does not work as anti-air.
Aerial Normals
- Neutral Jumping Jab:
| Damage | 12[2] |  |

|
| Stun | 1~7(-2) | ||
| Stun Timer | 40 | ||
| Frame Count | 3 | ∞ | |
Decent defensive move, stays active the whole jump.
- Diagonal Jumping Jab:
| Damage | 12[2] |  |
 |
 |

|
| Stun | 1~7(-2) | ||||
| Stun Timer | 40 | ||||
| Frame Count | 2 | 40 | 6 | ∞ | |
| Simplified | 2 | 40 | ∞ | ||
Can be used as a crossup.
- Neutral Jumping Strong:
| Damage | 22[2] |  |
 |

|
| Stun | 5~11 | |||
| Stun Timer | 50(+10) | |||
| Frame Count | 3 | 20 | ∞ | |
Pretty much the same uses as neutral jump jab.
- Diagonal Jumping Strong:
| Damage | 22[2] |  |
 |
 |

|
| Stun | 5~11 | ||||
| Stun Timer | 50(+10) | ||||
| Frame Count | 3 | 20 | 6 | ∞ | |
| Simplified | 3 | 20 | ∞ | ||
This move doesn't have many uses, but there is one situation in which it shines: after being bitten by Blanka you would normally expect him to just jump at you imediatelly after it with Jumping Jab or Short and try to Bite you again. Well this move happens to be able to trade with both moves with this specific spacing, just hold upback and do it right after Dictator goes to the air. This doesn't prevents Blanka to jump at you on that situation since his Jumping Fierce can beat this for example, be he has to do it in such a timing that would not hit Dictator if he just stayed on the ground blocking, so this creates a mixup situation.
- Neutral Jumping Fierce:
| Damage | 28[2] |  |
 |
 |
 |

|
| Stun | 11~17(-1) | |||||
| Stun Timer | 60(+20) | |||||
| Frame Count | 2 | 4 | 10 | 6 | ∞ | |
| Simplified | 6 | 10 | ∞ | |||
Good horizontal priority and ok reach. Stays out a little longer than nj hk, so has its uses. Mainly used as a defensive move.
- Diagonal Jumping Fierce:
| Damage | 28[2] |  |
 |
 |
 |

|
| Stun | 11~17(-1) | |||||
| Stun Timer | 60(+20) | |||||
| Frame Count | 3 | 6 | 12 | 5 | ∞ | |
| Simplified | 9 | 12 | ∞ | |||
Nothing special, if you want a high damage diagonal jump normal, favour hk for the better priority.
- Neutral Jumping Short:
| Damage | 12[2] |  |
 |
 |

|
| Stun | 1~7(-2) | ||||
| Stun Timer | 40 | ||||
| Frame Count | 2 | 40 | 3 | ∞ | |
| Simplified | 2 | 40 | ∞ | ||
Great priority, stays out for a really long time, low damage but it does beat a lot air to air.
- Diagonal Jumping Short:
| Damage | 12[2] |  |
 |
 |

|
| Stun | 1~7(-2) | ||||
| Stun Timer | 40 | ||||
| Frame Count | 2 | 40 | 3 | ∞ | |
| Simplified | 2 | 40 | ∞ | ||
Not very useful in general. Good vs Blanka as a "bail out" move. Can stuff horizontal, and vertical ball clean.
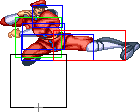
- Neutral Jumping Forward:
| Damage | 24[2] |  |
 |
 |

|
| Stun | 5~11 | ||||
| Stun Timer | 50(+10) | ||||
| Frame Count | 1 | 2 | 20 | ∞ | |
| Simplified | 3 | 20 | ∞ | ||
Stay out a decent amount of time, horizontal kick can stuff problem jump ins like Shoto j.hk quite well.
- Diagonal Jumping Forward:
| Damage | 24[2] |  |
 |
 |

|
| Stun | 5~11 | ||||
| Stun Timer | 50(+10) | ||||
| Frame Count | 3 | 20 | 5 | ∞ | |
| Simplified | 3 | 20 | ∞ | ||
Great when used as an instant overhead, excellent cross-up, can stuff Blanka's Up Ball which comes into play very often.
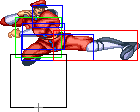
- Neutral Jumping Roundhouse:
| Damage | 30[2] |  |
 |
 |

|
| Stun | 11~17(-1) | ||||
| Stun Timer | 60(+20) | ||||
| Frame Count | 3 | 2 | 8 | ∞ | |
| Simplified | 5 | 8 | ∞ | ||
Like the neutral jumping forward but with more range and priority but less attacking frames.
- Diagonal Jumping Roundhouse:
| Damage | 30[2] |  |
 |
 |

|
| Stun | 11~17(-1) | ||||
| Stun Timer | 60(+20) | ||||
| Frame Count | 5 | 8 | 5 | ∞ | |
| Simplified | 5 | 8 | ∞ | ||
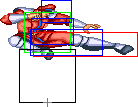
Great crossup, big damage, easier to use than j.Fowd on slimmer characters. Decent priority air to air.
Throws
O.M.Bison can only throw with Strong and Fierce. He has no kick throws, but Bison can still tech throws with any medium or higher punch or kick even if Bison has no kick throws. This rule only applies to all ST "new" characters, though, so as an "old" character, you won't be teching anything.
- Deadly Throw: (←/↖/↗/→ + Strong/Fierce)
| Damage | 32 |  |
 |

| |
| Stun | 7~13 | ||||
| Stun Timer | 100 | ||||
| Range | (from axis) | 52 | |||
| (from throwable box) | 24 | ||||
A good throw, in certain situations near the corner you can try a crossup slide. Use this sparingly. A couple of characters, like Sim for instance, this can be done mid screen as well.
Special Moves
- Psycho Crusher a.k.a. Torpedo: (Charge ←, → P)
Detailed Input: (Charge ←/↙/↖ for at least 60f, [7~14f] → [11/9/7f] Jab/Strong/Fierce. It is needed to wait at least 1 frame after leaving the charge direction to enter with the P button)
Bison flies across the screen in flames. It can do a maximum of 3 blocked hits. The distance and the speed at which it travels depends on the strength of the punch. It has been severely weakened since Super SFII, no longer has great priority besides the Jab version. Can be used to escape corners at times and can also hit opponents from behind/underneath with ridiculous timing and a lot of balls. Generally, stick with the scissor kick. If you make a mistake you can easily corner yourself. Normals beat this far too easily.
This move can be very unsafe in most cases, if you space it so you only hit them towards the end of the move (usually with the lp version) then you're usually ok. The mp/hp versions often pass through on block, despite looking safe, it isn't. The punishments other characters can do can vary in some cases based on distance and when they blocked it. Though if you land behind them in the corner, they can throw you just like with unsafe scissor kicks.
The punish guide:
- Ryu - Fierce fireball/super (Seems inconsistent as it sometimes won't reach)
- Ken - N.Ken st hk, or fierce srk (both versions)
- Guile - cr mk, backfist, flash kick
- Gief - sweep, st mk
- Chun - sweep
- Dhalsim - Most stretchy normals will work, st mk and st hp seem the most reliable
- Blanka - cr hp, cr mp
- Honda - N.Honda - mp/hp hands, Old Honda - any version of hands
- DJ - st hk, slide (slide is a little inconsistent)
- Cammy - st hk, st hp
- Hawk - st hk, cr mp
- Fei - rekka 1st hit(fierce is usually best), cr mp
- Boxer - st hp
- Dictator - st hk, st mk
- Claw - st hp, cr mp, cr lp
- Sagat - st hp, st mk
- Double Knee Press a.k.a. Scissor Kick: (Charge ←, → K)
Detailed Input: (Charge ←/↙/↖ for at least 78f, [7~14f] →/↘/↗ [11/9/7f] Short/Forward/Roundhouse. It is needed to wait at least 1 frame after leaving the charge direction to enter with the K button)
Bison kicks the opponent twice in a forward motion. The distance and speed at which it travels depends on the strength of the kick. When properly spaced to do only one hit, they can be quite safe and useful in pindown strategies. They also are quite useful for scoring knockdowns if opponent tries to counter standing kicks or do low attacks. Can be used as a ghetto anti air, unlike the Psycho Crusher which gets stuffed a lot.
- Head Stomp: (Charge ↓, ↑ K)
Detailed Input: (Charge ↓/↙/↘ for at least 60f, [7~14f] ↑/↖/↗ [11/9/7/1f] Short/Forward/Roundhouse/any K if you are at a jumpable state. It is needed to wait at least 1 frame after leaving the charge direction to enter with the K button)
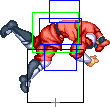
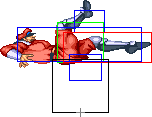
- Startup + Active:
| Short | Forward | Rh |  |
 |
 |
 |
Short | Forward & Rh | |
| Damage | 20[1] | 22[1] | 24[1] |  |

| ||||
| Stun | 9~15 | ||||||||
| Stun Timer | 100 | ||||||||
| Frame Count | 2 | 12 | 8 | 8 | ∞ | ||||
| Simplified | 30 | ∞ | |||||||
- Bounce/Recovery:
 |
 |
 |
 |
 |
 |
 |

| |
| Frame Count | 7 (IF) | 7 (IF) + 1 | 6 | 6 | 6 | 6 | ∞ | 6 |
| Simplified | ∞ | 6 | ||||||
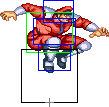
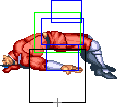
Bison flies towards the opponent and stomps their head with his boots. You can move very flexibly after the head stomp makes contact with a grounded opponent, but when the head stomp hits an airborne opponent, the control over mobility is not as flexible. Works well to get over fireballs.
- Somersault Skull Diver: (P, during the Bounce/Recovery animation of Head Stomp)
This is the punch that hits the opponent's head after head stomp. You can move left or right using the joystick while performing this move. The active hitting duration of the move depends on the strength of the punch. This can combo in really weird situations.
- Devil Reverse: (Charge ↓, ↑ P)
Detailed Input: (Charge ↓/↙/↘ for at least 61f, [7~14f] ↑/↖/↗ [11/9/7/1f] Jab/Strong/Fierce/any P if you are at a jumpable state. It is needed to wait at least 1 frame after leaving the charge direction to enter with the P button)
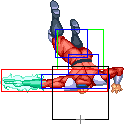
- Startup + Active:
- Recovery:
 |
 |
 |

| |
| Frame Count (Jab) | 2 | 2 | 2 | 6 |
| Simplified (Jab) | 4 | 8 | ||
| Frame Count (Strong) | 2 | 2 | 1 | 8 |
| Simplified (Strong) | 4 | 9 | ||
| Frame Count (Fierce) | 2 | 2 | 1 | 10 |
| Simplified (Fierce) | 4 | 11 | ||
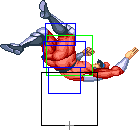
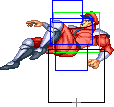
Overall this move is pretty bad, and should often be avoided. Unlike the N.Dictator version, you have no control during the moves active period. You can slightly change the angle you fly toward them at, by activiating it with ub,u, or uf. All characters have either a reliable way to stuff this clean, or get out of the way before it connects.
O.M.Bison has a reversal bug with this move; if you attempt to reverse with it at any strength, you will instead perform the last special move you used.
Misc Animations
Jump Animations
- Neutral/Back/Forward Jump:
Dictator's prejump animation is the fastest on the game(tied with Dhalsim and O.Sagat). This not only helps with his aerial game, but also makes him very "slippery". He jumps so fast that he can even escape tick throws (specially Zangief's SPDs) by just jumping, even though it's not an optimal way to deal with it and you shouldn't really rely on it. Unfortunately old Dictator has no true reversal to escape throws, due to lack of super, in addition to this you also can't tech throws being an old character. So while it's not reliable, it is in some cases the "best" option.
The landing recovery has a special property which allows it to be canceled into certain actions. At the first landing frame, you can perform throws (including command throws), and on the second landing frame, you can start another jump, attack with a normal or special move, or block. Blocking not being until the second landing frame, as well as hitbox-hurtbox interactions having priority over throwbox-throw hurtbox is why sweeps work as anti airs in this game.
Things are different when jumping over your opponent, however. In that situation it's possible to walk back/forward, to jump again or to even block on the first landing frame! Strangely, if a throw is timed on the first landing frame of a jump that crosses over, a throwbox will never come out, even though that input will result in a normal coming out 2 frames later (like it normally would). Anyway, being able to block on the first landing frame can help a little bit on some safe jump crossup setups, or maybe in other situations as well if your character has a huge jump arc.
The Basics
Sadly old Dictator is pretty terrible, not having a throw tech turns what are bad situations as N.Dictator, into fatal ones. He still has access to his touch of death combos, and his crossups are still useful. However worse priority on far mk/hk is very bad for his neutral game. You basically want to get a knockdown asap, then try for an ambigious crossup into a tod combo.
