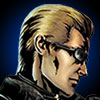

Wesker
Albert Wesker was a high-ranking executive of the Umbrella Corporation. In order to test the capabilities of the company's T-virus, which turned whoever it infected into undead zombies, Wesker went undercover as a mole for S.T.A.R.S' Alpha Team, along with Chris Redfield and Jill Valentine. When he was discovered to be a double agent, Wesker escaped and left Chris and Jill to die. His plans were seemingly foiled, but unbeknownst to anyone he had injected himself with an experimental virus which greatly enhanced his physical capabilities, and allowed himself to regenerate damage at an incredibly fast rate. He now plans to release the fruits of all of Umbrella's endeavors, the Uroboros virus, into the Earth's atmosphere, infecting all of humanity and allowing himself to rule over the world's populace as a god.
In a nutshell
Wesker is a powerful and fast character that focuses on his gun and his ability to teleport to confuse his opponent. Getting the hang of his movement can take some time, as his teleports move him a set distance instead of to a screen location or a location based on his opponent's position. He also has a super that can punish virtually any mistake from any angle, making him quite the force to be reckoned with.
Video Walkthrough
Move List
Assist Types
Normal Moves
Followup with
Can
Followup with
Can
Followup with
Special Moves
Followup with
Hyper Moves
Damage scales by 0.96
number of hits varies
Apprentice Combos
Strategy
Tips and Tricks
- Wesker can get big damage off of basically anything, but scoring the first opening can be tricky. Use Samurai Edge while calling an assist, and use a teleport followup to close in.
- It is best to attempt Wesker's counter attack super, the Rhino Charge, when you have an additional meter to DHC into a safe super if you miss.
Basic Strategy
The basic goal with Wesker is to get into a position to cross-up with Phantom Move L or H, with your primary assist still available. Therefore, he is bested suited as a point character (1st character on your team). Assists make teleporting safe.
What you can do is zone through projectiles (by guessing correctly when opponents will throw them out) with Phantom Move L or H. Tiger Uppercut H also works when in mid-range.
Use Samurai Edge ({{ ![]() + H}} and/or air {{
+ H}} and/or air {{ ![]() + H}}) to zone, build meter, and also to get-in on your opponent with a
+ H}}) to zone, build meter, and also to get-in on your opponent with a ![]() or
or ![]() teleport followup. However, don't teleport frequently while shooting as this will leave you wide-open (unless you use it in combination with an assist).
teleport followup. However, don't teleport frequently while shooting as this will leave you wide-open (unless you use it in combination with an assist).
If you're able to cross-up an opponent and do a full combo ending with OTG {{ ![]() + H}}, you can do an air throw, mini-air loop, or wait for them to land to do a mix-up of either cr.
+ H}}, you can do an air throw, mini-air loop, or wait for them to land to do a mix-up of either cr. ![]() or Mustang Kick. After hitting the OTG, depending on what your opponent does for air recovery, you can either:
or Mustang Kick. After hitting the OTG, depending on what your opponent does for air recovery, you can either:
1.) Wavedash twice towards your opponent if they air-recover backward midscreen while calling your assist.
2.) Do Phantom Move L or H after the OTG if your opponent air-recovers backward & in the corner while calling your assist.
3.) Do Phantom Move L or H after the OTG if your opponent does not air-recover while calling your assist.
4.) If the opponent air-recovers forward, you can crouch and wait for them to land to do a mix-up or do an backwards air throw. However, if the opponent attacks while going forward, you can either try a Tiger Uppercut L, Rhino Charge, or dash forward st. ![]() from the other side.
from the other side.
