

Introduction
The Supreme Ruler of the Shadaloo crime syndicate, the Psycho Power Master and final boss. No more words are necessary to present him.
Bison is a char for rushers, pokers and turtlers at the same time. He's just good at everything: his normals have good reach and priority, his specials are far reaching and he does overall huge damage, his throw has unfair priority, not to mention most of his attacks have incredible dizzy properties. And even worse: Bison has a nefarious practical infinite combo that can be applied with relative ease and may turn the tide in the dictator's favour anytime. With all these tricks and bad attitude, Bison is up to suprise those fools who expected to fight a man but found a god instead.
This is his best incarnation. From HF onwards, Bison has being nerfed a little too much on his normals and specials, rendering him almost low tier.
| Start | Default |
 |

|
Moves List
Normal Moves
- Deadly Throw: close, f + Medium or Hard Punch
Special Moves
- Psycho Crusher: b~f + Punch
- Scissor Knee: b~f + Kick
- Head Stomp: d~u + Kick
- Somersault Skull Driver: above move, Punch
The Basics
- Anti Air: jumping Low Kick or crouching High Punch
- High Poke: standing Medium Kick
- Low Poke: crouching Medium Kick
Pros
- Deadly Corner Trap and Poking Strategies
- Cheap Damage Psycho Crusher and Linking Scissor Knee
Cons
- Lack of Anti Air options
- Sweep and Stomp Recovery
Combos
- s.LP xx Psycho Crusher
- cross up j.HK,cr.LP x1-2,s.LP xx MK Scissor Knee,link cr.MP,s.MK
Hitboxes
Note: All frame data gathered by using the method described at http://code.google.com/p/macrolua/wiki/FrameDataExamples. Some differs from TAkiba's, and is noted by a *.
Standing Moves
- Standing Jab:
| Damage | 4 |  |
 |

|
| Rnd Dmg Table | 0x020 | |||
| Stun | 1~7 | |||
| Stun Timer | 40 | |||
| Chain Cancel | Yes | |||
| Special Cancel | Yes | |||
| On Hit | +5 | |||
| Frame Count | 3+1 | 4 | 5 | |
- Standing Strong:
| Damage | 18 |  |
 |
 |

|
| Rnd Dmg Table | 0x020 | ||||
| Stun | 5~11 | ||||
| Stun Timer | 60 | ||||
| Chain Cancel | No | ||||
| Special Cancel | No | ||||
| On Hit | +6 | ||||
| Frame Count | 2+1 | 4 | 4 | 6 | |
| Simplified | 7 | 4 | 6 | ||
- Standing Fierce:
| Damage | 26 |  |
 |
 |

|
| Rnd Dmg Table | 0x020 | ||||
| Stun | 11~17 | ||||
| Stun Timer | 80 | ||||
| Chain Cancel | No | ||||
| Special Cancel | No | ||||
| On Hit | -3 | ||||
| Frame Count | 4+1 | 4 | 6 | 20 | |
| Simplified | 9 | 6 | 20 | ||
- Standing Short:
| Damage | 8 |  |
 |
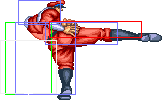 |
 |

|
| Rnd Dmg Table | 0x020 | |||||
| Stun | 1~7 | |||||
| Stun Timer | 40 | |||||
| Chain Cancel | No | |||||
| Special Cancel | No | |||||
| On Hit | +5 | |||||
| Frame Count | 2+1 | 2 | 4 | 4 | 1 | |
| Simplified | 5 | 4 | 5 | |||
- Standing Forward:
| Damage | 16 |  |
 |
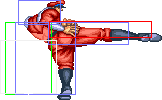 |
 |

|
| Rnd Dmg Table | 0x020 | |||||
| Stun | 5~11 | |||||
| Stun Timer | 60 | |||||
| Chain Cancel | No | |||||
| Special Cancel | No | |||||
| On Hit | +5 | |||||
| Frame Count | 2+1 | 2 | 4 | 7 | 1 | |
| Simplified | 5 | 4 | 8 | |||
- Standing Roundhouse:
| Damage | 24 |  |
 |
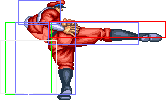 |
 |

|
| Rnd Dmg Table | 0x020 | |||||
| Stun | 11~17 | |||||
| Stun Timer | 80 | |||||
| Chain Cancel | No | |||||
| Special Cancel | No | |||||
| On Hit | -1 | |||||
| Frame Count | 2+1 | 3 | 6 | 20 | 1 | |
| Simplified | 6 | 6 | 21 | |||
Crouching Moves
- Crouching Jab:
| Damage | 4 |  |
 |
 |

| |
| Rnd Dmg Table | 0x020 | |||||
| Stun | 1~7 | |||||
| Stun Timer | 40 | |||||
| Chain Cancel | Yes | |||||
| Special Cancel | Yes | |||||
| On Hit | +6 | |||||
| Frame Count | 2 | 2 | 4 | 4 | ||
| Simplified | 4 | 4 | 4 | |||
- Crouching Strong:
| Damage | 18 |  |
 |
 |

| |
| Rnd Dmg Table | 0x020 | |||||
| Stun | 5~11 | |||||
| Stun Timer | 60 | |||||
| Chain Cancel | No | |||||
| Special Cancel | No | |||||
| On Hit | +6 | |||||
| Frame Count | 3 | 2 | 4 | 6 | ||
| Simplified | 5 | 4 | 6 | |||
- Crouching Fierce:
| Damage | 26 |  |
 |
 |

| |
| Rnd Dmg Table | 0x020 | |||||
| Stun | 11~17 | |||||
| Stun Timer | 80 | |||||
| Chain Cancel | No | |||||
| Special Cancel | No | |||||
| On Hit | -3 | |||||
| Frame Count | 5 | 4 | 6 | 20 | ||
| Simplified | 9 | 6 | 20 | |||
- Crouching Short:
| Damage | 8 |  |
 |

|
| Rnd Dmg Table | 0x020 | |||
| Stun | 1~7 | |||
| Stun Timer | 40 | |||
| Chain Cancel | No | |||
| Special Cancel | No | |||
| On Hit | +5 | |||
| Frame Count | 5 | 4 | 5 | |
Hits low.
- Crouching Forward:
| Damage | 16 |  |
 |

|
| Rnd Dmg Table | 0x020 | |||
| Stun | 5~11 | |||
| Stun Timer | 60 | |||
| Chain Cancel | No | |||
| Special Cancel | No | |||
| On Hit | +6 | |||
| Frame Count | 5 | 8 | 5 | |
Hits low.
- Crouching Roundhouse:
| Damage | 24 |  |
 |

|
| Rnd Dmg Table | 0x020 | |||
| Stun | 5~11 | |||
| Stun Timer | 130 | |||
| Chain Cancel | No | |||
| Special Cancel | No | |||
| On Hit | KD | |||
| On Block | -22 | |||
| Frame Count | 7 | 29 | 17 | |
Hits low. Slides roughly 3/4 the screen, knocking down on hit. Extremely unsafe unless connecting very late in the active frames.
Aerial Moves
- Neutral/Diagonal Jumping Jab:
| Damage | 8/7 |  |
 |
 |

| ||
| Rnd Dmg Table | 0x020 | ||||||
| Stun | 1~7 | ||||||
| Stun Timer | 40 | ||||||
| Special Cancel | No | ||||||
| Frame Count | 2 | 40 | 6 | ∞ | |||
| Simplified | 2 | 40 | ∞ | ||||
- Neutral/Diagonal Jumping Strong:
| Damage | 16/14 |  |
 |
 |

| ||
| Rnd Dmg Table | 0x020 | ||||||
| Stun | 5~11 | ||||||
| Stun Timer | 60 | ||||||
| Special Cancel | No | ||||||
| Frame Count | 3 | 20 | 6 | ∞ | |||
| Simplified | 3 | 20 | ∞ | ||||
- Neutral Jumping Fierce:
| Damage | 24 |  |
 |
 |

| ||
| Rnd Dmg Table | 0x020 | ||||||
| Stun | 11~17 | ||||||
| Stun Timer | 80 | ||||||
| Special Cancel | No | ||||||
| Frame Count | 5 | 8 | 6 | ∞ | |||
| Simplified | 5 | 8 | ∞ | ||||
- Diagonal Jumping Fierce:
| Damage | 22 |  |
 |
 |

| ||
| Rnd Dmg Table | 0x020 | ||||||
| Stun | 11~17 | ||||||
| Stun Timer | 80 | ||||||
| Special Cancel | No | ||||||
| Frame Count | 5 | 8 | 6 | ∞ | |||
| Simplified | 5 | 8 | ∞ | ||||
- Neutral Jumping Short:
| Damage | 10 |  |
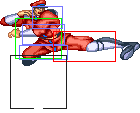 |

|
| Rnd Dmg Table | 0x020 | |||
| Stun | 1~7 | |||
| Stun Timer | 40 | |||
| Special Cancel | No | |||
| Frame Count | 2 | 40 | ∞ | |
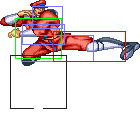
- Neutral Jumping Forward:
| Damage | 18 |  |
 |
 |

| |
| Rnd Dmg Table | 0x020 | |||||
| Stun | 5~11 | |||||
| Stun Timer | 60 | |||||
| Special Cancel | No | |||||
| Frame Count | 1 | 2 | 20 | ∞ | ||
| Simplified | 3 | 20 | ∞ | |||
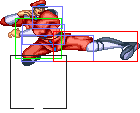
- Neutral Jumping Roundhouse:
| Damage | 26 |  |
 |
 |

| |
| Rnd Dmg Table | 0x020 | |||||
| Stun | 11~17 | |||||
| Stun Timer | 80 | |||||
| Special Cancel | No | |||||
| Frame Count | 3 | 2 | 8 | ∞ | ||
| Simplified | 5 | 8 | ∞ | |||
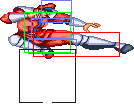
- Diagonal Jumping Short:
| Damage | 8 |  |
 |
 |

| ||
| Rnd Dmg Table | 0x020 | ||||||
| Stun | 1~7 | ||||||
| Stun Timer | 40 | ||||||
| Special Cancel | No | ||||||
| Frame Count | 2 | 40 | 5 | ∞ | |||
| Simplified | 2 | 40 | ∞ | ||||
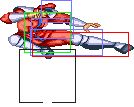
- Diagonal Jumping Forward:
| Damage | 16 |  |
 |
 |

| ||
| Rnd Dmg Table | 0x020 | ||||||
| Stun | 5~11 | ||||||
| Stun Timer | 60 | ||||||
| Special Cancel | No | ||||||
| Frame Count | 3 | 20 | 5 | ∞ | |||
| Simplified | 3 | 20 | ∞ | ||||
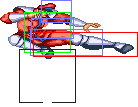
- Diagonal Jumping Roundhouse:
| Damage | 24 |  |
 |
 |

| ||
| Rnd Dmg Table | 0x020 | ||||||
| Stun | 11~17 | ||||||
| Stun Timer | 80 | ||||||
| Special Cancel | No | ||||||
| Frame Count | 5 | 8 | 5 | ∞ | |||
| Simplified | 5 | 8 | ∞ | ||||
Throws
M.Bison can only throw with Strong and Fierce. He has no kick throws.
- Deadly Throw: (←/→ + Strong/Fierce)
| Damage | 32 | 
| |
| Stun | 7~13 | ||
| Stun Timer | 99 | ||
| Range (from axis) | 52 | ||
| Range advantage | 24 | ||
Both punch throws are the same.
Special Moves
Psycho Crusher: (Charge ←, →, P) [charge time: 59f]
- Startup:
 |
 |
 |

| |
| Frame Count | 2 | 2 | 2 | 7 |
| Simplified | 13 | |||
- Active part 1:
- Jab Version: This happens 2 times.
- Strong Version: This happens 3 times.
- Fierce Version: This happens 5 times.
| Damage (Jab) | 24 |  |
 |
 |

|
| Damage (Strong) | 26 | ||||
| Damage (Fierce) | 28 | ||||
| Random dmg table | 0x040 | ||||
| Stun | 13~19 | ||||
| Stun Timer | 120 | ||||
| Frame Advantage | KD | ||||
| Frame Count | 3 | 3 | 3 | 3 | |
| Simplified | 12 | ||||
- Active part 2:
- Jab Version:
 |
 |

| ||
| Frame Count | 3 | 3 | 2 | |
| Simplified | 8 | |||
- Strong Version: No extra animation.
- Fierce Version:

| |
| Frame Count | 2 |
- Recovery:
 |

| ||
| Frame Count | 9 | 7 | |
| Simplified | 16 | ||
Though japanese Champion Edition has this special tuned down, it's still a really good move if used correctly.
LP Psycho Crusher is good chipping tool and fairly safe to use. MP Psycho Crusher can set up tick throws and crossing up folks who are getting up. HP Psycho Crusher is good at chasing people down, trading with projectiles up close, getting far away from the corner. It's also really good at hitting people from behind, either as they're getting up or coming down from a jump, since his legs can hit. HP Psycho Crusher is only somewhat safe if you do it when your opponent is far away from the corner though, and even then, some characters can still turn around and smack you before you land. Some characters can even hit you -in-between- the blocked hits of the Psycho Crusher, though in my 13 or so years of playing this game, I've only seen this occur -once-.
Bison's only special move with invincibility, though only 2 frames.
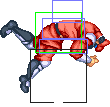
Double Knee Press: (Charge ←, →, K) [charge time: 107f]
- Startup:
 |
 |

| |
| Frame Count | 2/3/4 | 3 | 3 |
| Simplified | 8/9/10 | ||
- Active:
| Damage (Jab) | 24,16 | 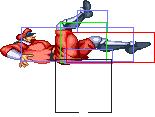 |

| |
| Damage (Strong) | 26,16 | |||
| Damage (Fierce) | 28,16 | |||
| Random dmg table | 0x020 | |||
| Stun | 13~19,1~7 | |||
| Stun Timer | 120,50 | |||
| Frame Advantage | +4/+3/+2 | |||
| Frame Count | 8 | 9 | ||
| Simplified | 17 | |||
- Recovery:

| |
| Frame Count | 6/7/8 |
Notes: This special move can be combined with normal ones to get a redizzy infinite combo on most chars except Blanka. Besides, it's Bison's best method for keeping pressure on the opponent. A MK Double Knee Press, followed by c.MK, s.MK, MK Double Knee Press is a very good way to trap the opponent on a block stunt state and can even deplete his life bar with sucessive chip damage. You can draw out retaliation attacks after the c.MK, either by doing c.LP or doing nothing. All versions of the Double Knee Press are relatively safe if you do them from far away, which is the only place you should be doing them. c.LP x 2, s.LP, MK Double Knee Press is M.Bison's most damaging and most reliable combo to perform when an opponent is dizzy. Don't use this attack against a crouch-blocking Blanka, since his sprite is so low to the ground that only one hit connects really fast and it will throw off your timing.
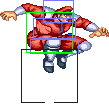
Head Stomp: (Charge ↓, ↑, K) [charge time: 59f]
- Startup:
 |
 |
 |
| |
| Frame Count | 2 | 12 | 8 | 8 |
| Simplified | 30 | |||
- Active:
- Short Version:
| Damage | 14 | 
|
| Random dmg table | 0x020 | |
| Stun | 11~17 | |
| Stun Timer | 60 | |
| Frame Count | ∞ | |
- Forward/Roundhouse Version:
| Damage (Frwrd) | 16 | 
|
| Damage (Rh) | 18 | |
| Random dmg table | 0x020 | |
| Stun | 11~17 | |
| Stun Timer | 60 | |
| Frame Count | ∞ | |
- Bounce/Recovery:
 |
 |
 |
 |
 |
 |
 |

| |
| Frame Count | 7 (IF) | 7 (IF) + 1 | 6 | 6 | 6 | 6 | ∞ | 6 |
Your main anti-projectile move. Use it to safely counter the projectiles of Ken, Dhalsim, or Chun-li on reaction from a full-screen away, which is where you'll be using this most of the time. You can counter Ryu or Sagat's with it, but only if you anticipate and launch the moment you see them throw their projectile. Guile's projectile cannot be reliably countered with this attack if you're at full screen - he may not be able to counter you back, but he should be able to block. The Head Press has some use as a low move counter in close, but only rarely, and not against anyone who has an instantaneous anti-air.
Somersault Skull Diver: (P, during the Bounce/Recovery animation of Head Stomp)
- Jab Version:
| Damage | 22 |  |
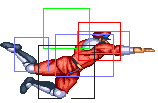 |

|
| Random dmg table | 0x060 | |||
| Stun | 11~17 | |||
| Stun Timer | 60 | |||
| Frame Count | 3 | ∞ | 6 | |
- Strong Version:
| Damage | 24 |  |
 |
 |
 |

|
| Random dmg table | 0x060 | |||||
| Stun | 11~17 | |||||
| Stun Timer | 60 | |||||
| Frame Count | 4 | 20 | 6 | ∞ | 6 | |
- Fierce Version:
| Damage | 26 |  |
 |
 |
 |

|
| Random dmg table | 0x060 | |||||
| Stun | 11~17 | |||||
| Stun Timer | 60 | |||||
| Frame Count | 6 | 8 | 6 | ∞ | 6 | |
The follow up to the Head Press is a very useful move. You can combo off of it if you land it deep enough. It's also great for goading certain people, especially characters with air throws - after a blocked Head Press, you should NEVER EVER be air thrown out of this, since you can -always- smack them before they reach you. It's great against characters who don't have instantaneous anti-air, or characters' whose anti-air doesn't hit behind.
Misc Animations
| Walk back | Neutral | Walk Fwd | Crouch |
 |
 |
 |

|
- Standing reel:
 |
 |

|
- Standing gut reel:
 |

|
- Crouching reel:
 |

|
- Dizzy:
 |
 |
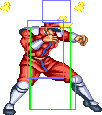
|
Advanced Strategy
He is of the top 4 fighters along with Guile,Sagat and Ryu.
Its the "ultimate poking" and rushdown gameplan one,also can be a nice turtler, and his crouching Roundhouse its a decent rushdown move for pressure and push the opponent in the corner for his "Corner Trap" Double Knee Press Loop and redizzy combos.
Your objetive as Dictador is about poke and charge to release your Psycho Crusher to push the opponent to the corner and use your Corner Trap or redizzy combos.
His standing normals are fast and had nice range for poking games, you main one will be standing Short and Forward, at had more varied jumpin attacks than his subordinates, jumpin diagonal kicks are the best for pressure and air-to-air, crouching ones had good range too, crouching Jab is your main RFWA and you can make a 2-in-1 weak Psycho Crusher for wake up games with your crouching Roundhouse that is your best one, and also alternate with your standing Jab.
Also Head Press is a decent overhead special against projectile spammers, but with a bad recovery that his follow up can be countered with an air throw or anti air or a decent jumpin attack with long range.
Double Knee Press its his main special move for rapid fire standing and crouching Jabs to special combo, and also crouching Strong and far Forward 2-in-1 can be linked after it. Your throw had great range and damage and use it if when your opponent is too near on you.
Psycho Crusher hit blocks in American version are broken (3/4/5/6 hits, according to the punch used and the opponent) and used for cheap KO's finish commonly, but Japanese and Later revisions nerfed them similar to the Hyper Fighting one (1/2/3 hits), anyway is the best move to start a round for medium hit attack.
His only problem can be the lack of anti air, but his crouching Fierce range and also neutral jumpin Jab and Short are fast as a lot of anti air specials and can be your main options.
Match-Ups
M. Bison's match-ups according the "official" SF2CE Tier List:
- against Ryu: 6
- against Ken: 6
- against Chun Li: 6
- against E. Honda: 6
- against Zangief: 4
- against Blanka: 7
- against Dhalsim: 6
- against Guile: 4
- against Balrog: 8
- against Vega: 5
- against Sagat: 6
- against M. Bison: 5
Vs. Ryu
Ryu's non stop spiritball attack and then dragon punch when you jump over pattern is Bison's largest problem here. Try using your standing roundhouse just as Balrog would use his standing fierce punch. This will allow you to knock him out of a spiritball. (if you have trouble predicting his projectiles try using the standing short kick. This is much faster while at the same range, and can be executed just as Ryu starts his spiritball motion allowing you to knock him out of it). The only problem with this attack is that it does quite a bit less energy than the roundhouse. Another way out of the spiritball trap is the flying head stomp. When you execute this move either try and predict his projectile, or start it as soon as he begins the spiritball motion. If you to be close enough and jump over the spiritball before he can dragon punch you it is best to use a fast attack (this limits the time he has to DP) and then execute the infamous torpedo body. If he jumps in on you your standing round- house kick will work well. (use this if he jumps in from about four body widths) If he jumps in closer the jump straight up fierce punch works well.
Vs. Ken
Handle very much as you would Ryu, taking into consideration the usual awareness of his larger uppercut. When he (or Ryu) helicopter kick you can torpedo body them out of it if you have time to get your attack fully executed. If they start it very close just duck under it and try to use the ducking fierce punch. Or you can just wait and torpedo body him after he lands.
Torpedo Body--- When you get in close to an opponent throw a few punches and if they block them execute the torpedo body. This will take off about the same damage as a roundhouse that connected. Most Bison players already do this but for beginners, use the torpedo body whenever you can to take off all the extra damage you can.
Vs. E.Honda
The key to defeating Honda is keeping him at a distance. Your standing roundhouse kick will work nicely for this. When jumping in use fast attacks and try to aim them so that they just barely hit him in the face (otherwise he may fierce chop you out of the air.) Another good attack is the torpedo body. He has no projectile (other than himself) to counter this attack and will take off a fair amount off damage even if he blocks. Finally a very effective attack is nonstop attack #1.
Torpedo pattern---When executing the torpedo pattern you will notice that the only time you are really vulnerable to counters is when you are in between torpedoes (esp in corners). The best way out of this dangerous situation is to either jump straight up into the air with the fierce punch ready, or immediately start jab punching like a mad man, following this up with either a scissor kick or torpedo body. (Another good way out of the corner is to simply throw your opponent as you come out of the torpedo body. This is however considered cheap in most arcades.)
Vs. Chun Li
A non-stop attack strategy is best here. Your standing roundhouse canÔknock her out of almost all air attacks (save head stomp or air throw, but she has to be close to use these) Non-stop attack #1 is very effective here as is using the torpedo body after knocking her out of any air attack. When coming out of the torpedo body in the corner it is better to use the jab defense against the throw than using the jumping fierce one.
Vs. Blanka
Your standing kicks are also very effective against Blanka. Try using a variety of strength and speed for if you use to many roundhouse kicks he may get your timing down and can ducking fierce punch you out of it. If you get any more than three body widths away the torpedo body or scissor kick will work very well. When he jumps in the best defense is to just jump back and then torpedo him. (try using different speeds of the torpedo besides fierce for you can be kicked out of the torpedo if Blanka jumps up and hits you in the front part of the body.) Like Chun the best way to get out of the corner after using the torpedo body is the jab method not the jump up method. Lastly when Blanka uses the ball you can either 1- scissor kick him out of it 2- torpedo body him (he will be able to block this part). The scissor kick is better for it does slightly more damage and knocks him down. The torpedo is better for it will set him up for further attacks as well as damage him.
Vs. Zangief
Zangief will want to made you a SPD if you are close after hit him with a jumping attack or a blocked slide,you gameplan will be only about poke him with far Kicks, and then punish his Double Lariat with you slide ,and then a Stomp for a meaty and be away for him instead of your follow up.
Psycho Crusher must be used if you are cornered,and reverse his position to corner, and you can push Zangief with Scicross Kicks and if blocked ,use a crouch Forward to be out of SPD.
Vs. Guile
The key to defeating Guile (esp. if your opponent is a defensive Guile) is to maintain a non-stop attack. Get close to him (just beyond his forward sweep range) and try using as few ducking jab punches. This will usually work well in drawing your opponent off sides into either a sonic boom or an axe-kick. If he goes for the axe the best thing to do is duck under it and then throw him as he comes down, follow this up with a non-stop attack. If he goes for a sonic boom the best counter is a roundhouse scissor kick just as his hands cross each other and the sonic boom starts to leave him. This will allow you to go over the sonic boom and land a double hit. When jumping in at a distance the best attack is a simple short kick. This works well for it has a high priority. If your opponent jumps in on you the best defense is the straight jump roundhouse.
Vs. Dhalsim
The scissor kick is a terror for Dhalsim. Once you start it nothing of his can counter it (unless he takes a major damage deficit). He can however slide under it if you become to predictable. Another good attack is non-stop attack #1. The best way to break his fireball kick pattern is the flying head stomp. Dhalsim's slow response time makes him prime bait for this move. You can knock him out of any standing kick with a ducking fierce punch. The scissor kick will also knock him out of a standing kick if you execute it just as his foot starts to retreat. Lastly a bit of forewarning he can screwdriver (feet first) you out of the torpedo if he hits the front part of yourÔ
Vs. Boxer
Use your standing roundhouse kick much as you would against Zangief. This will help to keep him back. The torpedo body works well here, but be sure that you can get the attack fully executed before you near him. (he can easily charging uppercut you out of it if he hits you before you are fully committed). If he charges in the best defense is to duck under the assault and scissor kick him as he recovers.
Vs. Claw
The torpedo body is very effective against Vega. It is one of your few attacks that hit him out of the crouching claw attacks. When jumping in it is best to use weak attacks for they will stay out longer and easily lead into future non-stop attacks. When Vega jumps in on you the best defense is the straight jump fierce punch, or at a slightly larger distance the straight roundhouse kick. If he uses lots of off the wall attacks the best counter is either 1- the jumping fierce punch if he goes off the wall closest you or 2- jumping roundhouse if he goes off the wall furthest you. Follow up either of these attacks with a torpedo body.
Vs. Sagat
Handle very much as you would Ryu. The only major difference is his low tigers. A good way to counter this is 1- the torpedo body (it easily goes over the low tigers) 2- scissor kick, works much like 1, 3- let him push you back to a distance and jump over the tiger just as he starts his motion. Hold your attack until you are close to the ground (this allows you to easier knock him out of it and if you hold your attack you are much harder for him to TU). When using the torpedo pattern it is better to come out into the jabs than into the jump for obvious reasons. (Tiger Uppercut)
Vs. Dictador
The standing roundhouse is good to keep your opponent at bay, and can also hit him out of his torpedo body if you strike him just as he starts to crunch up. (have to be close to do this.) The torpedo body is as always a good attack as is the scissor kick which with it's better start up speed can knock an opponent out of their torpedo body if you hit them as they start it. As far as attacking and air defense choose a fellow Bison like Vega.
| General | Game Mechanics | Strategy | Tiers | |
| The Characters | Balrog (Boxer) | Blanka | Chun-Li | Dhalsim | E. Honda | Guile | Ken | M. Bison (Dictator) | Ryu | Sagat | Vega (Claw) | Zangief |
