Capcom vs SNK 2/M. Bison

From SuperCombo Wiki
< Capcom vs SNK 2(Redirected from M. Bison (CvS2))

Introduction

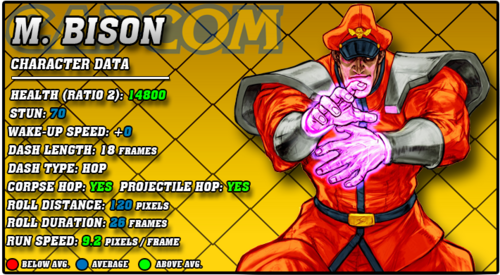
CVS2 Bison Data.png

Story

M. Bison, known in Japan as Vega, known as Dictator worldwide, is the big bad villain of the Street Fighter franchise. Almost nothing is known of his origin, not even what country he's from. All we know is that he grew up as a skilled martial artist learning an art called Soul Power. Bison saught more and more power however, and once he mastered Soul Power, he went on to kill his master. Before his masters death, he learned the secret art of Psycho Power from him. As Bisons strength grew, now infused with Psycho Power, he wanted to find all of the fighters in the world, defeat them, and learn their techniques. In his quest to do this, he formed Shadaloo, a criminal organization focused on money before anything else. Through Shadaloo, he finds and defeats many fighters. He fought Gouken, though he learned nothing as Gouken defeated him with simple strikes. He fought Charlie Nash, and defeated him. He fought Chun-Li and defeated her. He even beat Akuma up pretty badly. Even Ryu, in an epic showdown, lost to M. Bison. Ryu was then put under mind control, as the Satsui no Hado is a very similar power to Psycho Power. However, with the help of Ken, Sakura, and Sagat, who had changed his mind on working for Shadaloo after seeing M. Bison control Ryu, Ryu was freed and defeated M. Bison... for now.

Gameplay

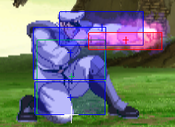
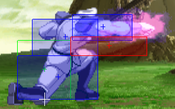
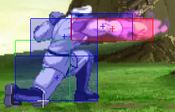
Bison is one of the most infamous top tiers in CvS2. His powerful control of neutral, strong mobility, scary pressure, great hitconfirms, and annoying roll cancels make dealing with him a pain. He has great pokes and footsies buttons, like his 2MK, 5MP, 2MP, 2HP, and his infamous 2HK slide. Psycho Crusher, Scissor Kicks, and Head Stomp all make for very annoying and powerful roll cancels to force the opponent to deal with. Bison also doesn't lack in damage, with plenty of confirms into Scissor Kicks or into his supers.

What truly makes Bison scary though is his amazing synergy with the best Groove in the game, A-Groove. Bison has the most versatile and useful tools for Custom Combo in the game, and his infamous Paint the Fence Custom Combo deals ridiculously high damage and can secure a round or just a life lead quickly. Bison can use CC as a reversal, as an offensive mixup with his throw, as a combo extender after Scissor Kicks, and as a situational combo extender. He has more ways to utilize CC than anyone else, and likely has the best CC in the game as well. Mixed with the above strengths, M. Bison is a mainstay on every high level A-Groove team, and is a terrifyingly powerful top tier.

Groove Selection

Best - A: While Bison isn't necessarily weak in other Grooves, his synergy with A-Groove makes A-Bison comfortably the best version of Bison. A-Groove already comes with plenty of versatile tools like roll and Alpha Counter, but Custom Combo is the real juice here. Bison's infamous CC, Paint the Fence, does ridiculous damage. If that wasn't enough, Bison has more ways to use this CC than any other character, giving him the best usage of an already incredibly powerful mechanic. If A-Bison has a full bar of meter, the opponent is scared for their life, regardless of the life lead or time remaining. A-Bison can always win with meter on his side. The threat of being hit by Bison's CC at any moment gives Bison really strong leverage in any given situation.

Useful - C/K/N/P: To some extent, Bison is useful in all of these Grooves. C-Bison is probably the most useful besides A. Bison can utilize C-Grooves level 2 cancels very well, as HP Psycho Crusher is a good damage dealer in that department. He also has access to his very powerful Mega Pyscho Crusher super, which has several good albeit difficult optimal confirms into. He can also end in super fairly often thanks to C-Grooves versatile meter. K-Bison is a lot more unique, with a run and hop to make his offense a lot scarier. Bison has lots of ways to build charge while confirming, so it isn't impossible to link into normals for long enough to charge a Scissor Kick ender. Rage allows him to end in a level 3 Mega Psycho Crusher for massive damage. Lack of rolls removes some of his more annoying tools though. N-Bison gets the movement and the rolls, but his damage is a lot lower in exchange for more consistent super enders and arguably the best offense besides A-Bison. P-Bison seems weak, since he requires charge to punish anything, until you realize that his 2HK is incredibly fast and will likely reach in time to punish whatever you parried. Close parries can lead into more realistic hitconfirms into Scissor Kicks as well, but similar to N, his damage is notably lower than all the other Grooves, despite having access to Mega Psycho Crusher.

Worst - S: S-Bison isn't necessarily bad, as it's still Bison. However, you have to grapple with S-Grooves limited mechanics, and Bison's damage is not up to par with the other Grooves until he has low life. His dodge attacks are pretty good, and can definitely make use of run and short hop to get in some good pressure, but due to S-Groove's very limited subsystems, Bison cannot do as well as he can in other grooves, although he is still a very strong character and one of the best S-Groove characters available.


M. Bison (Dictator) is a high damage combo character with incredible neutral tools that can annoy the opponent into a commital mistake, which he can punish with his best-in-class Custom Combo, Paint the Fence. His only real weakness is his reliance on meter for big damage. Bison is best played in A-Groove.

Difficulty: Hard (A-Groove), Pretty Easy (Any other Groove)
Tier: S
Pros Cons
  • Neutral: Between multiple strong buttons, a fast and high jump, plenty of annoying roll cancels, and more than enough ways to punish a fireball, Bison is a strong character in neutral
  • Combos: Bison has very consistent combo routes that can be confirmed into Custom Combo, and while the damage is low, they will always cause a knockdown
  • Pressure: With the right spacing, Scissor Kicks can give Bison some great guard break pressure and can bully the opponent in the corner
  • Custom Combo: When it comes to Custom Combos, nobody does it better than Bison. His Paint the Fence combo does ridiculous damage, racking up to 10k in a lot of situations, and he has more than enough ways to combo into it. Not only is it damaging but it is more versatile than any other CC, as he can not only do it raw but can confirm into it from many different confirms and moves that leave the opponent remotely in the air
  • Supers: If Bison is not in A-Groove, he can still threaten very high damage. His Mega Psycho Crusher does massive damage and can be confirmed into from many moves
  • Mobility: A fast walk, solid dash, good run, and a high and fast jump means getting Bison to sit still is a chore even other top tiers struggle with
  • Health: Higher than average health means that, even with all these strengths, Bison can still make plenty of mistakes and get away with them
  • Charge: Bison is reliant on having charge for any of his punishes, making it hard to be aggressive without good skill at charge buffering. His supers also require high charge time, meaning that reaction confirms are a lot more difficult than confirms into specials
  • Meter Hungry: Without meter, Bison isn't bad at all, but he really shines when he has a Custom Combo stored. Without it, not only is his damage noticeably lower but his threat in neutral is not as high as it can be
  • High Execution: Not only does Bison require good use of neutral and knowing how to work with his floaty movement, but if you want to optimally use Bison, you have to learn his very advanced Custom Combo. Custom Combos generally aren't easy, and Bison's Paint the Fence is a lot of fast inputs back to back. Not only that, but if you want to confirm into CC from most combo enders and ranges, you need to have good situational and space awareness, as well you need to know what starters/routes you need to use to get the opponent in the right spot from any spot on the screen.


Players to Watch

Name Country Groove Accounts Notes
Chari Japan C-Groove N/A Uses C-Bison very quick. No longer plays.
Sample Match
D44 BAS Japan A-Groove Twitter: @ryo151
Youtube: D44Bas
Discord: Bas#4095
Nothing instills more fear in a player more than BAS' Bison. Made the Paint the Fence combo popular amongst people in all fighting game communities.
Sample Match
YSK Japan A-Groove Twitter: @yosuke0815 The pinnacle of the A-Sakura Bison Blanka team. His Bison being fundamentally perfect and scary with a CC at his disposal.
Sample Match
Kodama Japan K-Groove N/A The only K-Bison user. Makes Bison's rage and short hop game worth respecting.
Sample Match


Normal Moves

Far Normals

5LP

Far Jab
Far Light Punch
5LP / Far LP
CVS2 Dictator 5LP.png
Version Damage Stun Cancel Guard Parry Startup Active Recovery Total Adv Hit Adv Block Invul
Far Lp.png 300 3 SP/SU Mid High 3 4 7 14 +6 +6 None

A quick Psycho Power infused jab.

  • Good last minute anti-air and a fast button overall.

5MP

Far Strong
Far Medium Punch
5MP / Far MP
CVS2 Dictator 5MP.png
Version Damage Stun Cancel Guard Parry Startup Active Recovery Total Adv Hit Adv Block Invul
Far Mp.png 1100 11 SP/SU Mid High 4 8 17 29 +3 +3 None

A big Psycho Power infused punch.

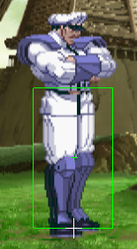
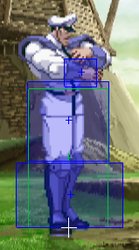
  • One of Bison's many pokes to control space with. Really fast and can check standing pokes.
  • Can be linked into from 2LP for optimal damage confirms. It's a very manageable 2-frame link and can confirm into both HK Scissor Kicks and Psycho Crusher unlike 5LK/2LK. It only works against some standing opponents though, however some crouchers can get hit by this button, and those are usually matchups where Bison can pressure a lot more freely.
  • Also one of the main buttons used to carry the opponent into the corner during Bison's CC. Since it's so fast and hits at a long range, it's one of Bison's preferred corner carry options.

5HP

Far Fierce
Far Heavy Punch
5HP / Far HP
CVS2 Dictator 5HP2.png
Version Damage Stun Cancel Guard Parry Startup Active Recovery Total Adv Hit Adv Block Invul
Far Hp.png 1300,1300 13,13 SU Mid High 5 12 20 37 -2 -2 None

A slow Psycho Power infused uppercut.

  • Not really used for anything other than anti-airs. It hits deceptively high and does great damage.
  • Good in Bison's CCs, whether it be for corner carry or blockstrings.

5LK

Far Short
Far Light Kick
5LK / Far LK
CVS2 Dictator 5LK.png
Version Damage Stun Cancel Guard Parry Startup Active Recovery Total Adv Hit Adv Block Invul
Far Lk.png 300 3 SP/SU Mid High 4 6 12 22 -1 -1 None

A fast midsection kick.

  • Good frame trap normal, very fast and while slightly minus it doesn't offer big gaps.
  • Unlike 5MP, 5LK can confirm into Scissor Kicks on all crouchers, although it does less damage than the 2LK confirm and it cannot confirm into HK Scissors. It can still confirm into Psycho Crusher fine though.

5MK

Far Forward
Far Medium Kick
5MK / Far MK
CVS2 Dictator 5MK.png
Version Damage Stun Cancel Guard Parry Startup Active Recovery Total Adv Hit Adv Block Invul
Far Mk.png 1000 10 None Mid High 9 7 18 35 -3 -3 None

A long ranged toe kick.

  • Pretty good poke. Good to use to end blockstrings with if Bison doesn't have enough charge for Scissor Kicks.

5HK

Far Roundhouse
Far Heavy Kick
5HK / Far HK
CVS2 Dictator 5HK.png
Version Damage Stun Cancel Guard Parry Startup Active Recovery Total Adv Hit Adv Block Invul
Far Hk.png 1400 14 None Mid High 12 8 29 49 -11 -11 None

A slower long ranged toe kick.

  • Same use as 5MK, although spacing is really important now since it is -11, but the damage is a lot better. The range is considerably longer so it is easier to space. If the spacing is right this button can be used over 5MK, but if you're unsure you can still use 5MK.

Close Standing Normals

clLP

Close Jab
Close Light Punch
cl.LP
CVS2 Dictator clLP.png
Version Damage Stun Cancel Guard Parry Startup Active Recovery Total Adv Hit Adv Block Invul
Close Lp.png 400 4 SP/SU Mid High 2 4 7 13 +6 +6 None

A quick Psycho Power infused jab.

  • Better than far LP because of the 2-frame startup. Generally when using close anti-airs this button works fine, since Bison might not get far HP.

clMP

Close Strong
Close Strong Punch
cl.MP
CVS2 Dictator clMP.png
Version Damage Stun Cancel Guard Parry Startup Active Recovery Total Adv Hit Adv Block Invul
Close Mp.png 1000 10 SP/SU Mid High 4 7 13 24 +2 +2 None

A big Psycho Power infused punch.

  • Good up-close meaty and melee button. Confirms into everything far MP can.

clHP

Close Fierce
Close Heavy Punch
cl.HP
CVS2 Dictator clHP.png
Version Damage Stun Cancel Guard Parry Startup Active Recovery Total Adv Hit Adv Block Invul
Close Hp.png 1500 15 SU Mid High 5 10 20 35 -2 -2 None

A slow Psycho Power infused midsection punch.

  • Another good meaty button, it's only -2 and has very high damage, as well it has good startup and great active frames.
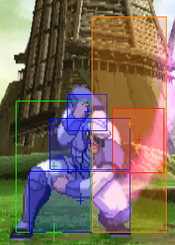
  • Also used a lot in CCs, most notably as the precursor move to the Psycho Banish reps during the actual painting of the fence. Once the opponent is juggled into the corner, most Bison players use this move to carry the opponent at the right height to mash DP.

clLK

Close Short
Close Light Kick
cl.LK
CVS2 Dictator clLK.png
Version Damage Stun Cancel Guard Parry Startup Active Recovery Total Adv Hit Adv Block Invul
Close Lk.png 300 3 SP/SU Mid High 4 6 12 22 -1 -1 None

A fast midsection kick.

  • Identical to far 5LK.

clMK

Close Forward
Close Medium Kick
cl.MK
CVS2 Dictator clMK.png
Version Damage Stun Cancel Guard Parry Startup Active Recovery Total Adv Hit Adv Block Invul
Close Mk.png 1100 11 SU Mid High 7 6 16 29 -2 -2 None

A long ranged toe kick.

  • Not much use. It is -2 and pretty active but Bison has better meaty buttons.

clHK

Close Roundhouse
Close Heavy Kick
cl.HK
CVS2 Dictator clHK.png
Version Damage Stun Cancel Guard Parry Startup Active Recovery Total Adv Hit Adv Block Invul
Close Hk.png 1500 15 None Mid High 12 8 20 40 -2 -2 None

A slower long ranged toe kick.

  • Same as cl.MK. Not too much use for it, usually done if Bison doesn't get kick throw.
  • Can be used in the same way as cl.HP, that being it can be used in Bison's CCs as a move to juggle the opponent with before Painting the Fence.

Crouching Normals

2LP

Crouch Jab
Crouching Light Punch
2LP / cr.LP
CVS2 Dictator 2LP.png
Version Damage Stun Cancel Guard Parry Startup Active Recovery Total Adv Hit Adv Block Invul
D.png+Lp.png 300 3 SP/SU Mid Low 2 4 7 13 +6 +6 None

A quick Psycho Power infused low jab.

  • A great low jab. With the uncommon 2-frame startup, this button can be used nicely in pressure, poking, and counterpoking.
  • Go-to combo starter, links into 2LK, 5LK, 2MK, and 5MP for his BnB combos.

2MP

Crouch Strong
Crouching Medium Punch
2MP / cr.MP
CVS2 Dictator 2MP.png
Version Damage Stun Cancel Guard Parry Startup Active Recovery Total Adv Hit Adv Block Invul
D.png+Mp.png 1100 11 SP/SU Mid Low 6 8 14 28 0 0 None

A slow Psycho Power infused low punch.

  • One of Bison's main pokes. It is slightly slower than 5MP, but it hits all crouchers, and is 0 on contact. It's also pretty fast, meaning Bison can counterpoke with it and not get killed for whiffing it.
  • Unlike 5MP, it is not used for combos but it can be used for blockstrings.

2HP

Crouch Fierce
Crouching Heavy Punch
2HP / cr.HP
CVS2 Dictator 2HP.png
Version Damage Stun Cancel Guard Parry Startup Active Recovery Total Adv Hit Adv Block Invul
D.png+Hp.png 1300 13 SU Mid Low 7 8 25 40 -7 -7 None

A big Psycho Power infused low punch.

  • Same as 2MP but there's a little more risk. It is unsafe and a lot slower, but deals great damage. Most times 2MP is used over this button but this is a great counterpoke and blockstring ender.

2LK

Crouch Short
Crouching Light Kick
2LK / cr.LK
CVS2 Dictator 2LK.png
Version Damage Stun Cancel Guard Parry Startup Active Recovery Total Adv Hit Adv Block Invul
D.png+Lk.png 400 4 SP/SU Low Low 3 6 7 16 +4 +4 None

A really fast low kick.

  • A quick low Bison uses in pressure and mixups. Not only can it link into 2LP, but it can be linked into from 2LP, meaning that it's a great button for combos as well and a nice button to have for low confirms.

2MK

Crouch Forward
Crouching Medium Kick
2MK / cr.MK
CVS2 Dictator 2MK.png
Version Damage Stun Cancel Guard Parry Startup Active Recovery Total Adv Hit Adv Block Invul
D.png+Mk.png 900 9 SP/SU Low Low 4 6 11 21 +5 +5 None

A slower low kick.

  • One of if not Bison's main poke. It's very fast, and Bison usually whiffs it in neutral to build meter and control neutral while pushing an untimely interaction from the opponent.
  • Super plus, can be used in blockstrings and combos. It can be linked into from 2LP, 5LP and itself for combo purposes.

2HK

Crouch Roundhouse
Crouching Heavy Kick
2HK / cr.HK
CVS2 Dictator 2HK.png
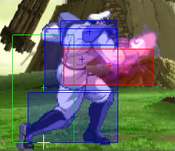
The Slide
Version Damage Stun Cancel Guard Parry Startup Active Recovery Total Adv Hit Adv Block Invul
D.png+Hk.png 1400 14 SU Low Low 6 35 18 59 HKND -29 None

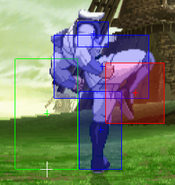
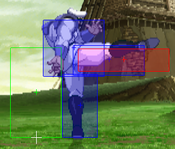
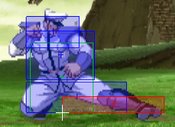
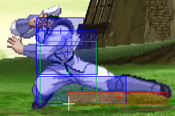
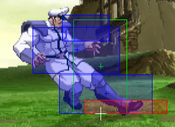
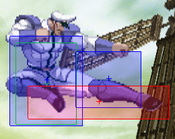
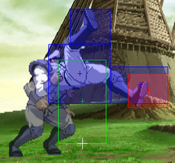
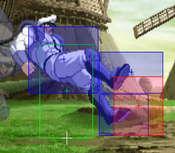
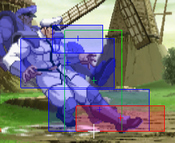
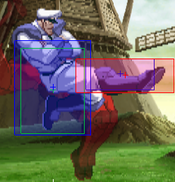
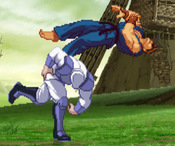
Bison slides a long distance with his legs sticking out.

  • One of Bison's most infamous moves. It's certainly a great move in his arsenal, but incorrect execution can lead to undesirable outcomes.
  • When spaced, it turns that -29 on block into potentially being plus if hit within the last 6 active frames, but most times it leads to Bison being near unpunishable.
  • Considering the huge 35 active frames, it's a great tool for meaties, although it is weak to reversals considering the long recovery.
  • Great move in Bison's whiff punish game. If he's too far out and doesn't have charge, this button works just as well, as it gives Bison a close knockdown and decent damage.

Jumping Normals

nj.LP

Neutral Jump Jab
Jumping Light Punch
nj.LP
CVS2 Dictator jLP.png
Version Damage Stun Cancel Guard Parry Startup Active Recovery Total Adv Hit Adv Block Invul
U.png+Lp.png 600 6 - High High 4 22 - 26 - - -

A quick aerial jab.

  • Not used much, nj.MP is the better air-to-air.

nj.MP

Neutral Jump Strong
Jumping Medium Punch
nj.MP
CVS2 Dictator jMP.png
Version Damage Stun Cancel Guard Parry Startup Active Recovery Total Adv Hit Adv Block Invul
U.png+Mp.png 1100 11 - High High 4 12 - 16 - - -

A slow aerial jab.

  • Okay air-to-air, in terms of instant neutral jump air-to-airs, Bison has other options.

nj.HP

Neutral Jump Fierce
Jumping Heavy Punch
nj.HP
CVS2 Dictator njHP.png
Version Damage Stun Cancel Guard Parry Startup Active Recovery Total Adv Hit Adv Block Invul
U.png+Hp.png 1400 14 - High High 7 10 - 17 - - -

A slower downward punch.

  • Good button to use as a jump-in against a dizzied opponent due to the very high damage. Other than that, not too much use.

nj.LK

Neutral Jump Short
Jumping Light Kick
nj.LK
CVS2 Dictator njLK.png
Version Damage Stun Cancel Guard Parry Startup Active Recovery Total Adv Hit Adv Block Invul
U.png+Lk.png 600 6 - High High 4 11 - 15 - - -

A quick outward kick.

  • Pretty much the same as nj.LP in terms of use. A quick and active air-to-air, but the damage is very unrewarding.

nj.MK

Neutral Jump Forward
Jumping Medium Kick
nj.MK
CVS2 Dictator njMK.png
Version Damage Stun Cancel Guard Parry Startup Active Recovery Total Adv Hit Adv Block Invul
U.png+Mk.png 1100 11 - High High 6 12 - 18 - - -

A slower outward kick.

  • A good instant neutral jump air-to-air. Good damage, decent startup and has great range.

nj.HK

Neutral Jump Roundhouse
Jumping Heavy Kick
nj.HK
CVS2 Dictator njHK.png
Version Damage Stun Cancel Guard Parry Startup Active Recovery Total Adv Hit Adv Block Invul
U.png+Hk.png 1300 13 - High High 7 9 - 16 - - -

A big outward kick.

  • Another good instant jump air-to-air. Compared to nj.MK, it deals more damage but it really depends on if you prefer 200 more damage or 1-frame less startup. Most times it's best to use nj.HK.

j.LP

Jump Jab
Jumping Light Punch
j.LP
CVS2 Dictator njLP.png
Version Damage Stun Cancel Guard Parry Startup Active Recovery Total Adv Hit Adv Block Invul
Ub.png/U.png/Uf.png+Lp.png 500 5 - High High 4 22 - 26 - - -

A quick aerial punch.

  • A good air-to-air, but there isn't much use besides that.

j.MP

Jump Strong
Jumping Medium Punch
j.MP
CVS2 Dictator jMP.png
Version Damage Stun Cancel Guard Parry Startup Active Recovery Total Adv Hit Adv Block Invul
Ub.png/U.png/Uf.png+Mp.png 500 5 Double Psycho Strike High High 5 8 - 13 - - -

A slower aerial punch.

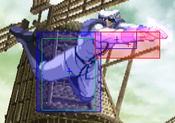
  • Has a unique property where if an aerial opponent gets hit it causes a hard knockdown, causing them to fall down instead of recover normally. In tandem with his Double Psycho Strike followup, Bison can confirm into CC, or Mega Psycho Crusher if CC isn't available to him.

j.HP

Jump Fierce
Jumping Heavy Punch
j.HP
CVS2 Dictator jHP.png
Version Damage Stun Cancel Guard Parry Startup Active Recovery Total Adv Hit Adv Block Invul
Ub.png/U.png/Uf.png+Hp.png 1300 13 - High High 7 10 - 17 - - -

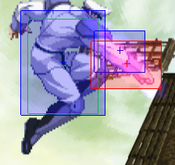
A double handed diving punch.

  • Primarily a high damage air-to-air. Pretty slow startup, but if done early the high priority can make it work.

j.LK

Jump Short
Jumping Light Kick
j.LK
CVS2 Dictator jLK.png
Version Damage Stun Cancel Guard Parry Startup Active Recovery Total Adv Hit Adv Block Invul
Ub.png/U.png/Uf.png+Lk.png 600 6 - High High 4 22 - 26 - - -

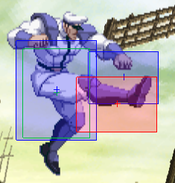
A quick outward knee.

  • One of Bison's many crossups. Unfortunately, this button can only cross-up against thicker characters, but the high active frames can make the crossups pretty ambigouous.

j.MK

Jump Forward
Jumping Medium Kick
j.MK
CVS2 Dictator jMK.png
Version Damage Stun Cancel Guard Parry Startup Active Recovery Total Adv Hit Adv Block Invul
Ub.png/U.png/Uf.png+Mk.png 1100 11 - High High 5 10 - 15 - - -

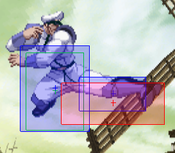
A slower more outward knee.

  • A very fast button, usually done as both an air-to-air and crossup. It's a lot more consistent compared to j.LK, but in terms of jump-ins Bison has other options.

j.HK

Jump Roundhouse
Jumping Heavy Kick
j.HK
CVS2 Dictator jHK.png
Version Damage Stun Cancel Guard Parry Startup Active Recovery Total Adv Hit Adv Block Invul
Ub.png/U.png/Uf.png+Hk.png 1300 13 - High High 6 18 - 24 - - -

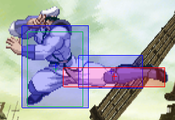
A slow, powerful outward kick.

  • Can also cross-up fine, and is just as consistent as j.MK. It deals a lot of damage and is usually done as a jump-in. In terms of air-to-air situations it can work fine but Bison can do better.

Command Normals

Double Psycho Strike

Double Psycho Strike
7/9MP > MP
CVS2 Dictator jMPMP.png
Version Damage Stun Cancel Guard Parry Startup Active Recovery Total Adv Hit Adv Block Invul
Ub.png/Uf.png+Mp.png>Mp.png 600 5 - High High 5 8 - 13 - - -

A slow downward punch.

  • Can be done after j.MP without making contact, creating an extra move to protect Bison in his back jumps.
  • Has the same air knockdown property as j.MP.
  • Usually confirms into either Custom Combo or Mega Psycho Crusher depending on groove.

Throws

Overhead Heave

Overhead Heave
Punch Throw
Near Opponent, 4/6HP
CVS2 Dictator Rangethrow.png
Throw Range
CVS2 Dictator Pthrow.png
Overhead Heave
Version Damage Stun Cancel Guard Parry Startup Active Recovery Total Adv Hit Adv Block Invul
Close B.png/F.png+Hp.png 1900 19 None - - 3 1 13 17 - - None

Bison tosses his opponent over his shoulder.

  • Bison's preferred throw. Has average range and good damage.

Scissor Toss

Scissor Toss
Kick Throw
Near Opponent, 4/6HK
CVS2 Dictator Rangethrow.png
Throw Range
CVS2 Dictator Kthrow.png
Scissor Toss
Version Damage Stun Cancel Guard Parry Startup Active Recovery Total Adv Hit Adv Block Invul
Close B.png/F.png+Hk.png 2000 20 None - - 5 1 13 19 - - None

Bison kicks his opponent twice, then throws them with his leg.

  • While a cooler looking throw, the extra 2 frames means that opponents might jump or poke out easier. Use the punch throw.

Special Moves

Psycho Crusher
Psycho Crusher
[4]6+P / Charge B, F+P
Charge B.png,F.png+P.png
CVS2 Dictator 46P.png
Version Damage Stun Cancel Guard Parry Startup Active Recovery Total Adv Hit Adv Block Invul
LP
Charge B.png,F.png+Lp.png
1300 13 None Mid High 11 31 18 64 HKND -24 None

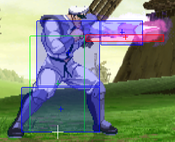
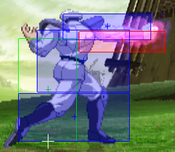
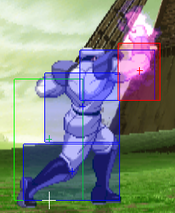
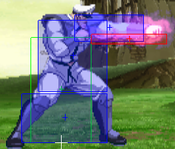
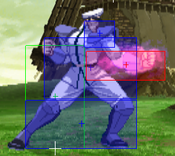
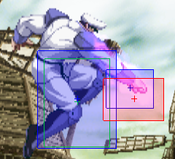
Bison does a forward moving drill attack while being coated in Psycho Power.

  • Only really useful as an RC anti-air. It's slow, so it won't go under the opponent like MP and HP would, and it would give Bison a close knockdown.
  • Can be spaced for pressure purposes but it's difficult to do so.
MP
Charge B.png,F.png+Mp.png
1400 14 None Mid High 6 64 18 74 HKND -52 None

Bison does a forward moving drill attack while being coated in Psycho Power.

  • The same as LP. Travels faster, meaning it's more difficult to anti-air but it's even more unsafe and very hard to space.
HP
Charge B.png,F.png+Hp.png
1500 15 None Mid High 2 Active until Bison reaches the corner 18 Varies HKND -47 None

Bison does a forward moving drill attack while being coated in Psycho Power.

  • Usually the version Bison players use. With a near instant 2-frame startup this is a very powerful reversal.
  • Good combo ender, but it depends on if you want damage or oki. If you're in the corner, use this move to end combos, but if you're not, then you can choose to either get damage but no oki with this move, or less damage but you get oki with Scissor Kicks.
  • On block, this move can chip, but if it doesn't kill, then the opponent has a free punish, as pretty much every character in the game has an answer for a blocked Psycho Crusher. Sure, it may be a single hit, but getting punished like that shouldn't happen too often.
  • It travels so fast that Bison doesn't stop until he reaches one of the corners. This makes it a very nice corner escape tactic, just note that some moves can punish it on it's way out.
Scissor Kick
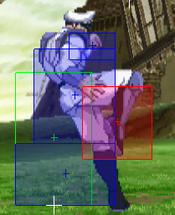
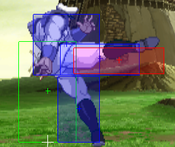
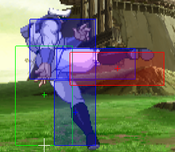
Scissor Kick
aka Knee Press
[4]6+K / Charge B, F+K

Charge B.png,F.png+K.png
CVS2 Dictator 46K1.png
First Hit
CVS2 Dictator 46K2.png
Second Hit
Version Damage Stun Cancel Guard Parry Startup Active Recovery Total Adv Hit Adv Block Invul
LK
Charge B.png,F.png+Lk.png
700+500 7+5 None Mid High 11 4+6 16 37 HKND -7 None

Bison does a flipping knee press.

  • Usually done in neutral or blockstrings. When spaced, this move is very hard to punish, although it is not completely unpunishable.
  • Gives Bison the best oki on his combo enders, but the weak damage means that it is better to just use the other versions as their oki is only marginally worse.
MK
Charge B.png,F.png+Mk.png
700+600 7+6 None Mid High 13 4+9 16 42 HKND -10 None

Bison does a flipping knee press.

  • The preferred combo ender if you want oki from lights. Can also be spaced to be made a little safer but LK is better for pressure purposes.
  • Good RC anti-air for closer jumps.
HK
Charge B.png,F.png+Hk.png
800+700 8+7 None Mid High 15 4+12 16 47 HKND -13 None

Bison does a flipping knee press.

  • Good damage combo ender. It can be confirmed into from 5MP and 2MK.
  • Can blow through fireballs as an RC and can anti air as well, although for closer jumps it can miss on them.
  • Incredibly hard to space, using it raw without RC will most likely get punished.
Head Stomp
Head Stomp
[2]8+K / Charge D, U+K
Charge D.png,U.png+K.png
CVS2 Dictator 28K1.png
Damage Stun Cancel Guard Parry Startup Active Recovery Total Adv Hit Adv Block Invul
1400 14 None High High 29 Until Landing 14 Variable - - None

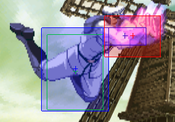
Bison leaps in the air and stomps on the opponent's head if he's close.

  • The distance Bison goes is determined by the opponent's position during the input. He cannot lock onto the opponent if they choose to move after the input.
  • After the Stomp connects, Bison can control his horizontal movement by holding forward or backward, which can make him safe or mix the opponent up a little bit depending on what you want to do afterwards.
  • A move that some characters can handle and some that can't. There are certain anti-airs that destroy this move, like invincible DPs or anti-airs with a lot of disjoint. The opponent can also move out of the way and punish the long landing recovery. If the opponent is not expecting it, using stomp can throw them off, and it always keeps them on their toes.
Skull Diver
Skull Diver
any Punch (after Head Stomp)
P.png
CVS2 Dictator njLP.png
Damage Stun Cancel Guard Parry Startup Active Recovery Total Adv Hit Adv Block Invul
1500 15 None High High 22 Until Landing 14 Variable +4 +4 None

Bison quickly does a double handed aerial strike.

  • After Stomp connects, Bison can do an additional attack afterwards by simply pressing any punch button.
  • Can hit opponents who are trying to anti-air the stomp after blocking or getting hit by it. Makes for a good way to give Stomp some protection. Also plus on block.
Devil Reverse
Devil Reverse
[2]8+K / Charge D, U+P
Charge D.png,U.png+P.png
CVS2 Dictator 28P1.png
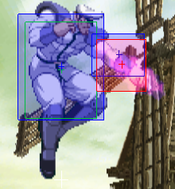
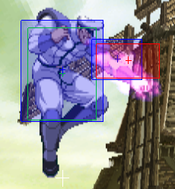
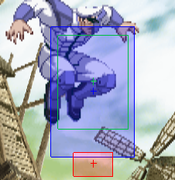
Jump Hitbox
CVS2 Dictator 28P2.png
Attack Hitbox
Damage Stun Cancel Guard Parry Startup Active Recovery Total Adv Hit Adv Block Invul
1300 13 None High High 54 (Initial Jump) 40 (Attack Startup) Until Landing 14 Variable HKND 0 None

Bison leaps in the air and then does a somersault aerial strike.

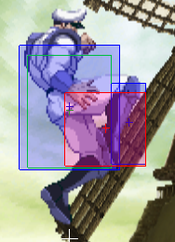
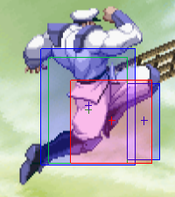
  • The distance Bison jumps is the same as Head Stomp. By pressing punch, Bison will jump back and do an additional attack which can also be directed with forward and backward.
  • Against someone who is weak to stomps or uses very committing anti-airs as answers to stomps using Devil Reverse works here. It can also cross-up and create some weird interactions. It can avoid anti-airs well because of Bison's back jump but it's not completely invincible. Don't use it too much if you find yourself getting anti-aired a lot from it.
Psycho Banish
Psycho Banish
623+P / DP+P
Dp.png+P.png
CVS2 Dictator 623P1.png
First Hit
CVS2 Dictator 623P2.png
Last Hit
Version Damage Stun Cancel Guard Parry Startup Active Recovery Total Adv Hit Adv Block Invul
LP
Dp.png+Lp.png
900 9 None Mid High 12 2+3+4 23 44 -1 -1 None
MP
Dp.png+Mp.png
1200 12 None Mid High 14 2+2+2+2 23 44 +1 +1 None
HP
Dp.png+Hp.png
1500 15 None Mid High 16 2+2+2+2+2 21 47 +1 +1 None

Bison swipes his fist downwards while creating a wall of Psycho Power.

  • Most known for being the reason why Bison's Custom Combo is called Paint the Fence (the motion of the move itself is similar to that of repeatedly painting a fence). When mashed, HP Psycho Banish does insane damage when done repeatedly in a CC. It's also used in Bison's blocked CC as well, and does great guard damage.
  • Safe on block but cannot be comboed into (without CC of course).
  • LP version is a good meterbuild option.
  • Good guard damage and damage overall.
  • Also eats fireballs if you need some anti-fireball tools without RCs. Super fireballs won't get absorbed.
Bison Warp
Bison Warp
aka Teleport
623/421+2P/2K / DP/RDP+2P/2K

Dp.png/Rdp.png+P.pngP.png/K.pngK.png
CVS2 Dictator TP1.png
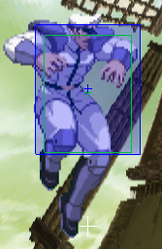
Startup
CVS2 Dictator TP2.png
Recovery
Version Damage Stun Cancel Guard Parry Startup Active Recovery Total Adv Hit Adv Block Invul
Any
Dp.png/Rdp.png+P.pngP.png/K.pngK.png
- - None - - 61 - 17 78 - - 16 Frames (full body)

Bison takes a pose then teleports.

  • Using a regular DP motion will make Bison teleport forwards, and using a reverse DP motion teleports him backwards. Using 2 punches will make him travel a short distance forward and using 2 kicks will make him travel to the other side of the screen.
  • Good for escaping the corner/pressure, Bison has startup invul and it lasts until the main recovery of the teleport. However, it can be punished hard if the opponent reads where you will go.

Super Moves

Scissor Kick Nightmare

Scissor Kick Nightmare
[4]646+K / Charge B, F, B, F+K
Charge B.png,F.pngB.pngF.png+K.png
CVS2 Dictator 4646K1.png
First Hit
CVS2 Dictator 4646K2.png
Second Hit
CVS2 Dictator 4646K3.png
Lvl.2 Slide
CVS2 Dictator 4646K4.png
Lvl.3 Ender
Version Damage Stun Cancel Guard Parry Startup Active Recovery Total Adv Hit Adv Block Invul
Charge B.png,F.pngB.pngF.png+Lk.png 2800 0 None Mid High 8 4+11 [16] 4+5 22 70 HKND -3 5 (Full)

Bison performs two Scissor Kicks.

  • Alright combo ender. Bison is pretty hard to punish at -3, but if he is in A-Groove he wants to preserve that meter for Custom Combo.
  • Decent desperation super, not a true reversal but it can deal higher damage for combo enders.
Charge B.png,F.pngB.pngF.png+Mk.png 4000 0 SP/SU Mid High 8 4+11 [16] 4+5 [6] 18 8 70 HKND -2 14 (Full)

Bison performs two Scissor Kicks and ends in a slide.

  • Good super for catching someone off guard. It is a true reversal and deals good damage with level 2 cancels.
  • Optimal Lvl.2 Cancel is an HP Psycho Crusher right after the slide ender.
Charge B.png,F.pngB.pngF.png+Hk.png 5800 0 None Mid High 8 4+11 [16] 4+5 [6] 2 [8] 2+2+2 [8] 5 52 135 HKND -13 22 (Full)

Bison performs two Scissor Kicks and ends by kicking the opponent away.

  • Really good damage but not Bison's best level 3.
  • Easy to punish unlike the other two levels.

Mega Psycho Crusher

Mega Psycho Crusher
[4]646+P / Charge B, F, B, F+P
Charge B.png,F.pngB.pngF.png+P.png
CVS2 Dictator 4646P.png
Version Damage Stun Cancel Guard Parry Startup Active Recovery Total Adv Hit Adv Block Invul
Level 3/MAX Only
Charge B.png,F.pngB.pngF.png+P.png
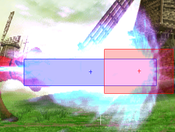
6400 0 None Mid High 8 Until Bison Reaches the Corner 16 Varies HKND -40 22 (Full)

Bison performs a far more powerful Psycho Crusher.

  • Deals massive damage, if you can land this super then the round will be turned in your favor. It's a little difficult to confirm into however and it is very unsafe on block.
  • Has very high charge time, so reaction confirms are pretty difficult, but it can be confirmed into from lights, mediums and Double Psycho Strike. It can also be juggled into from an anti-air Scissor Kick and Devil Reverse, but both are so situational that they are not worth fishing for.

Colors
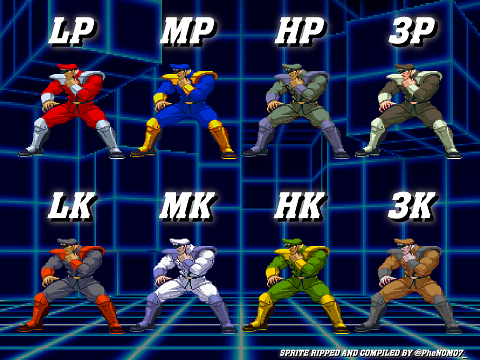
Dictator CvS2 colors.png


CvS2 Wiki Navigation

General
Controls
Notation
HUD
Glossary
System
Roll Cancel
Combo
CvS2 Versions
Netplay/ Training
FAQ
Grooves
Groove Overview
Groove Subsystems
C-Groove
A-Groove
P-Groove
S-Groove
N-Groove
K-Groove
Capcom Characters
Akuma (Gouki)
Balrog (Boxer)
Blanka
Cammy
Chun-Li
Dan
Dhalsim
Eagle
E.Honda
Guile
Ken
Kyosuke
Maki
M. Bison (Dictator)
Morrigan
Rolento
Ryu
Sagat
Sakura
Vega (Claw)
Yun
Zangief
SNK Characters
Athena
Benimaru
Chang
Geese
Haohmaru
Hibiki
Iori
Joe
Kim
King
Kyo
Mai
Nakoruru
Raiden
Rock
Rugal
Ryo
Terry
Todo
Vice
Yamazaki
Yuri
Boss Characters
Shin Akuma
Ultimate Rugal
Evil Ryu
Orochi Iori