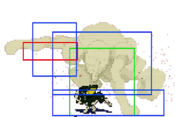
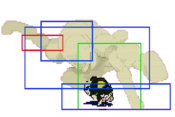
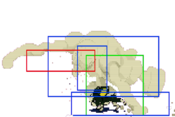
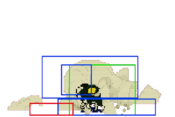
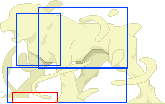
Movelist
Normals
Stand Off
| Startup | Active | Recovery | Damage | Guard | ||||
|---|---|---|---|---|---|---|---|---|
| 5 | 2 | 17 | 3 | Mid | ||||
| Hit Adv. | Block Adv. | Pushblock Adv. | Cancel | Properties | ||||
| -6 | -8 | -11 | 5A Special/Super |
Air UB | ||||
| ||||||||
| Startup | Active | Recovery | Damage | Guard | ||||
|---|---|---|---|---|---|---|---|---|
| 10 | 3 | 23 | 6 | Mid | ||||
| Hit Adv. | Block Adv. | Pushblock Adv. | Cancel | Properties | ||||
| -7 | -9 | -17 | Special/Super | Air UB | ||||
| ||||||||
| Startup | Active | Recovery | Damage | Guard | ||||
|---|---|---|---|---|---|---|---|---|
| 21 | 2 | 25 | 10 | High | ||||
| Hit Adv. | Block Adv. | Pushblock Adv. | Cancel | Properties | ||||
| 0 | -10 | -23 | Special/Super | - | ||||
| ||||||||
| Startup | Active | Recovery | Damage | Guard | ||||
|---|---|---|---|---|---|---|---|---|
| 10 | 22 | 2 | 9 | Mid | ||||
| Hit Adv. | Block Adv. | Pushblock Adv. | Cancel | Properties | ||||
| -4 | -6 | -24 | 236S/214S | Air UB | ||||
| ||||||||
| Startup | Active | Recovery | Damage | Guard | ||||
|---|---|---|---|---|---|---|---|---|
| 12 | 6 | 10 | 10 | Mid | ||||
| Hit Adv. | Block Adv. | Pushblock Adv. | Cancel | Properties | ||||
| 0 | -2 | -12 | 236S/214S | - | ||||
| ||||||||
| Startup | Active | Recovery | Damage | Guard | ||||
|---|---|---|---|---|---|---|---|---|
| 4 | 4 | 8 | 3 | Low | ||||
| Hit Adv. | Block Adv. | Pushblock Adv. | Cancel | Properties | ||||
| +8 | +6 | +3 | 2A Special/Super |
- | ||||
| ||||||||
| Startup | Active | Recovery | Damage | Guard | ||||
|---|---|---|---|---|---|---|---|---|
| 6 | 20 | 4 | 7 | Low | ||||
| Hit Adv. | Block Adv. | Pushblock Adv. | Cancel | Properties | ||||
| -8 | -10 | -18 | Special/Super | - | ||||
| ||||||||
| Startup | Active | Recovery | Damage | Guard | ||||
|---|---|---|---|---|---|---|---|---|
| 4 | 9 | 12 | 11 | Mid | ||||
| Hit Adv. | Block Adv. | Pushblock Adv. | Cancel | Properties | ||||
| Launch | -4 | -17 | 236S/214S | Air UB | ||||
| ||||||||
| Startup | Active | Recovery | Damage | Guard | ||||
|---|---|---|---|---|---|---|---|---|
| 2 | Until landing | - | 3 | High | ||||
| Hit Adv. | Block Adv. | Pushblock Adv. | Cancel | Properties | ||||
| +12 | +10 | +6 | - | - | ||||
| ||||||||
| Startup | Active | Recovery | Damage | Guard | ||||
|---|---|---|---|---|---|---|---|---|
| 2 | Until Landing | - | 8 | High | ||||
| Hit Adv. | Block Adv. | Pushblock Adv. | Cancel | Properties | ||||
| +12 | +10 | +6 | - | - | ||||
| ||||||||
| Startup | Active | Recovery | Damage | Guard | ||||
|---|---|---|---|---|---|---|---|---|
| 2 | Until landing | - | 10 | High | ||||
| Hit Adv. | Block Adv. | Pushblock Adv. | Cancel | Properties | ||||
| +12 | +10 | +6 | - | - | ||||
| ||||||||
| Startup | Active | Recovery | Damage | Guard | ||||
|---|---|---|---|---|---|---|---|---|
| 10 | 3 | 23 | 5 | Mid | ||||
| Hit Adv. | Block Adv. | Pushblock Adv. | Cancel | Properties | ||||
| -8 | -9 | -15 | Special/Super | Air UB | ||||
| ||||||||
| Startup | Active | Recovery | Damage | Guard | ||||
|---|---|---|---|---|---|---|---|---|
| 10 | 9 | 17 | 8 | Mid | ||||
| Hit Adv. | Block Adv. | Pushblock Adv. | Cancel | Properties | ||||
| -10 | -11 | -15 | Special/Super | Air UB | ||||
| ||||||||
| Startup | Active | Recovery | Damage | Guard | ||||
|---|---|---|---|---|---|---|---|---|
| 6 | 20 | 4 | 7 | Low | ||||
| Hit Adv. | Block Adv. | Pushblock Adv. | Cancel | Properties | ||||
| -8 | -10 | -18 | Special/Super | - | ||||
| ||||||||
| Startup | Active | Recovery | Damage | Guard | ||||
|---|---|---|---|---|---|---|---|---|
| - | - | - | 17 | Grab | ||||
| Hit Adv. | Block Adv. | Pushblock Adv. | Cancel | Properties | ||||
| - | - | - | - | Air UB | ||||
| ||||||||
Stand On
| Startup | Active | Recovery | Damage | Guard | ||||
|---|---|---|---|---|---|---|---|---|
| 5 | 3 | 11 | 4 | Mid | ||||
| Hit Adv. | Block Adv. | Pushblock Adv. | Cancel | Properties | ||||
| -1 | -2 | -5 | Special/Super | IPS=No Scales=yes Air-UB | ||||
| ||||||||
| Startup | Active | Recovery | Damage | Guard | ||||
|---|---|---|---|---|---|---|---|---|
| 8 | 4 | 13 | 11 | Mid | ||||
| Hit Adv. | Block Adv. | Pushblock Adv. | Cancel | Properties | ||||
| -1 | -2 | -10 | Special/Super | IPS=No Scaling=Yes Air-UB | ||||
| ||||||||
| Startup | Active | Recovery | Damage | Guard | ||||
|---|---|---|---|---|---|---|---|---|
| 9 | 7 | 19 | 13 | Mid | ||||
| Hit Adv. | Block Adv. | Pushblock Adv. | Cancel | Properties | ||||
| -6 | -9 | -21 | Special/Super | IPS=No Scaling=Yes Air-UB | ||||
| ||||||||
| Startup | Active | Recovery | Damage | Guard | ||||
|---|---|---|---|---|---|---|---|---|
| 5 | ? | 15 | 9 | Mid | ||||
| Hit Adv. | Block Adv. | Pushblock Adv. | Cancel | Properties | ||||
| 0 | -1 | -10 | Special/Super | IPS=No Scaling=Yes Air-UB | ||||
| ||||||||
| Startup | Active | Recovery | Damage | Guard | ||||
|---|---|---|---|---|---|---|---|---|
| 12 | 15 | 4 | 5 | Mid | ||||
| Hit Adv. | Block Adv. | Pushblock Adv. | Cancel | Properties | ||||
| -6 | -7 | -10 | Special/Super | IPS=No Scaling=no Air-UB | ||||
| ||||||||
| Startup | Active | Recovery | Damage | Guard | ||||
|---|---|---|---|---|---|---|---|---|
| 4 | 4 | 9 | 5 | Low | ||||
| Hit Adv. | Block Adv. | Pushblock Adv. | Cancel | Properties | ||||
| 0 | -1 | -4 | Special/Super | IPS=No Scaling=Yes Air-UB | ||||
| ||||||||
| Startup | Active | Recovery | Damage | Guard | ||||
|---|---|---|---|---|---|---|---|---|
| 4 | 4 | 9 | 10 | Mid | ||||
| Hit Adv. | Block Adv. | Pushblock Adv. | Cancel | Properties | ||||
| 3 | 2 | -6 | Special/Super | IPS=No Scaling=Yes Air-UB | ||||
| ||||||||
| Startup | Active | Recovery | Damage | Guard | ||||
|---|---|---|---|---|---|---|---|---|
| 10 | 4 | 38 | 13 | Low | ||||
| Hit Adv. | Block Adv. | Pushblock Adv. | Cancel | Properties | ||||
| Launch | -24 | -37 | Special/Super | IPS=No Scaling=Yes Air-UB | ||||
| ||||||||
| Startup | Active | Recovery | Damage | Guard | ||||
|---|---|---|---|---|---|---|---|---|
| 9 | 17 | 19 | 13 | Low | ||||
| Hit Adv. | Block Adv. | Pushblock Adv. | Cancel | Properties | ||||
| KD | -24 | -37 | - | IPS=No Scaling=Yes Air-UB | ||||
| ||||||||
| Startup | Active | Recovery | Damage | Guard | ||||
|---|---|---|---|---|---|---|---|---|
| 4 | 4 | until landing | 4 | High | ||||
| Hit Adv. | Block Adv. | Pushblock Adv. | Cancel | Properties | ||||
| 5 | - | - | - | IPS=No Scales=Yes | ||||
| ||||||||
| Startup | Active | Recovery | Damage | Guard | ||||
|---|---|---|---|---|---|---|---|---|
| 8 | 4 | until landing | 11 | High | ||||
| Hit Adv. | Block Adv. | Pushblock Adv. | Cancel | Properties | ||||
| - | - | - | - | IPS=No Scales=Yes | ||||
| ||||||||
| Startup | Active | Recovery | Damage | Guard | ||||
|---|---|---|---|---|---|---|---|---|
| 8 | 2 | until landing | 13 | High | ||||
| Hit Adv. | Block Adv. | Pushblock Adv. | Cancel | Properties | ||||
| - | - | - | nothing | IPS=No Scales=Yes | ||||
| ||||||||
| Startup | Active | Recovery | Damage | Guard | ||||
|---|---|---|---|---|---|---|---|---|
| 4 | 3 | 16 | 4 | Mid | ||||
| Hit Adv. | Block Adv. | Pushblock Adv. | Cancel | Properties | ||||
| -6 | -7 | -10 | Special/Super | Air UB | ||||
| ||||||||
| Startup | Active | Recovery | Damage | Guard | ||||
|---|---|---|---|---|---|---|---|---|
| 9 | 4 | 15 | 7 | Mid | ||||
| Hit Adv. | Block Adv. | Pushblock Adv. | Cancel | Properties | ||||
| 0 | -1 | -12 | Special/Super | Air UB | ||||
| ||||||||
| Startup | Active | Recovery | Damage | Guard | ||||
|---|---|---|---|---|---|---|---|---|
| 3 | 4 | 20 | 11 | Mid | ||||
| Hit Adv. | Block Adv. | Pushblock Adv. | Cancel | Properties | ||||
| -8 | -9 | -17 | Special/Super | Air UB | ||||
| ||||||||
| Startup | Active | Recovery | Damage | Guard | ||||
|---|---|---|---|---|---|---|---|---|
| 4 | 4 | 15 | 3 | Low | ||||
| Hit Adv. | Block Adv. | Pushblock Adv. | Cancel | Properties | ||||
| -6 | -7 | -1 | Special/Super | - | ||||
| ||||||||
| Startup | Active | Recovery | Damage | Guard | ||||
|---|---|---|---|---|---|---|---|---|
| 4 | 4 | 15 | 10 | Mid | ||||
| Hit Adv. | Block Adv. | Pushblock Adv. | Cancel | Properties | ||||
| -3 | -4 | -12 | Special/Super | Air UB | ||||
| ||||||||
| Startup | Active | Recovery | Damage | Guard | ||||
|---|---|---|---|---|---|---|---|---|
| 9 | 4 | 33 | 11 | Low | ||||
| Hit Adv. | Block Adv. | Pushblock Adv. | Cancel | Properties | ||||
| Launch | -19 | -32 | Special/Super | - | ||||
| ||||||||
| Startup | Active | Recovery | Damage | Guard | ||||
|---|---|---|---|---|---|---|---|---|
| 10 | until landing | 28 | 10 | High | ||||
| Hit Adv. | Block Adv. | Pushblock Adv. | Cancel | Properties | ||||
| - | - | - | nothing | IPS=No Scales=No | ||||
| ||||||||
| Startup | Active | Recovery | Damage | Guard | ||||
|---|---|---|---|---|---|---|---|---|
| - | - | - | 17 | Grab | ||||
| Hit Adv. | Block Adv. | Pushblock Adv. | Cancel | Properties | ||||
| - | - | - | - | - | ||||
| ||||||||
Specials
| Startup | Active | Recovery | Damage | Guard | ||||
|---|---|---|---|---|---|---|---|---|
| - | - | - | 1(A) 2(B) 3(C) |
Mid | ||||
| Hit Adv. | Block Adv. | Pushblock Adv. | Cancel | Properties | ||||
| - | - | - | - | - | ||||
Easily one of Iggy's strongest tools, if not his strongest. First, there's the glide itself. Combining this with his airdash and divekick, this can make Iggy very unpredictable in the air, since he can easily change or halt his momentum. It can also be used as a fast instant overhead that you can combo off of. And then there's the sandballs. This is an insanely low risk projectile that you can just throw out with little fear of being punished. Just a simple superjump means that no anti air can hit you, and even if you get air to aired somehow, you just block it. The only real threat you have is if someone rolls behind you, but you still have C sandball and divekick to catch people doing that. Also, since you can block while throwing out sandballs, this move will just flat out beat every air to air in the game. And you can also use it on oki to give yourself time for a high/low/grab mixup. You might notice that the sandballs only do 1 or 2 damage, but that isn't as big of a problem as it seems. If you can get the sandball to launch, you can usually follow up with an S.J.B. And even on ground hits you can get an aerial or some pressure. And the sanballs also still do chip, so blocking isn't very effective against them. They can bring you down to 1 health, and if Iggy gets to that point, he's almost unbeatable. This is one of the best projectiles in the game, do not overlook this move. | ||||||||
| Startup | Active | Recovery | Damage | Guard | ||||
|---|---|---|---|---|---|---|---|---|
| 15 | - | 14 | 8(S.Off) 19(S.On) |
Mid | ||||
| Hit Adv. | Block Adv. | Pushblock Adv. | Cancel | Properties | ||||
| -9(S.On) | -15 | -17(S.On) | - | Air UB | ||||
The stand off version of this move is generally used as a quick, long range poke. It's a strong roundstart option and can catch a lot of people off guard. However, it does very low damage, the Fool has a hurtbox, and the Fool takes a while to come back, locking Iggy out of a big portion of his moveset. The stand on version is mainly used as a combo ender or a long range punish tool. Be aware that this move is punishable on hit, but it also has a good amount of pushback. That means some characters will have a harder time punishing it. It goes fullscreen, so you can use it to punish slow projectiles. Be aware that this move is very punishable on block, though. | ||||||||
| Startup | Active | Recovery | Damage | Guard | ||||
|---|---|---|---|---|---|---|---|---|
| 5 | - | - | 14 | Mid | ||||
| Hit Adv. | Block Adv. | Pushblock Adv. | Cancel | Properties | ||||
| Launches | - | - | - | - | ||||
Mainly used as an anti air. It's a fairly decent one, but it does require a charge. The stand on version can also be decent to use when you're getting pressured, since it knocks the opponent away and has i-frames. Just remember this is also fairly unsafe. | ||||||||
| Startup | Active | Recovery | Damage | Guard | ||||
|---|---|---|---|---|---|---|---|---|
| 2 | - | - | - | - | ||||
| Hit Adv. | Block Adv. | Pushblock Adv. | Cancel | Properties | ||||
| - | - | - | - | - | ||||
| ||||||||
| Startup | Active | Recovery | Damage | Guard | ||||
|---|---|---|---|---|---|---|---|---|
| 15 | - | - | 24 | Grab | ||||
| Hit Adv. | Block Adv. | Pushblock Adv. | Cancel | Properties | ||||
| Launches | - | - | - | - | ||||
Not very good in neutral, so mainly used for oki. These are the main part of his unblockable setups, and you can read more about them in the Strategy section. These are also really good to catch people hold up back on wakeup. Don't use the stand on version. | ||||||||
| Startup | Active | Recovery | Damage | Guard | ||||
|---|---|---|---|---|---|---|---|---|
| 9 | 4 | 15 | 7 | Mid | ||||
| Hit Adv. | Block Adv. | Pushblock Adv. | Cancel | Properties | ||||
| -1 | -1 | -13 | - | Air UB | ||||
| ||||||||
| Startup | Active | Recovery | Damage | Guard | ||||
|---|---|---|---|---|---|---|---|---|
| 5 | 2 | 17 | 8 | Mid | ||||
| Hit Adv. | Block Adv. | Pushblock Adv. | Cancel | Properties | ||||
| 38 | 32 | 26 | - | - | ||||
|
Iggy performs his Sand Uprising for his Guard Cancel. A decent Guard Cancel with good invincibility.
| ||||||||
Supers
| Startup | Active | Recovery | Damage | Guard | ||||
|---|---|---|---|---|---|---|---|---|
| 6 | 5 | - | 38 | Mid | ||||
| Hit Adv. | Block Adv. | Pushblock Adv. | Cancel | Properties | ||||
| - | - | - | - | IPS = No SC = No | ||||
| ||||||||
| Startup | Active | Recovery | Damage | Guard | ||||
|---|---|---|---|---|---|---|---|---|
| 5 | 31 | 1 | 39 | Grab | ||||
| Hit Adv. | Block Adv. | Pushblock Adv. | Cancel | Properties | ||||
| - | - | - | - | - | ||||
| ||||||||
| Startup | Active | Recovery | Damage | Guard | ||||
|---|---|---|---|---|---|---|---|---|
| - | - | - | - | - | ||||
| Hit Adv. | Block Adv. | Pushblock Adv. | Cancel | Properties | ||||
| - | - | - | - | - | ||||
| ||||||||


