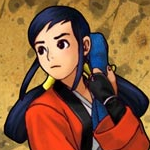
Introduction
Moves List
Normal Moves
Special Moves
Hibiki does a forward dash to opponent.
Hibiki raises her scabbard and hits the opponents mid section with it.
Hibiki does a quick evasion move.
Hibiki holds her sword close as it glows, asking her father for help. Meter is charged slowly in this motion.
Desperation Moves
Super Desperation Move
If your opponent is a distance away, it will strike upwards- about 45 degrees for far less damage.
Speed Combo Special
- d d + A/B (overhead/low) >
- A > B > C >
- A > B > C >
- A > B > qcf + C [~113 dmg]
- C > B > qcf + A (unblockable) [~138 dmg]
- d + C (low) > A >
- BC (overhead) > qcf + B []
- d + C (low) > f + BC (unblockable + jungle + cancelable) []
- A > B > C >
- A > B > C >
The Basics
Combos
Any Mode
Power Mode Only
Speed Mode Only
EX Mode Only
Power and EX Mode
Speed and EX Mode
Advanced Strategy
Don't use her ![]()
![]() move, and don't use her
move, and don't use her ![]()
![]() either.
either.
I don't use her ![]()
![]() much since you can't actually combo into it.
much since you can't actually combo into it.
The only time it really has any use is if you know the person's gonna try to low block, but even then I prefer ![]()
![]() on most occasions because it has more follow-up options.
on most occasions because it has more follow-up options.
I haven't had much reason to use her ![]()
![]() either unless the person is being really predictable with jump-ins.
either unless the person is being really predictable with jump-ins.
I prefer just to use the regular deflect since I can get way more damage off it, at the cost of slightly pickier deflect timing.
For ground poking, use ![]()
![]() and standing
and standing ![]() .
.
Get low jumping cross-up ![]() down. Great way to pin down inexperienced opponents, if you just low cross-up slash with her over and over. It's really hard to deflect and has a huge radius as well.
down. Great way to pin down inexperienced opponents, if you just low cross-up slash with her over and over. It's really hard to deflect and has a huge radius as well.
![]() is amazing ground anti-air but can be air parried by better players. It does a lot of damage on power, so it's very useful for punishing predictable air recoveries.
is amazing ground anti-air but can be air parried by better players. It does a lot of damage on power, so it's very useful for punishing predictable air recoveries.
Try dashing past someone on the ground, then using ![]()
![]() > :l:
> :l:![]() >
> ![]() > bread and butter. This should nail them when they get up if they don't see the cross-up coming.
> bread and butter. This should nail them when they get up if they don't see the cross-up coming.


