

Dhalsim
Yoga yoga yogaaa yoga yoga yoga. Dhalsim enters a brutal fighting tournament despite his pacifism in order to raise money for his village. Upon winning, he steals one of Tony Jaa's elephants to ride home on, and then spends the remainder of his life meditating in order to destroy Jaa before he can find Dhalsim's village.
In a nutshell
While one of the weaker incarnations of Dhalsim, HF Dhalsim is still capable of keeping opponents in their place with long range normals, slides and fireballs. Although primarily a keepaway character, Dhalsim can set up some nasty ![]() loops and corner traps when given a chance.
loops and corner traps when given a chance.
Character Specific Information
Color Options
| Default | Start |
 |

|
Moves List
Normal Moves
- Standing Normal Moves (st.)
- Close Normal Moves (st.)
- Crouching Normal Moves (cr.)
- Close Crouching Normal Moves (clcr.)
- Jumping and Diagonal Normal Jumping Moves (nj.)
Unique Moves
Throws
Special Moves
 /
/  }}
}}The Basics
Dhalsim is NOT an easy character to learn. Unlike later games, you have no direct control over which version of his normal moves are used, only the proximity of the opponent determines whether you get the close or far versions. This makes timing and positioning, along with an innate understanding of his entire moveset, even more crucial than is usually the case for Dhalsim. In general, you must outplay your opponent and make considerably fewer mistakes in order to win.
His main goal against most characters is to keep the opponent away, and hit them with long range attacks when vulnerable. Using fireballs to force the opponent to jump, and then hitting them out of the air with moves such as s.MK are very basic but strong techniques.
His slide moves will travel under fireballs (except Sagat's low tiger shot), and can be used as a punish. HK slide has considerable range.
Unfortunately, his damage output is very low, and any mistakes are very hard to come back from. Once the opponent is up close, Dhalsim has very little to fall back on to generate the much needed space.
Pros
- Teleport Mindgames
- Longest Pokes
Cons
- Weakest Fireball
- Teleport recovery brings free throws and holds for opponents
Advanced Strategy
Anti-airs:
- cl.LP
- slides (depending on distance)
His best anti-airs are slides (don't do this on anyone with a splash-type move, though) and close stand jab (Sim's only hope on a jumpy Sagat). You want to poke from a distance with low punches, tick with forward
slides, and go for an occasional yoga fire to force them to leave the ground.
Use drills to evade fireballs and the torpedo for air-to-air battles (and NOTHING else). As for the teleport, there's only one time to use it - when you're getting trapped by fireballs. Teleport then gauge whether you are at risk for a DP, and go for the noogie.
--Dasrik
Yeah, most of the time slides are the better choice. However, it depends on the spacing. Sometimes you'll be in a spot where they're jumping in where you're slide may take you too far under them, so that they don't land on it. You can still use the slide here and go for a throw, but you might eat a DP instead. This is usually when i use st.Jab instead of the slide. Also, I think st.Jab only works well if they're almost on top of you anyway. If you try it from further out, I think you'll get hit.
--SweetJohnnyV
A top UK ST player had noted to me that Sim does so well against Shotos because his old HK slide has way bigger range in HF. I don't have the numbers on this (RC?), but just look at how far out Sim is countering Ryu's FB, and on reaction too, he just can't throw anything once it gets near half screen. Light DP doesnt pay off in terms of risk reward against Sim's poking game esp as Sim has s.MK, again see matches. c.LK (which I asume you got off the Tomo vid) is useful in certain situations, but far from a real match defining technique.
HF Sim still has all the classic Sim sickness that makes him great, insane pokes, ticks, counters etc.. just with reduced damage. The matchups play mostly (not Blanka etc..) the same [as in ST], but just take a little more time and patience to play out.
--Crayfish
Match Videos
http://www.youtube.com/watch?v=xwltd6enlmM
http://www.youtube.com/watch?v=wh8DlzfMRvQ
Pay careful attention to Mike Watson's general spacing, use of normals as antiairs, tick setups and corner chip patterns.
Combos
Dhalsim isn't a combo material character,but had a lot of good tools
-close cr.MK x 2 (main low option)
-close cr.MK,Y. Fire (Trap)
Match-ups
Vs. Balrog (boxer)
Fairly even. Boxer hits hard, but you can pretty much zone him out most of the time. Even if he TAPs through your fire, as long as he's aways away when he does it, you can throw out another move to catch him as he comes through it. --SweetJohnnyV
Vs. Blanka
Blanka has a lot of high priority jump-ins that are hard to anti-air. You can annoy him in the corner with drills, but that's only if you get him in the corner. If he gets you in the corner, his up-ball tricks are really tough to get out of without taking some decent damage. --SweetJohnnyV
Dhalsim's gameplan it have some changes of Champion Edition, try to teleport if Blanka corner you, Yoga Flame its now a better option to block Vertical Roll.
Vs. Chun-Li
Chun pretty much wrecks Sim. Her attacks are really high priority, and she seems to get the priority on throws a lot, for some weird reason. Also, lightning legs and spinning bird kick hurt a LOT of you screw up against them. --SweetJohnnyV
Vs. Dhalsim (self)
A perfect Dhalsim use his normals wisely and Teleports at the dangerous moment.
Vs. E. Honda
In theory, you've got the moves to keep Honda out. But, a rushdown Honda can really give you trouble. His moves are high-priority and half the time you try to counter him from closer up, it allows him to grab you from further away then normal. The big problem is that you have to counter him correctly a lot, since you do so little damage, wheras it only takes one or two screwups for him to obliterate you. --SweetJohnnyV
Yoga Fire its your main far distance option, you can mix Jab Yoga Fire with a standing Forward or crouch Strong, Teleport its a riskful option.
Vs. Guile
You can punch/slide under his sonic booms, you can zone him pretty well, and you can AA his jump-ins pretty easily. You have to play this match kind of defensively though. If you try to rush him down, Guile's straight up jump HP stuffs you hard. --SweetJohnnyV
Vs. Ken
Since Ken's hurricane kick doesn't knock down it means you can zone him a LOT better than Ryu. You can spam yoga fires all day long, because even if he goes through your yoga fires with a hurricane kick, you usually have a chance to do something even if you get hit. Kens also like to spam LP dragon punch, which is easy to punish. The only thing you really gotta watch out for is letting him get on top of you and mixing up simple dizzy combos with tick-throws. --SweetJohnnyV
Vs. M. Bison (dictator)
If you can get him in the corner, you can really give Dictator trouble with ticks like: meaty Flame, c.LK slide, HP throw > repeat.. Out in the open go for MP throw (noogie), c.MK slide > repeat
Dictator will go for headstomp against your fireballs, if you fake him out and anticipate one early, jump HK will hit him clean. If Dictator is already in the air, do a c.LK slide at the last moment, Dictator will land next to you an you can begin a throw pattern.
Slides will also beat his regular jump ins. Go for the c.MK one, as you can start throw patterns off it, and mix up with combos like c.MK slide, c.MK, FB..
Keep pressure on him with Spears. Triangle jump sharply off the ground so that your feet hit his feet (this must be blocked low), this gives him no chance to throw/sac throw. In HF your Spears can beat the Psycho Crusher, but only from above. If it hits you side on he wins, if you hit the front of it, you trade for MUCH less damage. Be careful hitting the PC from above, although it will beat him clean, certain timings will give Dictator the 'frame advantage' to land first and throw you.
If you anticipate a psycho crusher before it gets going, you can snuff it with s.MK. this is handy because it really messes with Dictator's flow and gives you momentary initiative.
Keep him pinned down and try to stuff his offensive action before it gets going. If he gets out in the open he can give you a lot of trouble.
--SweetJohnnyV
Vs. Ryu
If you play really carefully, you can do OK, but Ryu's hurricane kick is tough stuff, his cr.LK beats a lot of your stuff, and random jab DP's can give your pokes problems. --SweetJohnnyV
Vs. Sagat
Sagat hits hard! But unlike Ryu, he doesn't have anything other than his uppercut that really gives you major problems. You can maneuver around his fireballs and you can beat his jump-ins with your slide. --SweetJohnnyV
Vs. Vega (claw)
A great poking match,Claw will play air game and you will be ground one, Yoga Fire its a bad option because Vega high jump and speed can counter it easily with Jumping Roundhouse or Barcelona.
Use Teleport or crouching Roundhouse to evade Barcelona, you can trade hits or hit miss with close Strong, Backdash its a good meaty Drill or Yoga Flame or Hold punish option.
Drill or Mummy are good tools for approach if Vega plays a turtling poking ground game.
Vs. Zangief
Now you must care about his Quick Lariat,use your Teleport wisely and poke him after, its still one of their best match ups but now you can mind game with Teleport and Flames setups.
Hitboxes
Standing Normals
- Standing LP:
| Damage | 6 |  |
 |
 |

|
| Stun | 1~7 | ||||
| Stun Timer | 40 | ||||
| Chain Cancel | No | ||||
| Special Cancel | No | ||||
| Frame Advantage | +4 | ||||
| Frame Count | 2 | 3 | 6 | 5 | |
| Simplified | 5+1 | 6 | 4 | ||
- Standing MP:
| Damage | 10 |  |
 |
 |
 |
 |
 |

|
| Stun | 5~11 | |||||||
| Stun Timer | 60 | |||||||
| Chain Cancel | No | |||||||
| Special Cancel | No | |||||||
| Frame Advantage | 0 | |||||||
| Frame Count | 3 | 4 | 4 | 6 | 4 | 4 | 1 | |
| Simplified | 1+7 | 10 | 9 | |||||
- Standing HP:
| Damage | 16 |  |
 |
 |
 |
 |
 |

|
| Stun | 11~17 | |||||||
| Stun Timer | 80 | |||||||
| Chain Cancel | No | |||||||
| Special Cancel | No | |||||||
| Frame Advantage | -2 | |||||||
| Frame Count | 3 | 4 | 4 | 6 | 10 | 8 | 1 | |
| Simplified | 1+7 | 10 | 19 | |||||
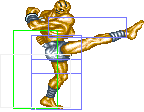
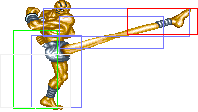
- Standing LK:
| Damage | 8 |  |
 |
 |
 |
 |

|
| Stun | 1~7 | ||||||
| Stun Timer | 40 | ||||||
| Chain Cancel | No | ||||||
| Special Cancel | No | ||||||
| Frame Advantage | -3 | ||||||
| Frame Count | 2 | 3 | 8 | 4 | 4 | 1 | |
| Simplified | 1+5 | 8 | 9 | ||||
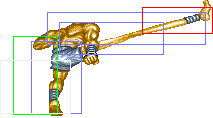
- Standing MK:
| Damage | 10 |  |
 |
 |
 |

|
| Stun | 5~11 | |||||
| Stun Timer | 60 | |||||
| Chain Cancel | No | |||||
| Special Cancel | No | |||||
| Frame Advantage | +4 | |||||
| Frame Count | 2 | 3 | 8 | 4 | 5 | |
| Simplified | 1+5 | 8 | 9 | |||
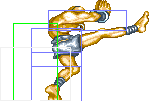
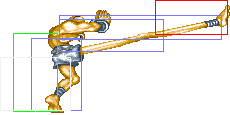
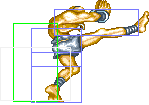
- Standing HK:
| Damage | 14 |  |
 |
 |
 |
 |
 |
 |

|
| Stun | 11~17 | ||||||||
| Stun Timer | 80 | ||||||||
| Chain Cancel | No | ||||||||
| Special Cancel | No | ||||||||
| Frame Advantage | -2 | ||||||||
| Frame Count | 1 | 2 | 3 | 4 | 6 | 10 | 8 | 1 | |
| Simplified | 1+10 | 6 | 19 | ||||||
Close Standing Normals
- Close Standing LP:
| Damage | 6 |  |
 |
 |

|
| Stun | 1~7 | ||||
| Stun Timer | 40 | ||||
| Chain Cancel | No | ||||
| Special Cancel | No | ||||
| Frame Advantage | +2 | ||||
| Frame Count | 2 | 3 | 6 | 5 | |
| Simplified | 1+2 | 9 | 5 | ||
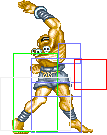
- Close Standing MP:
| Damage | 10 |  |
 |
 |
 |

|
| Stun | 5~11 | |||||
| Stun Timer | 60 | |||||
| Chain Cancel | No | |||||
| Special Cancel | Yes | |||||
| Frame Advantage | +6 | |||||
| Frame Count | 2 | 3 | 6 | 4 | 1 | |
| Simplified | 1+2 | 9 | 5 | |||
- Close Standing HP:
| Damage | 16,16 |  |
 |
 |
 |
 |

|
| Stun | 11~17 | ||||||
| Stun Timer | 80 | ||||||
| Chain Cancel | No | ||||||
| Special Cancel | No | ||||||
| Frame Advantage | -1 | ||||||
| Frame Count | 2 | 3 | 3 | 8 | 10 | 7 | |
| Simplified | 1+5 | 11 | 17 | ||||
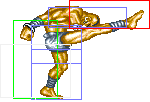
- Close Standing LK:
| Damage | 6 |  |
 |

|
| Stun | 1~7 | |||
| Stun Timer | 40 | |||
| Chain Cancel | No | |||
| Special Cancel | No | |||
| Frame Advantage | +2 | |||
| Frame Count | 3 | 8 | 5 | |
- Close Standing MK:
| Damage | 10 |  |
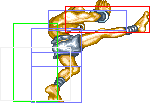 |

|
| Stun | 5~11 | |||
| Stun Timer | 60 | |||
| Chain Cancel | No | |||
| Special Cancel | No | |||
| Frame Advantage | +7 | |||
| Frame Count | 3 | 8 | 5 | |
- Close Standing HK:
| Damage | 16 |  |
 |
 |
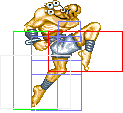 |
 |
 |

|
| Stun | 11~17 | |||||||
| Stun Timer | 80 | |||||||
| Chain Cancel | No | |||||||
| Special Cancel | No | |||||||
| Frame Advantage | +9 | |||||||
| Frame Count | 3 | 3 | 2 | 8 | 3 | 4 | 1 | |
| Simplified | 1+8 | 8 | 8 | |||||
Crouching Normals
- Crouching LP:
| Damage | 6 |  |
 |
 |
 |
 |

|
| Stun | 1~7 | ||||||
| Stun Timer | 40 | ||||||
| Chain Cancel | No | ||||||
| Special Cancel | No | ||||||
| Frame Advantage | -1 | ||||||
| Frame Count | 2 | 3 | 3 | 6 | 4 | 5 | |
| Simplified | 1+8 | 6 | 9 | ||||
- Crouching MP:
| Damage | 10 |  |
 |
 |
 |
 |

|
| Stun | 5~11 | ||||||
| Stun Timer | 60 | ||||||
| Chain Cancel | No | ||||||
| Special Cancel | No | ||||||
| Frame Advantage | +5 | ||||||
| Frame Count | 2 | 3 | 3 | 6 | 4 | 5 | |
| Simplified | 1+8 | 6 | 9 | ||||
- Crouching HP:
| Damage | 14 |  |
 |
 |
 |
 |

|
| Stun | 11~17 | ||||||
| Stun Timer | 80 | ||||||
| Chain Cancel | No | ||||||
| Special Cancel | No | ||||||
| Frame Advantage | -1 | ||||||
| Frame Count | 3 | 4 | 4 | 6 | 10 | 9 | |
| Simplified | 1+11 | 6 | 19 | ||||
- Crouching LK:
| Damage | 8 |  |
 |
 |

|
| Stun | 1~7 | ||||
| Stun Timer | 40 | ||||
| Chain Cancel | No | ||||
| Special Cancel | No | ||||
| Frame Advantage | -1 | ||||
| Frame Count | 1 | 1 | 14 | 5 | |
| Simplified | 1+2 | 14 | 5 | ||
- Crouching MK:
| Damage | 12 |  |
 |
 |

|
| Stun | 5~11 | ||||
| Stun Timer | 60 | ||||
| Chain Cancel | No | ||||
| Special Cancel | No | ||||
| Frame Advantage | +3 | ||||
| Frame Count | 3 | 4 | 16 | 5 | |
| Simplified | 1+7 | 16 | 5 | ||
- Crouching HK:
| Damage | 16 |  |
 |
 |
 |

|
| Stun | 5~11 | |||||
| Stun Timer | 130 | |||||
| Chain Cancel | No | |||||
| Special Cancel | No | |||||
| Frame Advantage | -27 | |||||
| Frame Count | 3 | 4 | 18 | 20 | 1 | |
| Simplified | 1+7 | 18 | 21 | |||
Close Crouching Normals
- Close Crouching LP:
| Damage | 8 |  |
 |

|
| Stun | 1~7 | |||
| Stun Timer | 40 | |||
| Chain Cancel | No | |||
| Special Cancel | No | |||
| Frame Advantage | +6 | |||
| Frame Count | 2 | 4 | 5 | |
- Close Crouching MP:
| Damage | 12 |  |
 |

|
| Stun | 5~11 | |||
| Stun Timer | 60 | |||
| Chain Cancel | No | |||
| Special Cancel | No | |||
| Frame Advantage | +8 | |||
| Frame Count | 3 | 5 | 7 | |
- Close Crouching MK:
| Damage | 12 |  |
 |

|
| Stun | 5~11 | |||
| Stun Timer | 60 | |||
| Chain Cancel | No | |||
| Special Cancel | Yes | |||
| Frame Advantage | +8 | |||
| Frame Count | 1 | 8 | 5 | |
Aerial Normals
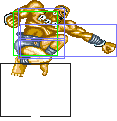
- Neutral/Diagonal Jumping LP:
| Damage | 8 |  |
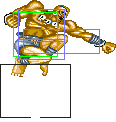 |
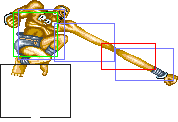 |
 |

|
| Stun | 1~7 | |||||
| Stun Timer | 40 | |||||
| Frame Count | 3 | 4 | 16 | ? | ∞ | |
| Simplified | 7 | 16 | ∞ | |||
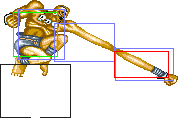
- Neutral/Diagonal Jumping MP:
| Damage | 12 |  |
 |
 |
 |

|
| Stun | 5~11 | |||||
| Stun Timer | 50 | |||||
| Frame Count | 3 | 4 | 10 | ? | ∞ | |
| Simplified | 7 | 10 | ∞ | |||
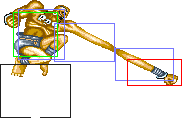
- Neutral/Diagonal Jumping HP:
| Damage | 16 |  |
 |
 |
 |

|
| Stun | 11~17 | |||||
| Stun Timer | 60 | |||||
| Frame Count | 3 | 4 | 4 | ? | ∞ | |
| Simplified | 7 | 4 | ∞ | |||
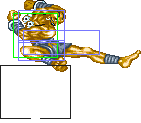
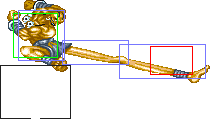
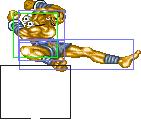
- Neutral/Diagonal Jumping LK:
| Damage | 8 |  |
 |
 |
 |

|
| Stun | 1~7 | |||||
| Stun Timer | 40 | |||||
| Frame Count | 4 | 6 | 18 | 4 | ∞ | |
| Simplified | 10 | 18 | ∞ | |||
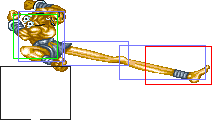
- Neutral/Diagonal Jumping MK:
| Damage | 12 |  |
 |
 |
 |

|
| Stun | 5~11 | |||||
| Stun Timer | 50 | |||||
| Frame Count | 4 | 6 | 12 | 4 | ∞ | |
| Simplified | 10 | 12 | ∞ | |||
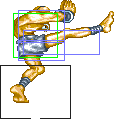
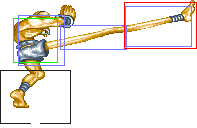
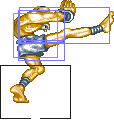
- Neutral/Diagonal Jumping HK:
| Damage | 16 |  |
 |
 |
 |
 |
 |
 |

|
| Stun | 11~17 | ||||||||
| Stun Timer | 60 | ||||||||
| Frame Count | 1 | 2 | 3 | 4 | 6 | 4 | 3 | ∞ | |
| Simplified | 10 | 6 | ∞ | ||||||
Unique Moves
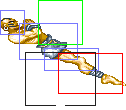
- Yoga Drill: (On air, ↓ + HK)
| Damage | 12 |  |
|
| Stun | 11~17 | ||
| Stun Timer | 80 | ||
| Frame Count | 5 | ∞ | |
| Simplified | 4 | ∞ | |
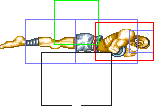
- Yoga Mummy: (On air, ↓ + HP)
| Damage | 12 |  |
|
| Stun | 11~17 | ||
| Stun Timer | 80 | ||
| Frame Count | 5 | ∞ | |
| Simplified | 4 | ∞ | |
Throws
- Yoga Smash: (←/→ + MP) and
- Yoga Throw: (←/→ + HP)
| Throw | Hold | 
| |||
| Damage | 30 | Damage | 20+(4*n) | ||
| Duration | - | Duration | 300 | ||
| Stun | 7~13 | Stun | - | ||
| Stun Timer | 100 | Stun Timer | - | ||
| Range (from axis) | 64 | Range (from axis) | 64 | ||
| Range advantage | 29 | Range advantage | 29 | ||
Special Moves
- Yoga Fire: ↓↘→ + Punch
Start up:
 |
 |
 |

|
| 2 | 2 | 7 | 1 |
LP version:
| Damage | 12 | 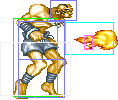 |
 |
 |
 |

|
| Stun | 13~19 | |||||
| Stun Timer | 120 | |||||
| Frame Advantage | - | |||||
| Frame Count | 1 | 1 | 3 | 6 | 9... | |
MP version:
| Damage | 14 | 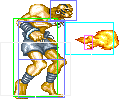 |
 |
 |
 |

|
| Stun | 13~19 | |||||
| Stun Timer | 120 | |||||
| Frame Advantage | - | |||||
| Frame Count | 1 | 1 | 3 | 6 | 9... | |
HP version :
| Damage | 16 | 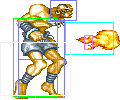 |
 |
 |
 |

|
| Stun | 13~19 | |||||
| Stun Timer | 120 | |||||
| Frame Advantage | - | |||||
| Frame Count | 1 | 1 | 3 | 6 | 9... | |
Not changed so much for Champion Edition but riskful against new E.Honda's Sumo Splash,Blanka's Vertical Roll or can be defeated easily with a Chun Li's Kikoken mind game in the medium distance...
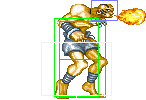
- Yoga Flame: ←↙↓↘→ + Punch
Start up:
| Damage | 32 |  |
 |
 |
 |
 |
 |
 |
 |
 |
 |
 |

|
| Stun | 13~19 | ||||||||||||
| Stun Timer | 120 | ||||||||||||
| Frame Advantage | - | ||||||||||||
| Jab | 2 | 2 | 3 | 2 | 2 | 1 | 1 | 1 | 2 | 1 | 3 | 1 | |
| Strong | 2 | 2 | 3 | 2 | 3 | 1 | 1 | 1 | 2 | 1 | 3 | 1 | |
| Fierce | 2 | 2 | 4 | 2 | 4 | 1 | 1 | 1 | 2 | 1 | 3 | 1 | |
Precycle:
 |
 |
 |
 |
 |
 |
 |

| |
| Frame Count | 3 | 1 | 3 | 1 | 3 | 1 | 3 | 1 |
Cycle:
 |
 |
 |
 |
 |
 |
 |

| |
| Frame Count | 3 | 1 | 3 | 1 | 3 | 1 | 3 | 1 |
Jab: 1 time
Strong: 2 times
Fierce: 3 times
Recovery:
 |
 |
 |
 |
 |
 |
 |
 |
 |
 |

| |
| Jab | 0 | 3 | 1 | 3 | 1 | 3 | 1 | 3 | 1 | 1 | 2 |
| Strong | 0 | 3 | 1 | 3 | 1 | 3 | 1 | 3 | 1 | 1 | 2 |
| Fierce | 1 | 3 | 1 | 3 | 1 | 3 | 1 | 3 | 1 | 1 | 2 |
Its still have some Champion Edition properties but if we talk about the mentioned new special moves this is your option.
- Yoga Teleport: →↓↘ + 3 Punches or 3 Kick
Start up:
 |
 |
 |
 |
 |
 |
||
| Frame Count | 2 | 3 | 3 | 3 | 3 | 12 | 12 |
Recovery:
 |
 |
 |
 |

| ||
| Frame Count | 8 | 9 | 3 | 3 | 3 | 3 |
A new special move focused in mind games, use it for surprise projectile spammers, and also Blanka Roll mixers and E.Honda Sumo Splashers or Headbutts.
Misc Animations
| Walk back | Neutral | Walk Fwd | Crouch |
 |
 |
 |

|
- Standing reel:
 |
 |
 |

|
- Standing gut reel:
 |
 |
 |

|
- Crouching reel:
 |

|
- Dizzy:
 |
 |

|
