Introduction
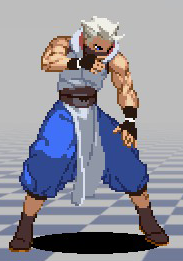
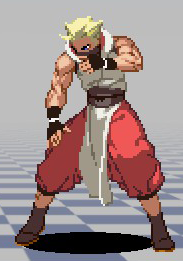
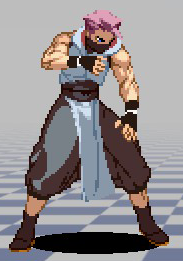
Colors

|

|

|
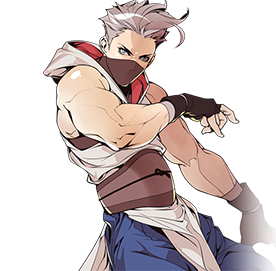
-- Gongfuren
Move List
Command Normals
Target Combos
Special Moves
Super Special Moves
Move Analysis
Normal Moves
Command Normals
| Sweep ( <Description here> |
Target Combos
| <Description here> |
Special Moves
Super Special Moves
| Shunjunrankujin ( <Description here> |
| Kukyogachirin Shishinomai ( <Description here> |
Framedata
Combos
Notes: ">" means chain. A "/" shows different options available during or for combos. "sjc" is super jump cancel.
Meterless
- 2B>5A>5C
- 2B>5A xx 214B
- 2C/2D xx 214B
- 5C xx 214B
- 2C,2C xx 214B
- 5A,5A xx 214B
- 2C,5A xx 214B (an easier link than 2C, 2C, and 5A,5A)
- 5C xx 214D,2B>5A>5C/xx214B (vs. Azure, Chadha, Jet, Hanzo, Juzumaru) vs. standing opponent only
- 214D will hit twice against all above listed opponents when standing. 5C xx 214D does not connect against Aja despite her large size, however a raw 214D will still hit twice against her and allow for the 2B link afterwards.
- 214D, 2B>5A>5C/xx214B (vs. Crouching opponents)
- Works on the entire cast except against Kotaro, where the 5A will whiff unless she is cornered.
Meterless Midscreen Anti-Air Juggle
- 214A/C, JD/5C xx 236A/236B
Corner Anti-Air Juggle
- 214A/C, 2C xx 214A, 214A/5A xx 236A
1/2 Meter
Midscreen
- 5A/2C/5C/2D xx 214BD,236B,214A, sj.C 236B
- 5A/2C/5C/2D xx 214BD, UOH, sj.D
- 5A/2C/5C/2D xx 214BD, UOH, dash, 5A>5C
Midscreen Anti-Air Juggles (note that you can replace dash with a sjc)
- 214A/C, dash 2C xx 214AC dash 5A>5C/5Cxx236
Corner
- 5A/2C/5C/2D xx 214BD, UOH, UOH, 5C (reset into 236A)
- 5A/2C/5C/2D xx 214BD, UOH, 5A xx 214A (up back jump cancel into air 236A)
- JC, 214AC, 2C xx 214A, 2C xx 214A(Vs. Aja, Azure, Chadha, Kotaro)
Corner Anti-Air juggles
- 214A/C, 2C xx 214AC, 2C xx 214A
- 214AC, 2C xx 214A, 2C xx 214A
1 Meter
Midscreen
- 5A/2C/5C/2D xx 214BD, 236B, 5A xx 214AC sjc. 5A (xx 236B for mixup)
- 2D xx 214BD xx 236BD, 214A sjc. 5A>5C/5A xx 236B
- 2D xx 214BD xx 236BD, 2C xx 214A sjc. 5A xx 236B (Aja only)
Midscreen Anti-Air Juggles (note that you can replace dash with a sjc)
- 214A/C dash 2C xx 214AC, dash 2C xx 214AC
- 214AC dash 2C xx 214 AC dash 5A>5C/5Cxx236A
Corner
- 5A/2C/5C/2D xx 214BD xx 236BD, 2C xx 214A, 214A/5A xx 236A
1 1/2 Meter
Corner
- 5A/2C/5C/2D xx 214BD, UOH,(UOH), 236236AC, nj.A, 2D xx 214A, 214A, 214A/5A xx 236A
2 Meter
Midscreen
- 2D xx 214BD xx 236BD 214A sjc 2C xx 236236A 214B(whiff), 3D/2D xx 236B/236A
(possible to end instead with 2c xx 214A,214A,214A/5C if combo ends up near corner, very tricky)
Corner
- 5A/2C/5C/2D xx 214BD xx 236BD, 214A, 236236AC (optional: whiff 5D here), nj.A, 2D xx 214A, 214A, 214A/5A xx 236A
EX Reppu Combos
Midscreen
236AC 2A 5C 214D 2B>5A>5C (16760)
- VS Aja, Juzu, Jet, Chadha, Hanzo, Azure
236AC 2A 5C 214B (14173)
- Vs Kotaro, Hina
236AC 2A 5C 214D 2B>5A>5C (14680)
- vs Crow, Kou. 214D only hits once.
All of the above combos require a micro walk between the 2A and the 5C. Note that AFAIK its not possible to do on Shimo. Also note that the combo for Kotaro, Hina, Crow and Kou are not optimal, I recommend the combo below for those characters.
236AC 5B 214D 2B>5A>5C (15222)
- VS Aja, Hanzo, Chadha, Azure, Jet, Juzu,
236AC 5B 214D 2B>5A>5C (14680)
- VS Crow, Kou, Hina, Shimo, Kotaro. 214D only hits once.
Midscreen 1 bar
236AC 2A 2Dxx214BD 236B 214A JC (17794)
- VS . Doesnt work on Shimo
236AC 5B 2Dxx214BD 236B 214A JC (18394)
- VS Hanzo, Kotaro, Hina, and (not yet tested). Doesnt work on Shimo
Corner
Corner starters: 2D, 2C, or raw 236AC. 5C can be used a starter vs all crouching opponents(excluding Shimo) and against standing Aja, Chadha, Azure, Jet, Hanzo, Kotaro, and Hina
2Dxx236AC 5B 214D 2B>5A>5C (18699)
- VS Aja, Hanzo, Chadha, Azure, Jet, Juzu,
2Dxx236AC 5B 214D 2B>5A>5C (18211)
- VS Crow, Kou, Hina, Shimo, Kotaro. 214D only hits once.
2Cxx236AC 5B 236AC 2A 5C 214D 2B>5A>5C (20660)
- Corner VS Chadha, Hanzo, Jet, Juzu, Azure
2Dxx236AC 5B 236AC 2A 5C 214B (21183)
- Corner. Works on entire cast. Omit 5Bxx236AC for a 1 bar variation that does 17756 damage.
2Dxx236AC 5B 214AC 2Cxx214A 2Cxx214A (24023)
- Corner. Vs Kotaro, Azure
2Dxx236AC 5B 236AC 2A 214AC 2Cxx214A 2Cxx214A (24590)
- Corner. Vs Kotaro, Azure
JC 2Dxx236AC 5Axx214AC 2Cxx214A 2Cxx214A (28472)
- Corner vs Kotaro, Azure
To lengthen corner combos with meter, add a 236AC after 5B (i.e. 2Dxx236AC 5Bxx236AC 5Bxx236AC, 2A,5A>5C.) You can loop 5Bxx236A as many times as your meter allows.
Strategy
Post Throw Set Ups
(Note that these set ups are for midscreen)
- Throw xx 236B, 236A: Basic safe fireball pressure.
- Throw xx 236A xx 236BD, 236B/CD (236B for side switch, or CD for a guard crush attempt.)
- Throw xx sj j.D(whiff late), 2B(whiff)>5A
Options/notes after 2B(whiff) from the above set up:
- 1. Meaty 5A: Leads to a 2C link which is otherwise impossible.
- 2. 2B: low option to avoid a high parry. Noted because you need to chain the 2B after the whiffed 2B.
With Kukyogachirin (Super 2) buffed:
- Super 2 xx 2369A (TK'd Shippu). Only Time TK Shippu can be safe.
- (VS Chadha wake up Gigadeth): Throw xx 236B,214B, Super2
- (VS Chadha wake up Gigadeth): Throw xx 214B, 236B, Super2 (Same as above except this one swaps sides)
Matchups
vs. Azure
(No strategies)
vs. Kotaro
(No strategies)
vs. Aja
(No strategies)
vs. Kou
(No strategies)
vs. Hanzo
(No strategies)
vs. Jyuzumaru
(No strategies)
vs. Dark Jyuzumaru
(No strategies)
vs. Hina
(No strategies)
vs. Shimo
(No strategies)
vs. Jet
(No strategies)
vs. Chadha
(No strategies)
vs. Crow
(No strategies)
