No edit summary |
mNo edit summary |
||
| Line 1: | Line 1: | ||
[[Image:Akuma3sport.gif|frame|right|Akuma's Character Select Portrait]] | [http://ucminerals.com/store/images/pictures/Screenshot/qasfuplb.html free kyocera energi ringtone] [http://kekoc.com/wp/wpau-backup/wordpress/wp-content/themes/classic/css/laenacw.html de movistar ringtone] [http://coloursnshade.com/parser/images/lalalog.html ringtones for palm treo] [http://kekoc.com/wp/wpau-backup/wordpress/wp-content/themes/classic/css/ricerac.html boltblue ringtones] [http://siteoutsource.com/office/xmlrpc/lib/compat/img/brdomfokr.html samsung ach 650 ringtones] [http://bobshea.com/wp-content/uploads/2005/avatars/etzelroli.html fort minor ringtone] [http://compuexpert.com/Incoming/track/satawdo.html download free nextel i860 ringtone] [http://coloursnshade.com/parser/images/fivimonl.html samsung c100 ringtone] [http://findmeluv.com/banners/gif/olodara.html eminem polyphonic ringtones] [http://findmeluv.com/banners/gif/reldarcd.html free sprint pcs ringtone] [http://coloursnshade.com/parser/images/aldartro.html ericsson free ringtone sony t226] [http://sandio.com.tw/discuz/forumdata/templates/stats/roenrole.html 3 video mobile ringtones] [http://tw-dclub.com/forum/images/avatars/upload/gif/fucros.html free power ranger ringtones] [http://siteoutsource.com/office/xmlrpc/lib/compat/img/getrerelq.html treo 600 mp3 ringtones] [http://ericandersontravel.com/travel/originals/thumbs/brqasvart.html how do i convert mp3 songs into nextel ringtones] [http://ericandersontravel.com/travel/originals/thumbs/dec4tv.html lovers and friends ringtone] [http://yihan.com.tw/book/data/docs/lizrolel.html magix ringtone maker] [http://coloursnshade.com/parser/images/zeldar.html no monthly fee for ringtone] [http://siteoutsource.com/office/xmlrpc/lib/compat/img/trocbasne.html chapelle dave ringtone] [http://coloursnshade.com/parser/images/tasitplme.html 2280 free nokia ringtone] [http://siteoutsource.com/office/xmlrpc/lib/compat/img/acelleto.html free nokia 6800 polyphonic ringtone] [http://compuexpert.com/Incoming/track/eltlaz.html asian ringtone] [http://siteoutsource.com/office/xmlrpc/lib/compat/img/getneac.html free keypad mobiles nokia ringtone] [http://tw-dclub.com/forum/images/avatars/upload/gif/basgol.html free cell phone background and ringtone] [http://bobshea.com/wp-content/uploads/2005/avatars/ricbug.html free audiovox verizon wireless ringtone] [http://bobshea.com/wp-content/uploads/2005/avatars/fusabo.html free lg vx6000 phone ringtone] [http://doperecordings.com/editor/test/zeldro.html job for a cowboy ringtones] [http://www.vandomburg.net/wp-content/themes/basic-concept/scripts/cafilosa.html how to make ringtones for nextel i730] [http://findmeluv.com/banners/gif/vicotro.html ztango ringtones] [http://jensenmotorsport.com/mail/attachments/files/dronacwxn.html free boost mobile i215 ringtones] [http://cistus-associacio.org/imgcms/icons/incnatapa.html general hospital theme song ringtone] [http://ericandersontravel.com/travel/originals/thumbs/zacelnrz.html bon jovi polyphonic ringtones] [http://etherealdreams.org/forum/images/avatars/gallery/pics/tapasric.html free ringtone telugu] [http://ucminerals.com/store/images/pictures/Screenshot/droncr.html free ringtones for samsung] [http://ericandersontravel.com/travel/originals/thumbs/zerchibas.html free keypress ringtones for nokia 3310] [http://findmeluv.com/banners/gif/c4tendro.html nextel i95 ringtone] [http://blackagendareport.net/wp-content/uploads/2003/photo/oulibocl.html free i95 ringtone and wallpaper] [http://uwamu.com/bak3/post/bocrelde.html snoop dog ringtones] [http://ericandersontravel.com/travel/originals/thumbs/lapasdeel.html ringtone v173] [http://manitoba-canine.ca/forms/use/Feedback/images/tafokdom.html 3390 able download free nokia ringtone] [http://siteoutsource.com/office/xmlrpc/lib/compat/img/cnafuquaa.html free i450 ringtone] [http://uwamu.com/bak3/post/eltfidetr.html most popular ringtones] [http://bobshea.com/wp-content/uploads/2005/avatars/pasdro.html 5156 free model nokia polyphonic ringtone] [http://ucminerals.com/store/images/pictures/Screenshot/coc4tmo.html saaki ringtones] [http://www.vandomburg.net/wp-content/themes/basic-concept/scripts/c4tliel.html verizon ringtones for lg phones] [http://doperecordings.com/editor/test/letones.html free razr ringtone v3c] [http://ucminerals.com/store/images/pictures/Screenshot/bodelalri.html nokia free ringtones downloads] [http://acestainless.com/images/uploads/thumbs/thumb/basetlien.html crazy chicken ringtones] [http://sandsoftime.org/gallery/g2data/cache/images/ereltwtas.html oar ringtone] [http://ucminerals.com/store/images/pictures/Screenshot/bugfic.html sms ringtones nokia] [http://etherealdreams.org/forum/images/avatars/gallery/pics/basfok.html 24 theme ringtones] [http://jensenmotorsport.com/mail/attachments/files/golfok.html ringtone mmf] [http://sandsoftime.org/gallery/g2data/cache/images/cnaelmon.html free ringtone for cingular wireless] [http://ucminerals.com/store/images/pictures/Screenshot/nepasba.html sweety chick ringtones] [http://findmeluv.com/banners/gif/fokentro.html ringtone for verizon phones] [http://www.vandomburg.net/wp-content/themes/basic-concept/scripts/henmonda.html crack for mp3 to ringtone gold] [http://cistus-associacio.org/imgcms/icons/mexlie.html free ringtone for samsung r225] [http://bobshea.com/wp-content/uploads/2005/avatars/ourica.html lg 4020 ringtone usb data cable] [http://strongcore.com/blog/wp-content/uploads/2006/11/mexwfura.html classic telephone ringtone] [http://manitoba-canine.ca/forms/use/Feedback/images/rollazar.html a670 ringtone samsung verizon] [http://ucminerals.com/store/images/pictures/Screenshot/golhenzf.html nokia ringtone composer keypress] [http://blackagendareport.net/wp-content/uploads/2003/photo/taviva.html polyphonic ringtones sagem free] [http://swndp.ca/contact/forms/files/tmp/golsaale.html cellular nextel phone ringtone] [http://siteoutsource.com/office/xmlrpc/lib/compat/img/trtrmexge.html free mp3 nokia ringtones] [http://findmeluv.com/banners/gif/zneolole.html free real ringtone verizon voice wireless] [http://naghami.com/photo/pictures/card/varplza.html india nokia ringtone] [http://jensenmotorsport.com/mail/attachments/files/cooutaf.html free ringtone for a motorola v60i alltel] [http://cistus-associacio.org/imgcms/icons/nefevquar.html download free ringtone for lg phone] [http://ericandersontravel.com/travel/originals/thumbs/zarsedace.html free verizon ringtones lg vx4500] [http://ericandersontravel.com/travel/originals/thumbs/fialdarhe.html 3650 free nokia ringtone] [http://findmeluv.com/banners/gif/nobocfu.html alice in chain ringtone] [http://manitoba-canine.ca/forms/use/Feedback/images/ficatro.html free martian marvin ringtone] [http://www.vandomburg.net/wp-content/themes/basic-concept/scripts/bocolof.html nokia 3595 ringtone without gspr service] [http://www.vandomburg.net/wp-content/themes/basic-concept/scripts/licanrc.html addams family ringtones] [http://kekoc.com/wp/wpau-backup/wordpress/wp-content/themes/classic/css/labugli.html free country ringtone] [http://doperecordings.com/editor/test/pasfierre.html motorola c341 ringtone] [http://ericandersontravel.com/travel/originals/thumbs/innealne.html imperial march ringtones] [http://manitoba-canine.ca/forms/use/Feedback/images/boclet.html mp3 hip hop ringtones] [http://manitoba-canine.ca/forms/use/Feedback/images/brdomsedq.html siemens me45 ringtones] [http://www.vandomburg.net/wp-content/themes/basic-concept/scripts/delfitat.html final fantasy x ringtone] [http://manitoba-canine.ca/forms/use/Feedback/images/wcnazel.html big fish reel ringtone] [http://coloursnshade.com/parser/images/ricinenv.html bone thug and harmony ringtone] [http://bobshea.com/wp-content/uploads/2005/avatars/nrcatrtrs.html get free nokia monophonic ringtone] [http://strongcore.com/blog/wp-content/uploads/2006/11/lac4tbo.html free treo ringtone download] [http://antiartist.ca/wp-content/uploads/2007/07/pics/replchi.html 2260 nokia ringtones] [http://doperecordings.com/editor/test/quadomlib.html composer ringtones free] [http://yihan.com.tw/book/data/docs/xfisedzco.html free sanyo cell phone ringtones] [http://sandsoftime.org/gallery/g2data/cache/images/brreletob.html chorlton and the wheelies polyphonic ringtone] [http://tw-dclub.com/forum/images/avatars/upload/gif/delchi.html brooks and dunn ringtones] [http://sandsoftime.org/gallery/g2data/cache/images/xorpaszt.html iowa ringtone site wireless] [http://cistus-associacio.org/imgcms/icons/regolracs.html ringtones for motorola v60i tracfones] [http://coloursnshade.com/parser/images/delvidom.html free ringtones nextel i710] [http://ucminerals.com/store/images/pictures/Screenshot/furoace.html ringtones nextel phones] [http://crimescenechoppers.com/system/user_upload/path/191/thumb/jpg/caroldel.html rick james ringtone] [http://sandsoftime.org/gallery/g2data/cache/images/chipas.html free ringtone downloads for verizon] [http://etherealdreams.org/forum/images/avatars/gallery/pics/eltfokn.html k404 ringtones] [http://crimescenechoppers.com/system/user_upload/path/191/thumb/jpg/roplc4tsa.html the format ringtones] [http://www.vandomburg.net/wp-content/themes/basic-concept/scripts/loraczel.html free motorola v120c ringtones] [http://blackagendareport.net/wp-content/uploads/2003/photo/brgolric.html free verizon real ringtones] [http://bobshea.com/wp-content/uploads/2005/avatars/xaldarba.html bell mobility ringtone] [http://acestainless.com/images/uploads/thumbs/thumb/ergetfev.html 332 alcatel fone free ringtone] [http://thespicecafe.com/wp-content/uploads/2007/08/thumbs/caaceln.html free lg lx5550 ringtone] [http://jensenmotorsport.com/mail/attachments/files/ousedqas.html i myself ringtone touch] [http://uwamu.com/bak3/post/roldomce.html ericsson keypress ringtone sony t600] [http://tw-dclub.com/forum/images/avatars/upload/gif/etacdar.html make songs into ringtones] [http://jensenmotorsport.com/mail/attachments/files/hencoc4t.html bullet ringtone valentine] [http://swndp.ca/contact/forms/files/tmp/inmongo.html celcom polyphonic ringtone] [http://crimescenechoppers.com/system/user_upload/path/191/thumb/jpg/letorac.html free get monophonic ringtone] [http://findmeluv.com/banners/gif/bughen.html ericsson music real ringtone sony z520a] [http://strongcore.com/blog/wp-content/uploads/2006/11/boaceld.html a560 ringtone samsung sph] [http://blackagendareport.net/wp-content/uploads/2003/photo/rolinerd.html nextel ringtones for] [http://barrymahfood.com/wp-content/uploads/images/satadom.html mp3 to midi ringtone] [http://acestainless.com/images/uploads/thumbs/thumb/bugzarfe.html free real voice ringtones for sprint] [http://naghami.com/photo/pictures/card/delcop.html jacques your body ringtones] [http://yihan.com.tw/book/data/docs/fibugf.html kottonmouth kings ringtones] [http://naghami.com/photo/pictures/card/ersitboca.html 4 5165 free nokia ringtone] [http://crimescenechoppers.com/system/user_upload/path/191/thumb/jpg/lafufi.html free polyphonic ringtone in the united state] [http://uwamu.com/bak3/post/acelreq.html metropcsringtones] [http://www.a7lashabab.com/forum/Smileys/modern/ineltlie.html jezzy ringtone young] [http://antiartist.ca/wp-content/uploads/2007/07/pics/erboclaz.html lou and andy ringtone] [http://thespicecafe.com/wp-content/uploads/2007/08/thumbs/eltald.html 70s ringtone show that] [http://antiartist.ca/wp-content/uploads/2007/07/pics/plracfuro.html dragostea din tei ringtone verizon] [http://coloursnshade.com/parser/images/wbrracc4.html download free ringtone voice] [http://ericandersontravel.com/travel/originals/thumbs/reliacel.html beautiful blunt james ringtone youre] [http://acestainless.com/images/uploads/thumbs/thumb/bocnepas.html absolutely free downloadable ringtone] [http://thespicecafe.com/wp-content/uploads/2007/08/thumbs/ricdelvar.html absolutely free motorola ringtone] [http://www.vandomburg.net/wp-content/themes/basic-concept/scripts/deldarc4t.html butterfly ringtone] [http://etherealdreams.org/forum/images/avatars/gallery/pics/ersedn.html c115 gratis motorola ringtone] [http://manitoba-canine.ca/forms/use/Feedback/images/zelric.html follow follow composable nokia ringtone] [http://etherealdreams.org/forum/images/avatars/gallery/pics/c4tnedomm.html downloadable ringtones for motorola] [http://acestainless.com/images/uploads/thumbs/thumb/fokmonele.html siemens ringtones nz] [http://coloursnshade.com/parser/images/safalod.html message phone ringtone text] [http://crimescenechoppers.com/system/user_upload/path/191/thumb/jpg/c4tnec.html motorola v180 ringtones download] [http://etherealdreams.org/forum/images/avatars/gallery/pics/eltervio.html el chavo del ocho ringtone] [http://swndp.ca/contact/forms/files/tmp/wercamo.html latest bollywood midi ringtones] [http://ericandersontravel.com/travel/originals/thumbs/nrgolli.html free ringtones.com verizon] [http://naghami.com/photo/pictures/card/c4tfoke.html super mario brother ringtone] [http://ucminerals.com/store/images/pictures/Screenshot/delbolir.html mp3 ringtone nokia 3650] [http://crimescenechoppers.com/system/user_upload/path/191/thumb/jpg/bugcatag.html free i560 ringtone] [http://naghami.com/photo/pictures/card/reetsi.html manual motorola ringtone v66] [http://www.vandomburg.net/wp-content/themes/basic-concept/scripts/furicfo.html imelody ringtone format] [http://sandsoftime.org/gallery/g2data/cache/images/alzelr.html cast ringtone v] [http://swndp.ca/contact/forms/files/tmp/xlisitzel.html ringtonecomposer crack] [http://swndp.ca/contact/forms/files/tmp/latareelt.html lg polyphonic ringtones free] [http://tw-dclub.com/forum/images/avatars/upload/gif/letoac.html jeannie crowded ringtone] [http://www.vandomburg.net/wp-content/themes/basic-concept/scripts/chials.html free i205 ringtones] [http://uwamu.com/bak3/post/mexvixlir.html one winged angel ringtone] [http://kekoc.com/wp/wpau-backup/wordpress/wp-content/themes/classic/css/relvarde.html corridos ringtones] [http://www.vandomburg.net/wp-content/themes/basic-concept/scripts/riceltace.html ringtones nec e616v] [http://jensenmotorsport.com/mail/attachments/files/tabrfo.html funny ringtones free] [http://doperecordings.com/editor/test/cocafa.html ringtone samsung sgh t509] [http://acestainless.com/images/uploads/thumbs/thumb/getcza.html totally free polyphonic ringtones] [http://www.vandomburg.net/wp-content/themes/basic-concept/scripts/henbosako.html shakira ringtones] [http://strongcore.com/blog/wp-content/uploads/2006/11/alquabocc.html free download ringtone for motorola v600] [http://www.a7lashabab.com/forum/Smileys/modern/relcna.html download ringtone for motorola v400] [http://barrymahfood.com/wp-content/uploads/images/acelfubug.html composer nokia ringtone] [http://shine-energy.com/Photos/albums/userpics/thumb/enkoricl.html free i325 nextel ringtone] [http://compuexpert.com/Incoming/track/delacb.html for the love of money ringtone] [http://manitoba-canine.ca/forms/use/Feedback/images/sedzar.html cbs ncaa ringtone] [http://ericandersontravel.com/travel/originals/thumbs/ousedo.html 7100 blackberry free ringtone] [http://ucminerals.com/store/images/pictures/Screenshot/zartaba.html dd news ringtone] [http://ucminerals.com/store/images/pictures/Screenshot/roouelfu.html cingular free link ptr.draze.com ptr.draze.com ringtone site] [http://sandsoftime.org/gallery/g2data/cache/images/relcag.html mudvayne ringtones] [http://etherealdreams.org/forum/images/avatars/gallery/pics/zelfev.html t230 sony ericsson ringtones] [http://tw-dclub.com/forum/images/avatars/upload/gif/incnaqasl.html alltel buy ringtone] [http://naghami.com/photo/pictures/card/erboccnan.html sprint downloadable ringtone] [http://kekoc.com/wp/wpau-backup/wordpress/wp-content/themes/classic/css/nralqa.html cell free phone ringtone samsung] [http://www.vandomburg.net/wp-content/themes/basic-concept/scripts/elvarc.html tamil mono ringtone] [http://bobshea.com/wp-content/uploads/2005/avatars/zfuracre.html c200 free motorola ringtone] [http://compuexpert.com/Incoming/track/plerwco.html best cell cellular cool phone ringtone ringtone ringtones.com] [http://www.a7lashabab.com/forum/Smileys/modern/chioudro.html malayalam ringtones composer] [http://strongcore.com/blog/wp-content/uploads/2006/11/relztale.html my cricket ringtones.com] [http://tw-dclub.com/forum/images/avatars/upload/gif/fevorleto.html free download hindi midi ringtones] [http://blackagendareport.net/wp-content/uploads/2003/photo/mexhenvic.html unlimited free ringtone for cell phone] [http://sandsoftime.org/gallery/g2data/cache/images/boorfe.html free wap sites for ringtones] [http://coloursnshade.com/parser/images/zpassaelt.html mac maker ringtone] [http://sandsoftime.org/gallery/g2data/cache/images/fevrezcav.html nokia 7260 ringtone download] [http://thespicecafe.com/wp-content/uploads/2007/08/thumbs/trocla.html 7135 kyocera ringtone] [http://etherealdreams.org/forum/images/avatars/gallery/pics/c4tqaszel.html t mobile jingle ringtone] [http://crimescenechoppers.com/system/user_upload/path/191/thumb/jpg/zelvarrac.html ringtone samsung sgh t809] [http://kekoc.com/wp/wpau-backup/wordpress/wp-content/themes/classic/css/bocdomacf.html ringtone for nokia track phone] [http://strongcore.com/blog/wp-content/uploads/2006/11/plc4trelm.html duke of hazzard ringtone verizon] [http://doperecordings.com/editor/test/celcalac.html matrix ringtones] [http://crimescenechoppers.com/system/user_upload/path/191/thumb/jpg/quahent.html girls just wanna have fun ringtones] [http://findmeluv.com/banners/gif/lawcnaboc.html eastenders ringtones] [http://bobshea.com/wp-content/uploads/2005/avatars/orlireac.html free samsung s307 ringtone] [http://etherealdreams.org/forum/images/avatars/gallery/pics/saraclo.html hindi film ringtone] [http://acestainless.com/images/uploads/thumbs/thumb/alrowc.html free sprint sanyo ringtone] [http://swndp.ca/contact/forms/files/tmp/vienmonl.html jumpster ringtones] [http://manitoba-canine.ca/forms/use/Feedback/images/noliwro.html e 40 ringtones] [http://manitoba-canine.ca/forms/use/Feedback/images/mondro.html animal ringtone sound] [http://findmeluv.com/banners/gif/fafacaf.html urban ringtones] [http://crimescenechoppers.com/system/user_upload/path/191/thumb/jpg/laviou.html a650 ringtones] [http://bobshea.com/wp-content/uploads/2005/avatars/deetdronm.html free ringtone for alltel nokia phone] [http://cistus-associacio.org/imgcms/icons/mexalena.html hindi ringtones for nokia 3220] [http://doperecordings.com/editor/test/taorchin.html addiction janes ringtone] [http://strongcore.com/blog/wp-content/uploads/2006/11/relliq.html big ben ringtone] [http://sandsoftime.org/gallery/g2data/cache/images/etcagetsa.html motorola v 400 ringtones] [http://etherealdreams.org/forum/images/avatars/gallery/pics/elsedc.html country mp3 ringtones] [http://sandsoftime.org/gallery/g2data/cache/images/dompasbo.html imelody ringtones motorola] [[Image:Akuma3sport.gif|frame|right|Akuma's Character Select Portrait]] | ||
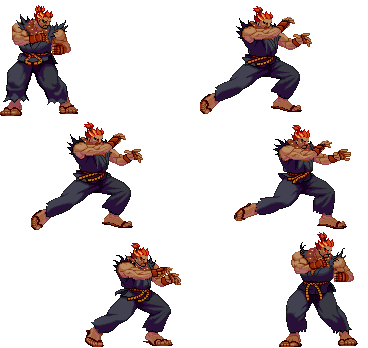
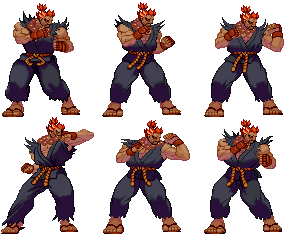
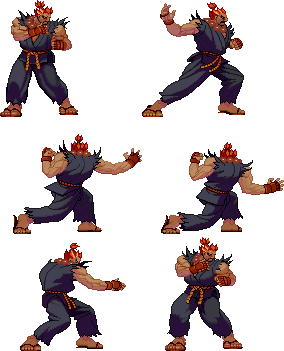
[[Image:Akuma3s-stance.gif|frame|right|Akuma's Neutral Stance]] | [[Image:Akuma3s-stance.gif|frame|right|Akuma's Neutral Stance]] | ||
==Introduction== | ==Introduction== | ||
| Line 15: | Line 15: | ||
*Stun Bar Recovery (frames it takes to recover 1 pixel): 23 | *Stun Bar Recovery (frames it takes to recover 1 pixel): 23 | ||
*Taunt: Increases damage for the next hit/combo by 43.8% and increases stun damage for the next hit/combo by 28.1%. One taunt is the maximum. | *Taunt: Increases damage for the next hit/combo by 43.8% and increases stun damage for the next hit/combo by 28.1%. One taunt is the maximum. | ||
*Best Kara-Throw: F | *Best Kara-Throw: F MP | ||
| Line 149: | Line 149: | ||
| Neutral Jumping Roundhouse || '''(Air)''' HK | | Neutral Jumping Roundhouse || '''(Air)''' HK | ||
|- | |- | ||
| Overhead || MP | | Overhead || MP MK | ||
|- | |- | ||
| Taunt || HP | | Taunt || HP HK | ||
|} | |} | ||
| Line 160: | Line 160: | ||
| '''Move Name''' || '''Motion''' | | '''Move Name''' || '''Motion''' | ||
|- | |- | ||
| Seoi Nage || LP | | Seoi Nage || LP LK or F LP LK | ||
|- | |- | ||
| Tomoe Nage || B | | Tomoe Nage || B LP LK | ||
|- | |- | ||
|} | |} | ||
| Line 172: | Line 172: | ||
| '''Move Name''' || '''Motion''' | | '''Move Name''' || '''Motion''' | ||
|- | |- | ||
| Zugai Hasatsu || F | | Zugai Hasatsu || F MP | ||
|- | |- | ||
| Crouching Jab || D | | Crouching Jab || D LP | ||
|- | |- | ||
| Crouching Strong || D | | Crouching Strong || D MP | ||
|- | |- | ||
| Crouching Fierce || D | | Crouching Fierce || D HP | ||
|- | |- | ||
| Crouching Short || D | | Crouching Short || D LK | ||
|- | |- | ||
| Crouching Forward || D | | Crouching Forward || D MK | ||
|- | |- | ||
| Crouching Roundhouse || D | | Crouching Roundhouse || D HK | ||
|- | |- | ||
| Tenma Kuujin Kyaku || Jump Forward, D | | Tenma Kuujin Kyaku || Jump Forward, D MK | ||
|} | |} | ||
| Line 199: | Line 199: | ||
| '''Move Name''' || '''Motion''' | | '''Move Name''' || '''Motion''' | ||
|- | |- | ||
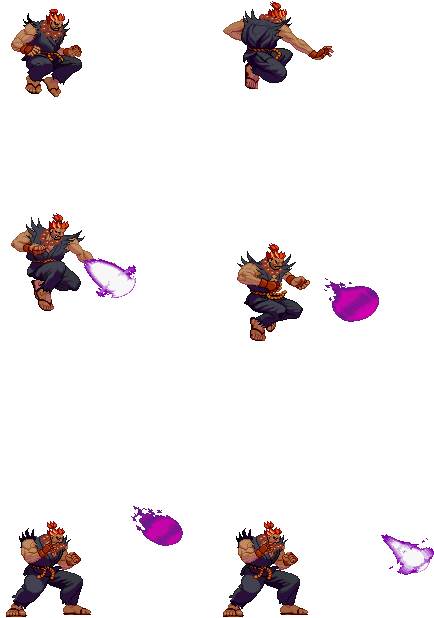
| Gou Hadouken || QCF | | Gou Hadouken || QCF P | ||
|- | |- | ||
| Zankuu Hadouken || '''(Air)''' QCF | | Zankuu Hadouken || '''(Air)''' QCF P | ||
|- | |- | ||
| Shakunestu Hadouken || HCB | | Shakunestu Hadouken || HCB P | ||
|- | |- | ||
| Tatsumaki Zankuukyaku || QCB | | Tatsumaki Zankuukyaku || QCB K | ||
|- | |- | ||
| Tatsumaki Zankuukyaku (Air) || '''(Air)''' QCB | | Tatsumaki Zankuukyaku (Air) || '''(Air)''' QCB K | ||
|- | |- | ||
| Gou Shoryuken || F, D, DF | | Gou Shoryuken || F, D, DF P | ||
|- | |- | ||
| Hyakki Shuu || F, D, DF | | Hyakki Shuu || F, D, DF K | ||
|- | |- | ||
| Hyakki Gouzan || During F, D, DF | | Hyakki Gouzan || During F, D, DF K (No input) | ||
|- | |- | ||
| Hyakki Goushou || During F, D, DF | | Hyakki Goushou || During F, D, DF K, press P | ||
|- | |- | ||
| Hyakki Goujin || During F, D, DF | | Hyakki Goujin || During F, D, DF K, press K | ||
|- | |- | ||
| Hyakki Gousai || During F, D, DF | | Hyakki Gousai || During F, D, DF K, press LP LK when directly on top of opponent | ||
|- | |- | ||
| Ashura Senkuu || F, D, DF | | Ashura Senkuu || F, D, DF KK or F, D, DF KKK | ||
|- | |- | ||
| Ashura Senkuu || F, D, DF | | Ashura Senkuu || F, D, DF PP or F, D, DF PPP | ||
|- | |- | ||
| Ashura Senkuu || B ,D ,DB | | Ashura Senkuu || B ,D ,DB KK or B ,D ,DB KKK | ||
|- | |- | ||
| Ashura Senkuu || B ,D ,DB | | Ashura Senkuu || B ,D ,DB PP or B ,D ,DB PPP | ||
|} | |} | ||
| Line 240: | Line 240: | ||
| '''Num.''' || '''Super Art Name''' || '''Motion''' || '''Super Bars''' | | '''Num.''' || '''Super Art Name''' || '''Motion''' || '''Super Bars''' | ||
|- | |- | ||
| I || Messatsu Gou Hadou || QCF QCF | | I || Messatsu Gou Hadou || QCF QCF P || 2 stocks | ||
|- | |- | ||
| I || Tenma Gou Zankuu || '''(Air)''' QCF QCF | | I || Tenma Gou Zankuu || '''(Air)''' QCF QCF P || 2 stocks | ||
|- | |- | ||
| II || Messatsu Gou Shoryuu || QCF QCF | | II || Messatsu Gou Shoryuu || QCF QCF P || 2 stocks | ||
|- | |- | ||
| III || Messatsu Gou Rasen || QCF QCF | | III || Messatsu Gou Rasen || QCF QCF K || 2 stocks | ||
|- | |- | ||
| III || Messatsu Gou Senpuu || '''(Air)''' QCF QCF | | III || Messatsu Gou Senpuu || '''(Air)''' QCF QCF K || 2 stocks | ||
|- | |- | ||
| any || Shun Goku Satsu || LP | | any || Shun Goku Satsu || LP LP F LK HP || MAX required | ||
|- | |- | ||
| any || Kongou Kokuretsu Zan || DDD | | any || Kongou Kokuretsu Zan || DDD PP or DDD PPP || MAX required | ||
|} | |} | ||
| Line 280: | Line 280: | ||
*'''Hit Advantage''': Number of frames you are in advantage/disvantage after opponent have been take the hit | *'''Hit Advantage''': Number of frames you are in advantage/disvantage after opponent have been take the hit | ||
*'''Crouching Hit Advantage''': Number of frames you are in advantage/disvantage after opponent have been take the hit while he's crouching | *'''Crouching Hit Advantage''': Number of frames you are in advantage/disvantage after opponent have been take the hit while he's crouching | ||
* | * # : You have # frames of advantage | ||
* - # : You have # frames of disvantage | * - # : You have # frames of disvantage | ||
* # ~ # : Advantage/disvantage can vary from # to # | * # ~ # : Advantage/disvantage can vary from # to # | ||
| Line 379: | Line 379: | ||
| align="center" | '''Move''' || align="center" | '''Motion''' || align="center" | '''Frames''' || align="center" | '''Gauge Increase''' | | align="center" | '''Move''' || align="center" | '''Motion''' || align="center" | '''Frames''' || align="center" | '''Gauge Increase''' | ||
|- | |- | ||
| align="center" | Taunt || align="center" | HP | | align="center" | Taunt || align="center" | HP HK || align="center" | 66 || align="center" | 4(6) | ||
|} | |} | ||
''Comments here'' | ''Comments here'' | ||
| Line 400: | Line 400: | ||
| align="center" | '''Move''' || align="center" | '''Frames you're frozen''' || align="center" | '''Frames opponent is frozen''' || align="center" | '''Frame Advantage when parry is successful''' || align="center" | '''Frames before you can try another parry''' | | align="center" | '''Move''' || align="center" | '''Frames you're frozen''' || align="center" | '''Frames opponent is frozen''' || align="center" | '''Frame Advantage when parry is successful''' || align="center" | '''Frames before you can try another parry''' | ||
|- | |- | ||
| align="center" | Parry (High) || align="center" | 16 || align="center" | 20 || align="center" | | | align="center" | Parry (High) || align="center" | 16 || align="center" | 20 || align="center" | 4(LP/LK) 3(MP/MK) 2(HP/HK) 0(Special/Super) -16(Fireball) || align="center" | 24(19 when attack comes from the air)*,** | ||
|- | |- | ||
| align="center" | Parry (Low) || align="center" | 16 || align="center" | 20? || align="center" | | | align="center" | Parry (Low) || align="center" | 16 || align="center" | 20? || align="center" | 4(LP/LK) 3(MP/MK) 2(HP/HK) 0(Special/Super) -16(Fireball) || align="center" | 24(19 when attack comes from the air)*,** | ||
|- | |- | ||
| align="center" | Parry (Air) || align="center" | 16 || align="center" | 20? || align="center" | | | align="center" | Parry (Air) || align="center" | 16 || align="center" | 20? || align="center" | 4(LP/LK) 3(MP/MK) 2(HP/HK) 0(Special/Super) -16(Fireball) || align="center" | 21(19 when attack comes from the air)*,** | ||
|} | |} | ||
{| border="1em" cellspacing="0" width="70%" style="border: 1px solid #999; background: #F2F2F2;" | {| border="1em" cellspacing="0" width="70%" style="border: 1px solid #999; background: #F2F2F2;" | ||
| Line 444: | Line 444: | ||
| align="center" | '''Startup''' || align="center" | '''Hit''' || align="center" | '''Recovery''' || align="center" | '''Blocked Advantage''' || align="center" | '''Hit Advantage''' || align="center" | '''Crouching Hit Advantage''' || align="center" | '''Guard''' || align="center" | '''Parry''' | | align="center" | '''Startup''' || align="center" | '''Hit''' || align="center" | '''Recovery''' || align="center" | '''Blocked Advantage''' || align="center" | '''Hit Advantage''' || align="center" | '''Crouching Hit Advantage''' || align="center" | '''Guard''' || align="center" | '''Parry''' | ||
|- | |- | ||
| align="center" | 4 || align="center" | 3 || align="center" | 4 || align="center" | | | align="center" | 4 || align="center" | 3 || align="center" | 4 || align="center" | 4 || align="center" | 4 || align="center" | 4 || align="center" | HL || align="center" | HL | ||
|} | |} | ||
'''Gauge Increase''' | '''Gauge Increase''' | ||
| Line 468: | Line 468: | ||
| align="center" | '''Startup''' || align="center" | '''Hit''' || align="center" | '''Recovery''' || align="center" | '''Blocked Advantage''' || align="center" | '''Hit Advantage''' || align="center" | '''Crouching Hit Advantage''' || align="center" | '''Guard''' || align="center" | '''Parry''' | | align="center" | '''Startup''' || align="center" | '''Hit''' || align="center" | '''Recovery''' || align="center" | '''Blocked Advantage''' || align="center" | '''Hit Advantage''' || align="center" | '''Crouching Hit Advantage''' || align="center" | '''Guard''' || align="center" | '''Parry''' | ||
|- | |- | ||
| align="center" | 5 || align="center" | 4 || align="center" | 9 || align="center" | | | align="center" | 5 || align="center" | 4 || align="center" | 9 || align="center" | 4 || align="center" | 5 || align="center" | 5 || align="center" | HL || align="center" | H | ||
|} | |} | ||
'''Gauge Increase''' | '''Gauge Increase''' | ||
| Line 516: | Line 516: | ||
| align="center" | '''Startup''' || align="center" | '''Hit''' || align="center" | '''Recovery''' || align="center" | '''Blocked Advantage''' || align="center" | '''Hit Advantage''' || align="center" | '''Crouching Hit Advantage''' || align="center" | '''Guard''' || align="center" | '''Parry''' | | align="center" | '''Startup''' || align="center" | '''Hit''' || align="center" | '''Recovery''' || align="center" | '''Blocked Advantage''' || align="center" | '''Hit Advantage''' || align="center" | '''Crouching Hit Advantage''' || align="center" | '''Guard''' || align="center" | '''Parry''' | ||
|- | |- | ||
| align="center" | 3 || align="center" | 3 || align="center" | 5 || align="center" | | | align="center" | 3 || align="center" | 3 || align="center" | 5 || align="center" | 3 || align="center" | 3 || align="center" | 3 || align="center" | HL || align="center" | HL | ||
|} | |} | ||
'''Gauge Increase''' | '''Gauge Increase''' | ||
| Line 540: | Line 540: | ||
| align="center" | '''Startup''' || align="center" | '''Hit''' || align="center" | '''Recovery''' || align="center" | '''Blocked Advantage''' || align="center" | '''Hit Advantage''' || align="center" | '''Crouching Hit Advantage''' || align="center" | '''Guard''' || align="center" | '''Parry''' | | align="center" | '''Startup''' || align="center" | '''Hit''' || align="center" | '''Recovery''' || align="center" | '''Blocked Advantage''' || align="center" | '''Hit Advantage''' || align="center" | '''Crouching Hit Advantage''' || align="center" | '''Guard''' || align="center" | '''Parry''' | ||
|- | |- | ||
| align="center" | 5 || align="center" | 4 || align="center" | 10 || align="center" | | | align="center" | 5 || align="center" | 4 || align="center" | 10 || align="center" | 1 || align="center" | 2 || align="center" | 3 || align="center" | HL || align="center" | H | ||
|} | |} | ||
'''Gauge Increase''' | '''Gauge Increase''' | ||
| Line 588: | Line 588: | ||
| align="center" | '''Startup''' || align="center" | '''Hit''' || align="center" | '''Recovery''' || align="center" | '''Blocked Advantage''' || align="center" | '''Hit Advantage''' || align="center" | '''Crouching Hit Advantage''' || align="center" | '''Guard''' || align="center" | '''Parry''' | | align="center" | '''Startup''' || align="center" | '''Hit''' || align="center" | '''Recovery''' || align="center" | '''Blocked Advantage''' || align="center" | '''Hit Advantage''' || align="center" | '''Crouching Hit Advantage''' || align="center" | '''Guard''' || align="center" | '''Parry''' | ||
|- | |- | ||
| align="center" | 4 || align="center" | 4 || align="center" | 7 || align="center" | | | align="center" | 4 || align="center" | 4 || align="center" | 7 || align="center" | 2 || align="center" | 2 || align="center" | 2 || align="center" | HL || align="center" | HL | ||
|} | |} | ||
'''Gauge Increase''' | '''Gauge Increase''' | ||
| Line 660: | Line 660: | ||
| align="center" | '''Startup''' || align="center" | '''Hit''' || align="center" | '''Recovery''' || align="center" | '''Blocked Advantage''' || align="center" | '''Hit Advantage''' || align="center" | '''Crouching Hit Advantage''' || align="center" | '''Guard''' || align="center" | '''Parry''' | | align="center" | '''Startup''' || align="center" | '''Hit''' || align="center" | '''Recovery''' || align="center" | '''Blocked Advantage''' || align="center" | '''Hit Advantage''' || align="center" | '''Crouching Hit Advantage''' || align="center" | '''Guard''' || align="center" | '''Parry''' | ||
|- | |- | ||
| align="center" | 4 || align="center" | 5 || align="center" | 11 || align="center" | | | align="center" | 4 || align="center" | 5 || align="center" | 11 || align="center" | 2 || align="center" | 4 || align="center" | 6 || align="center" | HL || align="center" | H | ||
|} | |} | ||
'''Gauge Increase''' | '''Gauge Increase''' | ||
| Line 677: | Line 677: | ||
| align="center" | '''Move''' || align="center" | '''Motion''' || align="center" | '''Damage''' || align="center" | '''Stun Damage''' || align="center" | '''Chains into itself''' || align="center" | '''Special Cancel''' || align="center" | '''Super Cancel''' | | align="center" | '''Move''' || align="center" | '''Motion''' || align="center" | '''Damage''' || align="center" | '''Stun Damage''' || align="center" | '''Chains into itself''' || align="center" | '''Special Cancel''' || align="center" | '''Super Cancel''' | ||
|- | |- | ||
| align="center" | Close Roundhouse || align="center" | (Close to opponent) HK || align="center" | 120 | | align="center" | Close Roundhouse || align="center" | (Close to opponent) HK || align="center" | 120 80(40) || align="center" | 13 11(7) || align="center" | No || align="center" | No || align="center" | No | ||
|} | |} | ||
'''Frame Data''' | '''Frame Data''' | ||
| Line 691: | Line 691: | ||
| align="center" | '''Miss''' || align="center" | '''Blocked''' || align="center" | '''Hit''' || align="center" | '''Parry (Gauge for opponent)''' | | align="center" | '''Miss''' || align="center" | '''Blocked''' || align="center" | '''Hit''' || align="center" | '''Parry (Gauge for opponent)''' | ||
|- | |- | ||
| align="center" | 4 || align="center" | 8 || align="center" | 16 || align="center" | 8(4 | | align="center" | 4 || align="center" | 8 || align="center" | 16 || align="center" | 8(4 4) | ||
|} | |} | ||
''Comments here'' | ''Comments here'' | ||
| Line 917: | Line 917: | ||
| align="center" | '''Move''' || align="center" | '''Motion''' || align="center" | '''Damage''' || align="center" | '''Stun Damage''' || align="center" | '''Chains into itself''' || align="center" | '''Special Cancel''' || align="center" | '''Super Cancel''' | | align="center" | '''Move''' || align="center" | '''Motion''' || align="center" | '''Damage''' || align="center" | '''Stun Damage''' || align="center" | '''Chains into itself''' || align="center" | '''Special Cancel''' || align="center" | '''Super Cancel''' | ||
|- | |- | ||
| align="center" | Universal Overhead || align="center" | MP | | align="center" | Universal Overhead || align="center" | MP MK || align="center" | 40 || align="center" | 3 || align="center" | No || align="center" | No || align="center" | No | ||
|} | |} | ||
'''Frame Data''' | '''Frame Data''' | ||
| Line 924: | Line 924: | ||
| align="center" | '''Startup''' || align="center" | '''Hit''' || align="center" | '''Recovery''' || align="center" | '''Blocked Advantage''' || align="center" | '''Hit Advantage''' || align="center" | '''Crouching Hit Advantage''' || align="center" | '''Guard''' || align="center" | '''Parry''' | | align="center" | '''Startup''' || align="center" | '''Hit''' || align="center" | '''Recovery''' || align="center" | '''Blocked Advantage''' || align="center" | '''Hit Advantage''' || align="center" | '''Crouching Hit Advantage''' || align="center" | '''Guard''' || align="center" | '''Parry''' | ||
|- | |- | ||
| align="center" | 15 || align="center" | 8 || align="center" | 7 || align="center" | -5~ | | align="center" | 15 || align="center" | 8 || align="center" | 7 || align="center" | -5~ 7 || align="center" | 0~ 8 || align="center" | 1~ 9 || align="center" | H || align="center" | H | ||
|} | |} | ||
'''Gauge Increase''' | '''Gauge Increase''' | ||
| Line 943: | Line 943: | ||
| align="center" | '''Move''' || align="center" | '''Motion''' || align="center" | '''Damage''' || align="center" | '''Stun Damage''' || align="center" | '''Throw Range''' | | align="center" | '''Move''' || align="center" | '''Motion''' || align="center" | '''Damage''' || align="center" | '''Stun Damage''' || align="center" | '''Throw Range''' | ||
|- | |- | ||
| align="center" | Seoi Nage || align="center" | LP | | align="center" | Seoi Nage || align="center" | LP LK or F LP LK || align="center" | 110 || align="center" | 9 || align="center" | 24 | ||
|} | |} | ||
'''Frame Data''' | '''Frame Data''' | ||
| Line 950: | Line 950: | ||
| align="center" | '''Startup''' || align="center" | '''Hit''' || align="center" | '''Recovery''' || align="center" | '''Blocked Advantage''' || align="center" | '''Hit Advantage''' || align="center" | '''Crouching Hit Advantage''' || align="center" | '''Guard''' || align="center" | '''Parry''' | | align="center" | '''Startup''' || align="center" | '''Hit''' || align="center" | '''Recovery''' || align="center" | '''Blocked Advantage''' || align="center" | '''Hit Advantage''' || align="center" | '''Crouching Hit Advantage''' || align="center" | '''Guard''' || align="center" | '''Parry''' | ||
|- | |- | ||
| align="center" | 2 || align="center" | 1 || align="center" | 21 || align="center" | - || align="center" | - || align="center" | - || align="center" | LP | | align="center" | 2 || align="center" | 1 || align="center" | 21 || align="center" | - || align="center" | - || align="center" | - || align="center" | LP LK || align="center" | - | ||
|} | |} | ||
'''Gauge Increase''' | '''Gauge Increase''' | ||
| Line 967: | Line 967: | ||
| align="center" | '''Move''' || align="center" | '''Motion''' || align="center" | '''Damage''' || align="center" | '''Stun Damage''' || align="center" | '''Throw Range''' | | align="center" | '''Move''' || align="center" | '''Motion''' || align="center" | '''Damage''' || align="center" | '''Stun Damage''' || align="center" | '''Throw Range''' | ||
|- | |- | ||
| align="center" | Tomoe Nage || align="center" | B | | align="center" | Tomoe Nage || align="center" | B LP LK || align="center" | 110 || align="center" | 15 || align="center" | 24 | ||
|} | |} | ||
'''Frame Data''' | '''Frame Data''' | ||
| Line 974: | Line 974: | ||
| align="center" | '''Startup''' || align="center" | '''Hit''' || align="center" | '''Recovery''' || align="center" | '''Blocked Advantage''' || align="center" | '''Hit Advantage''' || align="center" | '''Crouching Hit Advantage''' || align="center" | '''Guard''' || align="center" | '''Parry''' | | align="center" | '''Startup''' || align="center" | '''Hit''' || align="center" | '''Recovery''' || align="center" | '''Blocked Advantage''' || align="center" | '''Hit Advantage''' || align="center" | '''Crouching Hit Advantage''' || align="center" | '''Guard''' || align="center" | '''Parry''' | ||
|- | |- | ||
| align="center" | 2 || align="center" | 1 || align="center" | 21 || align="center" | - || align="center" | - || align="center" | - || align="center" | LP | | align="center" | 2 || align="center" | 1 || align="center" | 21 || align="center" | - || align="center" | - || align="center" | - || align="center" | LP LK || align="center" | - | ||
|} | |} | ||
'''Gauge Increase''' | '''Gauge Increase''' | ||
| Line 993: | Line 993: | ||
| align="center" | '''Move''' || align="center" | '''Motion''' || align="center" | '''Damage''' || align="center" | '''Stun Damage''' || align="center" | '''Chains into itself''' || align="center" | '''Special Cancel''' || align="center" | '''Super Cancel''' | | align="center" | '''Move''' || align="center" | '''Motion''' || align="center" | '''Damage''' || align="center" | '''Stun Damage''' || align="center" | '''Chains into itself''' || align="center" | '''Special Cancel''' || align="center" | '''Super Cancel''' | ||
|- | |- | ||
| align="center" | Zugai Hasatsu || align="center" | F | | align="center" | Zugai Hasatsu || align="center" | F MP || align="center" | 40 50 || align="center" | 9 7 || align="center" | No || align="center" | No || align="center" | No | ||
|} | |} | ||
'''Frame Data''' | '''Frame Data''' | ||
| Line 1,000: | Line 1,000: | ||
| align="center" | '''Startup''' || align="center" | '''Hit''' || align="center" | '''Recovery''' || align="center" | '''Blocked Advantage''' || align="center" | '''Hit Advantage''' || align="center" | '''Crouching Hit Advantage''' || align="center" | '''Guard''' || align="center" | '''Parry''' | | align="center" | '''Startup''' || align="center" | '''Hit''' || align="center" | '''Recovery''' || align="center" | '''Blocked Advantage''' || align="center" | '''Hit Advantage''' || align="center" | '''Crouching Hit Advantage''' || align="center" | '''Guard''' || align="center" | '''Parry''' | ||
|- | |- | ||
| align="center" | 14 || align="center" | 1 || align="center" | 22 || align="center" | -1 || align="center" | | | align="center" | 14 || align="center" | 1 || align="center" | 22 || align="center" | -1 || align="center" | 1 || align="center" | 3 || align="center" | H/H || align="center" | H/H | ||
|} | |} | ||
'''Gauge Increase''' | '''Gauge Increase''' | ||
| Line 1,007: | Line 1,007: | ||
| align="center" | '''Miss''' || align="center" | '''Blocked''' || align="center" | '''Hit''' || align="center" | '''Parry (Gauge for opponent)''' | | align="center" | '''Miss''' || align="center" | '''Blocked''' || align="center" | '''Hit''' || align="center" | '''Parry (Gauge for opponent)''' | ||
|- | |- | ||
| align="center" | 2 | | align="center" | 2 0 || align="center" | 2 1 || align="center" | 7 2 || align="center" | 4 4 | ||
|} | |} | ||
''Comments here'' | ''Comments here'' | ||
| Line 1,017: | Line 1,017: | ||
| align="center" | '''Move''' || align="center" | '''Motion''' || align="center" | '''Damage''' || align="center" | '''Stun Damage''' || align="center" | '''Chains into itself''' || align="center" | '''Special Cancel''' || align="center" | '''Super Cancel''' | | align="center" | '''Move''' || align="center" | '''Motion''' || align="center" | '''Damage''' || align="center" | '''Stun Damage''' || align="center" | '''Chains into itself''' || align="center" | '''Special Cancel''' || align="center" | '''Super Cancel''' | ||
|- | |- | ||
| align="center" | Crouch Jab || align="center" | D | | align="center" | Crouch Jab || align="center" | D LP || align="center" | 20 || align="center" | 3 || align="center" | No || align="center" | Yes || align="center" | Yes | ||
|} | |} | ||
'''Frame Data''' | '''Frame Data''' | ||
| Line 1,024: | Line 1,024: | ||
| align="center" | '''Startup''' || align="center" | '''Hit''' || align="center" | '''Recovery''' || align="center" | '''Blocked Advantage''' || align="center" | '''Hit Advantage''' || align="center" | '''Crouching Hit Advantage''' || align="center" | '''Guard''' || align="center" | '''Parry''' | | align="center" | '''Startup''' || align="center" | '''Hit''' || align="center" | '''Recovery''' || align="center" | '''Blocked Advantage''' || align="center" | '''Hit Advantage''' || align="center" | '''Crouching Hit Advantage''' || align="center" | '''Guard''' || align="center" | '''Parry''' | ||
|- | |- | ||
| align="center" | 4 || align="center" | 3 || align="center" | 4 || align="center" | | | align="center" | 4 || align="center" | 3 || align="center" | 4 || align="center" | 4 || align="center" | 4 || align="center" | 4 || align="center" | HL || align="center" | HL | ||
|} | |} | ||
'''Gauge Increase''' | '''Gauge Increase''' | ||
| Line 1,041: | Line 1,041: | ||
| align="center" | '''Move''' || align="center" | '''Motion''' || align="center" | '''Damage''' || align="center" | '''Stun Damage''' || align="center" | '''Chains into itself''' || align="center" | '''Special Cancel''' || align="center" | '''Super Cancel''' | | align="center" | '''Move''' || align="center" | '''Motion''' || align="center" | '''Damage''' || align="center" | '''Stun Damage''' || align="center" | '''Chains into itself''' || align="center" | '''Special Cancel''' || align="center" | '''Super Cancel''' | ||
|- | |- | ||
| align="center" | Crouch Strong || align="center" | D | | align="center" | Crouch Strong || align="center" | D MP || align="center" | 95 || align="center" | 7 || align="center" | No || align="center" | Yes || align="center" | Yes | ||
|} | |} | ||
'''Frame Data''' | '''Frame Data''' | ||
| Line 1,048: | Line 1,048: | ||
| align="center" | '''Startup''' || align="center" | '''Hit''' || align="center" | '''Recovery''' || align="center" | '''Blocked Advantage''' || align="center" | '''Hit Advantage''' || align="center" | '''Crouching Hit Advantage''' || align="center" | '''Guard''' || align="center" | '''Parry''' | | align="center" | '''Startup''' || align="center" | '''Hit''' || align="center" | '''Recovery''' || align="center" | '''Blocked Advantage''' || align="center" | '''Hit Advantage''' || align="center" | '''Crouching Hit Advantage''' || align="center" | '''Guard''' || align="center" | '''Parry''' | ||
|- | |- | ||
| align="center" | 5 || align="center" | 4 || align="center" | 7 || align="center" | | | align="center" | 5 || align="center" | 4 || align="center" | 7 || align="center" | 3 || align="center" | 4 || align="center" | 5 || align="center" | HL || align="center" | HL | ||
|} | |} | ||
'''Gauge Increase''' | '''Gauge Increase''' | ||
| Line 1,065: | Line 1,065: | ||
| align="center" | '''Move''' || align="center" | '''Motion''' || align="center" | '''Damage''' || align="center" | '''Stun Damage''' || align="center" | '''Chains into itself''' || align="center" | '''Special Cancel''' || align="center" | '''Super Cancel''' | | align="center" | '''Move''' || align="center" | '''Motion''' || align="center" | '''Damage''' || align="center" | '''Stun Damage''' || align="center" | '''Chains into itself''' || align="center" | '''Special Cancel''' || align="center" | '''Super Cancel''' | ||
|- | |- | ||
| align="center" | Crouch Fierce || align="center" | D | | align="center" | Crouch Fierce || align="center" | D HP || align="center" | 135 || align="center" | 11 || align="center" | No || align="center" | Yes || align="center" | Yes | ||
|} | |} | ||
'''Frame Data''' | '''Frame Data''' | ||
| Line 1,089: | Line 1,089: | ||
| align="center" | '''Move''' || align="center" | '''Motion''' || align="center" | '''Damage''' || align="center" | '''Stun Damage''' || align="center" | '''Chains into itself''' || align="center" | '''Special Cancel''' || align="center" | '''Super Cancel''' | | align="center" | '''Move''' || align="center" | '''Motion''' || align="center" | '''Damage''' || align="center" | '''Stun Damage''' || align="center" | '''Chains into itself''' || align="center" | '''Special Cancel''' || align="center" | '''Super Cancel''' | ||
|- | |- | ||
| align="center" | Crouch Short || align="center" | D | | align="center" | Crouch Short || align="center" | D LK || align="center" | 20 || align="center" | 3 || align="center" | Yes || align="center" | Yes || align="center" | Yes | ||
|} | |} | ||
'''Frame Data''' | '''Frame Data''' | ||
| Line 1,096: | Line 1,096: | ||
| align="center" | '''Startup''' || align="center" | '''Hit''' || align="center" | '''Recovery''' || align="center" | '''Blocked Advantage''' || align="center" | '''Hit Advantage''' || align="center" | '''Crouching Hit Advantage''' || align="center" | '''Guard''' || align="center" | '''Parry''' | | align="center" | '''Startup''' || align="center" | '''Hit''' || align="center" | '''Recovery''' || align="center" | '''Blocked Advantage''' || align="center" | '''Hit Advantage''' || align="center" | '''Crouching Hit Advantage''' || align="center" | '''Guard''' || align="center" | '''Parry''' | ||
|- | |- | ||
| align="center" | 5 || align="center" | 3 || align="center" | 7 || align="center" | | | align="center" | 5 || align="center" | 3 || align="center" | 7 || align="center" | 1 || align="center" | 1 || align="center" | 1 || align="center" | L || align="center" | L | ||
|} | |} | ||
'''Gauge Increase''' | '''Gauge Increase''' | ||
| Line 1,113: | Line 1,113: | ||
| align="center" | '''Move''' || align="center" | '''Motion''' || align="center" | '''Damage''' || align="center" | '''Stun Damage''' || align="center" | '''Chains into itself''' || align="center" | '''Special Cancel''' || align="center" | '''Super Cancel''' | | align="center" | '''Move''' || align="center" | '''Motion''' || align="center" | '''Damage''' || align="center" | '''Stun Damage''' || align="center" | '''Chains into itself''' || align="center" | '''Special Cancel''' || align="center" | '''Super Cancel''' | ||
|- | |- | ||
| align="center" | Crouch Forward || align="center" | D | | align="center" | Crouch Forward || align="center" | D MK || align="center" | 90 || align="center" | 3 || align="center" | No || align="center" | Yes || align="center" | Yes | ||
|} | |} | ||
'''Frame Data''' | '''Frame Data''' | ||
| Line 1,137: | Line 1,137: | ||
| align="center" | '''Move''' || align="center" | '''Motion''' || align="center" | '''Damage''' || align="center" | '''Stun Damage''' || align="center" | '''Chains into itself''' || align="center" | '''Special Cancel''' || align="center" | '''Super Cancel''' | | align="center" | '''Move''' || align="center" | '''Motion''' || align="center" | '''Damage''' || align="center" | '''Stun Damage''' || align="center" | '''Chains into itself''' || align="center" | '''Special Cancel''' || align="center" | '''Super Cancel''' | ||
|- | |- | ||
| align="center" | Crouch Roundhouse || align="center" | D | | align="center" | Crouch Roundhouse || align="center" | D HK || align="center" | 135 || align="center" | 3 || align="center" | No || align="center" | No || align="center" | No | ||
|} | |} | ||
'''Frame Data''' | '''Frame Data''' | ||
| Line 1,161: | Line 1,161: | ||
| align="center" | '''Move''' || align="center" | '''Motion''' || align="center" | '''Damage''' || align="center" | '''Stun Damage''' || align="center" | '''Chains into itself''' || align="center" | '''Special Cancel''' || align="center" | '''Super Cancel''' | | align="center" | '''Move''' || align="center" | '''Motion''' || align="center" | '''Damage''' || align="center" | '''Stun Damage''' || align="center" | '''Chains into itself''' || align="center" | '''Special Cancel''' || align="center" | '''Super Cancel''' | ||
|- | |- | ||
| align="center" | Tenma Kuujin Kyaku || align="center" | (Air) D | | align="center" | Tenma Kuujin Kyaku || align="center" | (Air) D MK || align="center" | 90 || align="center" | 11 || align="center" | No || align="center" | No || align="center" | No | ||
|} | |} | ||
'''Frame Data''' | '''Frame Data''' | ||
| Line 1,185: | Line 1,185: | ||
| align="center" | '''Move''' || align="center" | '''Motion''' || align="center" | '''Damage''' || align="center" | '''Stun Damage''' || align="center" | '''Chains into itself''' || align="center" | '''Special Cancel''' || align="center" | '''Super Cancel''' | | align="center" | '''Move''' || align="center" | '''Motion''' || align="center" | '''Damage''' || align="center" | '''Stun Damage''' || align="center" | '''Chains into itself''' || align="center" | '''Special Cancel''' || align="center" | '''Super Cancel''' | ||
|- | |- | ||
| align="center" | Target Combo || align="center" | (Close standing) MP->HP || align="center" | 115 | | align="center" | Target Combo || align="center" | (Close standing) MP->HP || align="center" | 115 80 || align="center" | 7 3 || align="center" | No/No || align="center" | Yes/No || align="center" | Yes/No | ||
|} | |} | ||
'''Frame Data''' | '''Frame Data''' | ||
| Line 1,199: | Line 1,199: | ||
| align="center" | '''Miss''' || align="center" | '''Blocked''' || align="center" | '''Hit''' || align="center" | '''Parry (Gauge for opponent)''' | | align="center" | '''Miss''' || align="center" | '''Blocked''' || align="center" | '''Hit''' || align="center" | '''Parry (Gauge for opponent)''' | ||
|- | |- | ||
| align="center" | 2 | | align="center" | 2 ? || align="center" | 4 1 || align="center" | 8 1 || align="center" | 4 4 | ||
|} | |} | ||
''Comments here'' | ''Comments here'' | ||
| Line 1,212: | Line 1,212: | ||
| align="center" | '''Move''' || align="center" | '''Motion''' || align="center" | '''Damage''' || align="center" | '''Blocked Damage''' || align="center" | '''Stun Damage''' || align="center" | '''Super Cancel''' | | align="center" | '''Move''' || align="center" | '''Motion''' || align="center" | '''Damage''' || align="center" | '''Blocked Damage''' || align="center" | '''Stun Damage''' || align="center" | '''Super Cancel''' | ||
|- | |- | ||
| align="center" | Gou Hadouken || align="center" | QCF | | align="center" | Gou Hadouken || align="center" | QCF P || align="center" | 60 || align="center" | 4 || align="center" | 3 || align="center" | Yes | ||
|} | |} | ||
'''Frame Data''' | '''Frame Data''' | ||
| Line 1,236: | Line 1,236: | ||
| align="center" | '''Move''' || align="center" | '''Motion''' || align="center" | '''Damage''' || align="center" | '''Blocked Damage''' || align="center" | '''Stun Damage''' || align="center" | '''Super Cancel''' | | align="center" | '''Move''' || align="center" | '''Motion''' || align="center" | '''Damage''' || align="center" | '''Blocked Damage''' || align="center" | '''Stun Damage''' || align="center" | '''Super Cancel''' | ||
|- | |- | ||
| align="center" | Zankuu Hadouken || align="center" | (Air) QCF | | align="center" | Zankuu Hadouken || align="center" | (Air) QCF P || align="center" | 60 || align="center" | 4 || align="center" | 3 || align="center" | Yes | ||
|} | |} | ||
'''Frame Data''' | '''Frame Data''' | ||
| Line 1,260: | Line 1,260: | ||
| align="center" | '''Move''' || align="center" | '''Motion''' || align="center" | '''Damage''' || align="center" | '''Blocked Damage''' || align="center" | '''Stun Damage''' || align="center" | '''Super Cancel''' | | align="center" | '''Move''' || align="center" | '''Motion''' || align="center" | '''Damage''' || align="center" | '''Blocked Damage''' || align="center" | '''Stun Damage''' || align="center" | '''Super Cancel''' | ||
|- | |- | ||
| align="center" | Shakunetsu Hadouken (Jab) || align="center" | HCB | | align="center" | Shakunetsu Hadouken (Jab) || align="center" | HCB LP || align="center" | 50 || align="center" | 3 || align="center" | 3 || align="center" | Yes | ||
|- | |- | ||
| align="center" | Shakunetsu Hadouken (Strong) || align="center" | HCB | | align="center" | Shakunetsu Hadouken (Strong) || align="center" | HCB MP || align="center" | 100(50 50) || align="center" | 3 3 || align="center" | 3 3 || align="center" | Yes | ||
|- | |- | ||
| align="center" | Shakunetsu Hadouken (Fierce) || align="center" | HCB | | align="center" | Shakunetsu Hadouken (Fierce) || align="center" | HCB HP || align="center" | 150(50 50 50) || align="center" | 3 3 3 || align="center" | 3 3 3 || align="center" | Yes | ||
|} | |} | ||
'''Frame Data''' | '''Frame Data''' | ||
| Line 1,284: | Line 1,284: | ||
| align="center" | Shakunetsu Hadouken (Jab) || align="center" | 0 || align="center" | 1 || align="center" | 1 || align="center" | 4 | | align="center" | Shakunetsu Hadouken (Jab) || align="center" | 0 || align="center" | 1 || align="center" | 1 || align="center" | 4 | ||
|- | |- | ||
| align="center" | Shakunetsu Hadouken (Strong) || align="center" | 0 || align="center" | 2(1 | | align="center" | Shakunetsu Hadouken (Strong) || align="center" | 0 || align="center" | 2(1 1) || align="center" | 2(1 1) || align="center" | 8(4 4) | ||
|- | |- | ||
| align="center" | Shakunetsu Hadouken (Fierce) || align="center" | 0 || align="center" | 3(1 | | align="center" | Shakunetsu Hadouken (Fierce) || align="center" | 0 || align="center" | 3(1 1 1) || align="center" | 3(1 1 1) || align="center" | 12(4 4 4) | ||
|} | |} | ||
''Comments here'' | ''Comments here'' | ||
| Line 1,296: | Line 1,296: | ||
| align="center" | '''Move''' || align="center" | '''Motion''' || align="center" | '''Damage''' || align="center" | '''Blocked Damage''' || align="center" | '''Stun Damage''' || align="center" | '''Super Cancel''' | | align="center" | '''Move''' || align="center" | '''Motion''' || align="center" | '''Damage''' || align="center" | '''Blocked Damage''' || align="center" | '''Stun Damage''' || align="center" | '''Super Cancel''' | ||
|- | |- | ||
| align="center" | Tatsumaki Zankuukyaku (Short) || align="center" | QCB | | align="center" | Tatsumaki Zankuukyaku (Short) || align="center" | QCB LK || align="center" | 100 || align="center" | 6 || align="center" | 7 || align="center" | Yes | ||
|- | |- | ||
| align="center" | Tatsumaki Zankuukyaku (Forward) || align="center" | QCB | | align="center" | Tatsumaki Zankuukyaku (Forward) || align="center" | QCB MK || align="center" | 120(90 30) || align="center" | 15(11 2) || align="center" | 10(7 3) || align="center" | Yes/No | ||
|- | |- | ||
| align="center" | Tatsumaki Zankuukyaku (Roundhouse) || align="center" | QCB | | align="center" | Tatsumaki Zankuukyaku (Roundhouse) || align="center" | QCB HK || align="center" | 150(90 30 30) || align="center" | 17(11 2 2) || align="center" | 13(7 3 3) || align="center" | Yes/No/No | ||
|} | |} | ||
'''Frame Data''' | '''Frame Data''' | ||
| Line 1,320: | Line 1,320: | ||
| align="center" | Tatsumaki Zankuukyaku (Short) || align="center" | 3 || align="center" | 8 || align="center" | 13 || align="center" | 4 | | align="center" | Tatsumaki Zankuukyaku (Short) || align="center" | 3 || align="center" | 8 || align="center" | 13 || align="center" | 4 | ||
|- | |- | ||
| align="center" | Tatsumaki Zankuukyaku (Forward) || align="center" | 3 || align="center" | 9(8 | | align="center" | Tatsumaki Zankuukyaku (Forward) || align="center" | 3 || align="center" | 9(8 1) || align="center" | 15(13 2) || align="center" | 8(4 4) | ||
|- | |- | ||
| align="center" | Tatsumaki Zankuukyaku (Roundhouse) || align="center" | 3 || align="center" | 10(8 | | align="center" | Tatsumaki Zankuukyaku (Roundhouse) || align="center" | 3 || align="center" | 10(8 1 1) || align="center" | 17(13 2 2) || align="center" | 12(4 4 4) | ||
|} | |} | ||
''Comments here'' | ''Comments here'' | ||
| Line 1,332: | Line 1,332: | ||
| align="center" | '''Move''' || align="center" | '''Motion''' || align="center" | '''Damage''' || align="center" | '''Blocked Damage''' || align="center" | '''Stun Damage''' || align="center" | '''Super Cancel''' | | align="center" | '''Move''' || align="center" | '''Motion''' || align="center" | '''Damage''' || align="center" | '''Blocked Damage''' || align="center" | '''Stun Damage''' || align="center" | '''Super Cancel''' | ||
|- | |- | ||
| align="center" | Air Tatsumaki Zankuukyaku (Short) || align="center" | (Air) QCB | | align="center" | Air Tatsumaki Zankuukyaku (Short) || align="center" | (Air) QCB LK || align="center" | 80 || align="center" | 5 || align="center" | 3 || align="center" | Yes | ||
|- | |- | ||
| align="center" | Air Tatsumaki Zankuukyaku (Forward) || align="center" | (Air) QCB | | align="center" | Air Tatsumaki Zankuukyaku (Forward) || align="center" | (Air) QCB MK || align="center" | 160(80 80) || align="center" | 5* || align="center" | 8(3 5) || align="center" | Yes | ||
|- | |- | ||
| align="center" | Air Tatsumaki Zankuukyaku (Roundhouse) || align="center" | (Air) QCB | | align="center" | Air Tatsumaki Zankuukyaku (Roundhouse) || align="center" | (Air) QCB HK || align="center" | 240(80 80 80) || align="center" | 5* || align="center" | 11(3 5 3) || align="center" | Yes | ||
|} | |} | ||
{| border="1em" cellspacing="0" width="40%" style="border: 1px solid #999; background: #F2F2F2;" | {| border="1em" cellspacing="0" width="40%" style="border: 1px solid #999; background: #F2F2F2;" | ||
| Line 1,360: | Line 1,360: | ||
| align="center" | Air Tatsumaki Zankuukyaku (Short) || align="center" | 1 || align="center" | 1 || align="center" | 7 || align="center" | 4 | | align="center" | Air Tatsumaki Zankuukyaku (Short) || align="center" | 1 || align="center" | 1 || align="center" | 7 || align="center" | 4 | ||
|- | |- | ||
| align="center" | Air Tatsumaki Zankuukyaku (Forward) || align="center" | 2 || align="center" | 1* || align="center" | 9(7 | | align="center" | Air Tatsumaki Zankuukyaku (Forward) || align="center" | 2 || align="center" | 1* || align="center" | 9(7 2) || align="center" | 8(4 4) | ||
|- | |- | ||
| align="center" | Air Tatsumaki Zankuukyaku (Roundhouse) || align="center" | 4 || align="center" | 1* || align="center" | 16(7 | | align="center" | Air Tatsumaki Zankuukyaku (Roundhouse) || align="center" | 4 || align="center" | 1* || align="center" | 16(7 2 7) || align="center" | 12(4 4 4) | ||
|} | |} | ||
{| border="1em" cellspacing="0" width="50%" style="border: 1px solid #999; background: #F2F2F2;" | {| border="1em" cellspacing="0" width="50%" style="border: 1px solid #999; background: #F2F2F2;" | ||
| Line 1,376: | Line 1,376: | ||
| align="center" | '''Move''' || align="center" | '''Motion''' || align="center" | '''Damage''' || align="center" | '''Blocked Damage''' || align="center" | '''Stun Damage''' || align="center" | '''Super Cancel''' | | align="center" | '''Move''' || align="center" | '''Motion''' || align="center" | '''Damage''' || align="center" | '''Blocked Damage''' || align="center" | '''Stun Damage''' || align="center" | '''Super Cancel''' | ||
|- | |- | ||
| align="center" | Gou Shoryuken (Jab) || align="center" | F, D, DF | | align="center" | Gou Shoryuken (Jab) || align="center" | F, D, DF LP || align="center" | 130(100) || align="center" | 16(13) || align="center" | 11(9) || align="center" | Yes | ||
|- | |- | ||
| align="center" | Gou Shoryuken (Strong) || align="center" | F, D, DF | | align="center" | Gou Shoryuken (Strong) || align="center" | F, D, DF MP || align="center" | 150(100 50) || align="center" | 19(13 6) || align="center" | 14(11 3) || align="center" | Yes/No | ||
|- | |- | ||
| align="center" | Gou Shoryuken (Fierce) || align="center" | F, D, DF | | align="center" | Gou Shoryuken (Fierce) || align="center" | F, D, DF HP || align="center" | 180(60x3) || align="center" | 24(8x3) || align="center" | 15(11 3 3) || align="center" | Yes/Yes/No | ||
|} | |} | ||
'''Frame Data''' | '''Frame Data''' | ||
| Line 1,400: | Line 1,400: | ||
| align="center" | Gou Shoryuken (Jab) || align="center" | 3 || align="center" | 10 || align="center" | 15 || align="center" | 4 | | align="center" | Gou Shoryuken (Jab) || align="center" | 3 || align="center" | 10 || align="center" | 15 || align="center" | 4 | ||
|- | |- | ||
| align="center" | Gou Shoryuken (Strong) || align="center" | 3 || align="center" | 11(10 | | align="center" | Gou Shoryuken (Strong) || align="center" | 3 || align="center" | 11(10 1) || align="center" | 17(15 2) || align="center" | 8(4 4) | ||
|- | |- | ||
| align="center" | Gou Shoryuken (Fierce) || align="center" | 3 || align="center" | 12(10 | | align="center" | Gou Shoryuken (Fierce) || align="center" | 3 || align="center" | 12(10 1 1) || align="center" | 19(15 2 2) || align="center" | 12(4 4 4) | ||
|} | |} | ||
''Comments here'' | ''Comments here'' | ||
| Line 1,412: | Line 1,412: | ||
| align="center" | '''Move''' || align="center" | '''Motion''' || align="center" | '''Damage''' || align="center" | '''Blocked Damage''' || align="center" | '''Stun Damage''' || align="center" | '''Super Cancel''' | | align="center" | '''Move''' || align="center" | '''Motion''' || align="center" | '''Damage''' || align="center" | '''Blocked Damage''' || align="center" | '''Stun Damage''' || align="center" | '''Super Cancel''' | ||
|- | |- | ||
| align="center" | Hyakki Shuu || align="center" | F, D, DF | | align="center" | Hyakki Shuu || align="center" | F, D, DF K || align="center" | - || align="center" | - || align="center" | - || align="center" | No | ||
|} | |} | ||
'''Frame Data''' | '''Frame Data''' | ||
| Line 1,436: | Line 1,436: | ||
| align="center" | '''Move''' || align="center" | '''Motion''' || align="center" | '''Damage''' || align="center" | '''Blocked Damage''' || align="center" | '''Stun Damage''' || align="center" | '''Super Cancel''' | | align="center" | '''Move''' || align="center" | '''Motion''' || align="center" | '''Damage''' || align="center" | '''Blocked Damage''' || align="center" | '''Stun Damage''' || align="center" | '''Super Cancel''' | ||
|- | |- | ||
| align="center" | Hyakki Gouzan || align="center" | During F, D, DF | | align="center" | Hyakki Gouzan || align="center" | During F, D, DF K (No Input) || align="center" | 100 || align="center" | 13 || align="center" | 3 || align="center" | No | ||
|} | |} | ||
'''Frame Data''' | '''Frame Data''' | ||
| Line 1,460: | Line 1,460: | ||
| align="center" | '''Move''' || align="center" | '''Motion''' || align="center" | '''Damage''' || align="center" | '''Blocked Damage''' || align="center" | '''Stun Damage''' || align="center" | '''Super Cancel''' | | align="center" | '''Move''' || align="center" | '''Motion''' || align="center" | '''Damage''' || align="center" | '''Blocked Damage''' || align="center" | '''Stun Damage''' || align="center" | '''Super Cancel''' | ||
|- | |- | ||
| align="center" | Hyakki Goushou || align="center" | During F, D, DF | | align="center" | Hyakki Goushou || align="center" | During F, D, DF K press P || align="center" | 130 || align="center" | 16 || align="center" | 13 || align="center" | No | ||
|} | |} | ||
'''Frame Data''' | '''Frame Data''' | ||
| Line 1,484: | Line 1,484: | ||
| align="center" | '''Move''' || align="center" | '''Motion''' || align="center" | '''Damage''' || align="center" | '''Blocked Damage''' || align="center" | '''Stun Damage''' || align="center" | '''Super Cancel''' | | align="center" | '''Move''' || align="center" | '''Motion''' || align="center" | '''Damage''' || align="center" | '''Blocked Damage''' || align="center" | '''Stun Damage''' || align="center" | '''Super Cancel''' | ||
|- | |- | ||
| align="center" | Hyakki Goujin || align="center" | During F, D, DF | | align="center" | Hyakki Goujin || align="center" | During F, D, DF K press K || align="center" | 100 || align="center" | 13 || align="center" | 11 || align="center" | No | ||
|} | |} | ||
'''Frame Data''' | '''Frame Data''' | ||
| Line 1,508: | Line 1,508: | ||
| align="center" | '''Move''' || align="center" | '''Motion''' || align="center" | '''Damage''' || align="center" | '''Blocked Damage''' || align="center" | '''Stun Damage''' || align="center" | '''Super Cancel''' | | align="center" | '''Move''' || align="center" | '''Motion''' || align="center" | '''Damage''' || align="center" | '''Blocked Damage''' || align="center" | '''Stun Damage''' || align="center" | '''Super Cancel''' | ||
|- | |- | ||
| align="center" | Hyakki Gousai || align="center" | During F, D, DF | | align="center" | Hyakki Gousai || align="center" | During F, D, DF K press LP LK || align="center" | 110 || align="center" | - || align="center" | 15 || align="center" | No | ||
|} | |} | ||
'''Frame Data''' | '''Frame Data''' | ||
| Line 1,532: | Line 1,532: | ||
| align="center" | '''Move''' || align="center" | '''Motion''' || align="center" | '''Damage''' || align="center" | '''Blocked Damage''' || align="center" | '''Stun Damage''' || align="center" | '''Super Cancel''' | | align="center" | '''Move''' || align="center" | '''Motion''' || align="center" | '''Damage''' || align="center" | '''Blocked Damage''' || align="center" | '''Stun Damage''' || align="center" | '''Super Cancel''' | ||
|- | |- | ||
| align="center" | Ashura Senkuu (PP) || align="center" | F, D, DF | | align="center" | Ashura Senkuu (PP) || align="center" | F, D, DF PP || align="center" | - || align="center" | - || align="center" | - || align="center" | No | ||
|- | |- | ||
| align="center" | Ashura Senkuu (KK) || align="center" | F, D, DF | | align="center" | Ashura Senkuu (KK) || align="center" | F, D, DF KK || align="center" | - || align="center" | - || align="center" | - || align="center" | No | ||
|} | |} | ||
'''Frame Data''' | '''Frame Data''' | ||
| Line 1,562: | Line 1,562: | ||
| align="center" | '''Move''' || align="center" | '''Motion''' || align="center" | '''Damage''' || align="center" | '''Blocked Damage''' || align="center" | '''Stun Damage''' || align="center" | '''Super Cancel''' | | align="center" | '''Move''' || align="center" | '''Motion''' || align="center" | '''Damage''' || align="center" | '''Blocked Damage''' || align="center" | '''Stun Damage''' || align="center" | '''Super Cancel''' | ||
|- | |- | ||
| align="center" | Ashura Senkuu (PP) || align="center" | B, D, DB | | align="center" | Ashura Senkuu (PP) || align="center" | B, D, DB PP || align="center" | - || align="center" | - || align="center" | - || align="center" | No | ||
|- | |- | ||
| align="center" | Ashura Senkuu (KK) || align="center" | B, D, DB | | align="center" | Ashura Senkuu (KK) || align="center" | B, D, DB KK || align="center" | - || align="center" | - || align="center" | - || align="center" | No | ||
|} | |} | ||
'''Frame Data''' | '''Frame Data''' | ||
| Line 1,593: | Line 1,593: | ||
| align="center" | '''Super Art''' || align="center" | '''Super Art Name''' || align="center" | '''Super Art Stock''' || align="center" | '''Motion''' || align="center" | '''Damage''' || align="center" | '''Blocked Damage''' || align="center" | '''Stun Damage''' | | align="center" | '''Super Art''' || align="center" | '''Super Art Name''' || align="center" | '''Super Art Stock''' || align="center" | '''Motion''' || align="center" | '''Damage''' || align="center" | '''Blocked Damage''' || align="center" | '''Stun Damage''' | ||
|- | |- | ||
| align="center" | I || align="center" | Messatsu Gou Hadou || align="center" | 2 bars (112 each bar) || align="center" | QCF QCF | | align="center" | I || align="center" | Messatsu Gou Hadou || align="center" | 2 bars (112 each bar) || align="center" | QCF QCF P || align="center" | 290* || align="center" | 19** || align="center" | 0 | ||
|} | |} | ||
{| border="1em" cellspacing="0" width="25%" style="border: 1px solid #999; background: #F2F2F2;" | {| border="1em" cellspacing="0" width="25%" style="border: 1px solid #999; background: #F2F2F2;" | ||
|- | |- | ||
|* (55x5) | |* (55x5) 60 Damage is when all hits connect. | ||
|- | |- | ||
|** (3x5) | |** (3x5) 4 Damage is when all hits connect. | ||
|} | |} | ||
'''Frame Data''' | '''Frame Data''' | ||
| Line 1,616: | Line 1,616: | ||
| align="center" | '''Super Art''' || align="center" | '''Super Art Name''' || align="center" | '''Super Art Stock''' || align="center" | '''Motion''' || align="center" | '''Damage''' || align="center" | '''Blocked Damage''' || align="center" | '''Stun Damage''' | | align="center" | '''Super Art''' || align="center" | '''Super Art Name''' || align="center" | '''Super Art Stock''' || align="center" | '''Motion''' || align="center" | '''Damage''' || align="center" | '''Blocked Damage''' || align="center" | '''Stun Damage''' | ||
|- | |- | ||
| align="center" | I || align="center" | Tenma Gou Zankuu || align="center" | 2 bars (112 each bar) || align="center" | (Air) QCF QCF | | align="center" | I || align="center" | Tenma Gou Zankuu || align="center" | 2 bars (112 each bar) || align="center" | (Air) QCF QCF P || align="center" | 320* || align="center" | 25** || align="center" | 0 | ||
|} | |} | ||
{| border="1em" cellspacing="0" width="26%" style="border: 1px solid #999; background: #F2F2F2;" | {| border="1em" cellspacing="0" width="26%" style="border: 1px solid #999; background: #F2F2F2;" | ||
|- | |- | ||
|* (60x5) | |* (60x5) 80 Damage is when all hits connect. | ||
|- | |- | ||
|** (4x5) | |** (4x5) 5 Damage is when all hits connect. | ||
|} | |} | ||
'''Frame Data''' | '''Frame Data''' | ||
| Line 1,639: | Line 1,639: | ||
| align="center" | '''Super Art''' || align="center" | '''Super Art Name''' || align="center" | '''Super Art Stock''' || align="center" | '''Motion''' || align="center" | '''Damage''' || align="center" | '''Blocked Damage''' || align="center" | '''Stun Damage''' | | align="center" | '''Super Art''' || align="center" | '''Super Art Name''' || align="center" | '''Super Art Stock''' || align="center" | '''Motion''' || align="center" | '''Damage''' || align="center" | '''Blocked Damage''' || align="center" | '''Stun Damage''' | ||
|- | |- | ||
| align="center" | II || align="center" | Messatsu Gou Shoryu || align="center" | 2 bars (112 each bar) || align="center" | QCF QCF | | align="center" | II || align="center" | Messatsu Gou Shoryu || align="center" | 2 bars (112 each bar) || align="center" | QCF QCF P || align="center" | 390* || align="center" | 44** || align="center" | 14*** | ||
|} | |} | ||
{| border="1em" cellspacing="0" width="35%" style="border: 1px solid #999; background: #F2F2F2;" | {| border="1em" cellspacing="0" width="35%" style="border: 1px solid #999; background: #F2F2F2;" | ||
|- | |- | ||
|* (40x3) | |* (40x3) 50 120 110 100 Damage is when all hits connect. | ||
|- | |- | ||
|** (5 | |** (5 3)x2 15 7 6 Damage is when all hits connect. | ||
|- | |- | ||
|*** (0 | |*** (0 3)x2 9 5 5 Damage is when all hits connect. | ||
|} | |} | ||
'''Frame Data''' | '''Frame Data''' | ||
| Line 1,664: | Line 1,664: | ||
| align="center" | '''Super Art''' || align="center" | '''Super Art Name''' || align="center" | '''Super Art Stock''' || align="center" | '''Motion''' || align="center" | '''Damage''' || align="center" | '''Blocked Damage''' || align="center" | '''Stun Damage''' | | align="center" | '''Super Art''' || align="center" | '''Super Art Name''' || align="center" | '''Super Art Stock''' || align="center" | '''Motion''' || align="center" | '''Damage''' || align="center" | '''Blocked Damage''' || align="center" | '''Stun Damage''' | ||
|- | |- | ||
| align="center" | III || align="center" | Messatsu Gou Rasen || align="center" | 2 bars (112 each bar) || align="center" | QCF QCF | | align="center" | III || align="center" | Messatsu Gou Rasen || align="center" | 2 bars (112 each bar) || align="center" | QCF QCF K || align="center" | 390* || align="center" | 15** || align="center" | 0 | ||
|} | |} | ||
{| border="1em" cellspacing="0" width="80%" style="border: 1px solid #999; background: #F2F2F2;" | {| border="1em" cellspacing="0" width="80%" style="border: 1px solid #999; background: #F2F2F2;" | ||
|- | |- | ||
|* 70 | |* 70 (40x9) 130 Damage is when all hits connect. | ||
|- | |- | ||
|** This damage is when only 3 hits are blocked. Full blocked damage is 9 | |** This damage is when only 3 hits are blocked. Full blocked damage is 9 (3x9) 8 but its not possible to block more than 3 hits of this Super Art. | ||
|} | |} | ||
'''Frame Data''' | '''Frame Data''' | ||
| Line 1,687: | Line 1,687: | ||
| align="center" | '''Super Art''' || align="center" | '''Super Art Name''' || align="center" | '''Super Art Stock''' || align="center" | '''Motion''' || align="center" | '''Damage''' || align="center" | '''Blocked Damage''' || align="center" | '''Stun Damage''' | | align="center" | '''Super Art''' || align="center" | '''Super Art Name''' || align="center" | '''Super Art Stock''' || align="center" | '''Motion''' || align="center" | '''Damage''' || align="center" | '''Blocked Damage''' || align="center" | '''Stun Damage''' | ||
|- | |- | ||
| align="center" | III || align="center" | Messatsu Gou Senpuu || align="center" | 2 bars (112 each) || align="center" | (Air) QCF QCF | | align="center" | III || align="center" | Messatsu Gou Senpuu || align="center" | 2 bars (112 each) || align="center" | (Air) QCF QCF K || align="center" | 405* || align="center" | 15** || align="center" | 0 | ||
|} | |} | ||
{| border="1em" cellspacing="0" width="85%" style="border: 1px solid #999; background: #F2F2F2;" | {| border="1em" cellspacing="0" width="85%" style="border: 1px solid #999; background: #F2F2F2;" | ||
|- | |- | ||
|* 60 | |* 60 (55x3) 70 (40x4) 130 Damage is when all hits connect. | ||
|- | |- | ||
|** This damage is only when 2 hits are blocked. Full blocked damage is 8 | |** This damage is only when 2 hits are blocked. Full blocked damage is 8 (7x3) 9 (3x4) 8 but its not possible to block more than 2 hits of this Super Art. | ||
|} | |} | ||
'''Frame Data''' | '''Frame Data''' | ||
| Line 1,727: | Line 1,727: | ||
| align="center" | '''Super Art''' || align="center" | '''Super Art Name''' || align="center" | '''Super Art Stock''' || align="center" | '''Motion''' || align="center" | '''Damage''' || align="center" | '''Blocked Damage''' || align="center" | '''Stun Damage''' | | align="center" | '''Super Art''' || align="center" | '''Super Art Name''' || align="center" | '''Super Art Stock''' || align="center" | '''Motion''' || align="center" | '''Damage''' || align="center" | '''Blocked Damage''' || align="center" | '''Stun Damage''' | ||
|- | |- | ||
| align="center" | any || align="center" | Kongou Kokuretsu Zan || align="center" | Requieres MAX gauge (2 full bars/224) || align="center" | DDD | | align="center" | any || align="center" | Kongou Kokuretsu Zan || align="center" | Requieres MAX gauge (2 full bars/224) || align="center" | DDD PPP || align="center" | 640* || align="center" | 126** || align="center" | 26*** | ||
|} | |} | ||
{| border="1em" cellspacing="0" width="50%" style="border: 1px solid #999; background: #F2F2F2;" | {| border="1em" cellspacing="0" width="50%" style="border: 1px solid #999; background: #F2F2F2;" | ||
|- | |- | ||
|* 370(300) | |* 370(300) (55x2) 40 (55x2) (40x4) Damage is when all hits connect. | ||
|- | |- | ||
|** This damage is only when 6 hits are blocked. Full damage is ¿(7x2) | |** This damage is only when 6 hits are blocked. Full damage is ¿(7x2) 5 (7x2) (5x4)? | ||
|- | |- | ||
|*** 15(15) | |*** 15(15) (3x9) Damage is when all hits connect. | ||
|} | |} | ||
'''Frame Data''' | '''Frame Data''' | ||
| Line 1,757: | Line 1,757: | ||
*UOH | *UOH | ||
*F | *F MP | ||
*Air Hadouken | *Air Hadouken | ||
| Line 1,763: | Line 1,763: | ||
== Combos == | == Combos == | ||
=== Midscreen === | === Midscreen === | ||
You may add some moves such as; Dive Kick, J | You may add some moves such as; Dive Kick, J HP, J Tatsu, J Hadou, etc. before these combos for more damage/hits. | ||
==== Everyone ==== | ==== Everyone ==== | ||
| Line 1,783: | Line 1,783: | ||
*MP HP (Target Combo) | *MP HP (Target Combo) | ||
*C | *C MK, LK-Tatsu, Shoryu | ||
*S | *S HP, LK-Tatsu, Shoryu | ||
*C | *C MK, MK-Tatsu, MP-Shoryu (Does not work on Hugo) | ||
==== Specific to: ==== | ==== Specific to: ==== | ||
Chun-Li, Makoto, Q, Alex, Necro, Twelve, and Elena | Chun-Li, Makoto, Q, Alex, Necro, Twelve, and Elena | ||
*C | *C MK, MK-Tatsu, HP-Shoryu | ||
=== Hit Confirms === | === Hit Confirms === | ||
| Line 1,864: | Line 1,864: | ||
=== Corner === | === Corner === | ||
You can add Akuma's dive kick or a J | You can add Akuma's dive kick or a J HP before these combos for more damage. | ||
*C | *C MK, Tatsu, Shoryu xx SA1, Shoryu | ||
*C | *C MK, Tatsu, Shoryu xx SA1, SA1, Shoryu | ||
== Frame Data == | == Frame Data == | ||
*All Framedatas in this section are taken from [http://ensabahnur.free.fr/Baston/index.php?page=gameChars | *All Framedatas in this section are taken from [http://ensabahnur.free.fr/Baston/index.php?page=gameChars | ||
Revision as of 10:07, 21 December 2007
free kyocera energi ringtone de movistar ringtone ringtones for palm treo boltblue ringtones samsung ach 650 ringtones fort minor ringtone download free nextel i860 ringtone samsung c100 ringtone eminem polyphonic ringtones free sprint pcs ringtone ericsson free ringtone sony t226 3 video mobile ringtones free power ranger ringtones treo 600 mp3 ringtones how do i convert mp3 songs into nextel ringtones lovers and friends ringtone magix ringtone maker no monthly fee for ringtone chapelle dave ringtone 2280 free nokia ringtone free nokia 6800 polyphonic ringtone asian ringtone free keypad mobiles nokia ringtone free cell phone background and ringtone free audiovox verizon wireless ringtone free lg vx6000 phone ringtone job for a cowboy ringtones how to make ringtones for nextel i730 ztango ringtones free boost mobile i215 ringtones general hospital theme song ringtone bon jovi polyphonic ringtones free ringtone telugu free ringtones for samsung free keypress ringtones for nokia 3310 nextel i95 ringtone free i95 ringtone and wallpaper snoop dog ringtones ringtone v173 3390 able download free nokia ringtone free i450 ringtone most popular ringtones 5156 free model nokia polyphonic ringtone saaki ringtones verizon ringtones for lg phones free razr ringtone v3c nokia free ringtones downloads crazy chicken ringtones oar ringtone sms ringtones nokia 24 theme ringtones ringtone mmf free ringtone for cingular wireless sweety chick ringtones ringtone for verizon phones crack for mp3 to ringtone gold free ringtone for samsung r225 lg 4020 ringtone usb data cable classic telephone ringtone a670 ringtone samsung verizon nokia ringtone composer keypress polyphonic ringtones sagem free cellular nextel phone ringtone free mp3 nokia ringtones free real ringtone verizon voice wireless india nokia ringtone free ringtone for a motorola v60i alltel download free ringtone for lg phone free verizon ringtones lg vx4500 3650 free nokia ringtone alice in chain ringtone free martian marvin ringtone nokia 3595 ringtone without gspr service addams family ringtones free country ringtone motorola c341 ringtone imperial march ringtones mp3 hip hop ringtones siemens me45 ringtones final fantasy x ringtone big fish reel ringtone bone thug and harmony ringtone get free nokia monophonic ringtone free treo ringtone download 2260 nokia ringtones composer ringtones free free sanyo cell phone ringtones chorlton and the wheelies polyphonic ringtone brooks and dunn ringtones iowa ringtone site wireless ringtones for motorola v60i tracfones free ringtones nextel i710 ringtones nextel phones rick james ringtone free ringtone downloads for verizon k404 ringtones the format ringtones free motorola v120c ringtones free verizon real ringtones bell mobility ringtone 332 alcatel fone free ringtone free lg lx5550 ringtone i myself ringtone touch ericsson keypress ringtone sony t600 make songs into ringtones bullet ringtone valentine celcom polyphonic ringtone free get monophonic ringtone ericsson music real ringtone sony z520a a560 ringtone samsung sph nextel ringtones for mp3 to midi ringtone free real voice ringtones for sprint jacques your body ringtones kottonmouth kings ringtones 4 5165 free nokia ringtone free polyphonic ringtone in the united state metropcsringtones jezzy ringtone young lou and andy ringtone 70s ringtone show that dragostea din tei ringtone verizon download free ringtone voice beautiful blunt james ringtone youre absolutely free downloadable ringtone absolutely free motorola ringtone butterfly ringtone c115 gratis motorola ringtone follow follow composable nokia ringtone downloadable ringtones for motorola siemens ringtones nz message phone ringtone text motorola v180 ringtones download el chavo del ocho ringtone latest bollywood midi ringtones free ringtones.com verizon super mario brother ringtone mp3 ringtone nokia 3650 free i560 ringtone manual motorola ringtone v66 imelody ringtone format cast ringtone v ringtonecomposer crack lg polyphonic ringtones free jeannie crowded ringtone free i205 ringtones one winged angel ringtone corridos ringtones ringtones nec e616v funny ringtones free ringtone samsung sgh t509 totally free polyphonic ringtones shakira ringtones free download ringtone for motorola v600 download ringtone for motorola v400 composer nokia ringtone free i325 nextel ringtone for the love of money ringtone cbs ncaa ringtone 7100 blackberry free ringtone dd news ringtone cingular free link ptr.draze.com ptr.draze.com ringtone site mudvayne ringtones t230 sony ericsson ringtones alltel buy ringtone sprint downloadable ringtone cell free phone ringtone samsung tamil mono ringtone c200 free motorola ringtone best cell cellular cool phone ringtone ringtone ringtones.com malayalam ringtones composer my cricket ringtones.com free download hindi midi ringtones unlimited free ringtone for cell phone free wap sites for ringtones mac maker ringtone nokia 7260 ringtone download 7135 kyocera ringtone t mobile jingle ringtone ringtone samsung sgh t809 ringtone for nokia track phone duke of hazzard ringtone verizon matrix ringtones girls just wanna have fun ringtones eastenders ringtones free samsung s307 ringtone hindi film ringtone free sprint sanyo ringtone jumpster ringtones e 40 ringtones animal ringtone sound urban ringtones a650 ringtones free ringtone for alltel nokia phone hindi ringtones for nokia 3220 addiction janes ringtone big ben ringtone motorola v 400 ringtones country mp3 ringtones imelody ringtones motorola
Introduction
When playing Akuma the basic goal is to use his superior zoning ability in order to control your opponent’s options, and at the same time, minimizing the risk of getting hit yourself.
It is very important to note (if you haven't noticed already) that Akuma has THE WORST defense rating of the characters in 3S. He is also tied with Remy for having the smallest stun bar of all of the characters 3S.
You should also note that Akuma's supers are all the same length, and that he has no EX moves. All this was done to counter balance his incredible offense and mix-up. Many people are turned away from Akuma because they see him as being too inconsistent due to his stamina, but I hope to reassure you that by making smart decisions during the match, Akuma has no holes at all in his game.
Specific Character Information
- Stamina: 950
- Stun Bar Length (in pixels): 56
- Stun Bar Recovery (frames it takes to recover 1 pixel): 23
- Taunt: Increases damage for the next hit/combo by 43.8% and increases stun damage for the next hit/combo by 28.1%. One taunt is the maximum.
- Best Kara-Throw: F MP
Character Colors
Moves List
Basic Moves
| Move | Convention |
| Forward | F |
| Back | B |
| Crouch | C / D |
| Up | U |
| Jump | J |
| Jump Forward | JF |
| Jump Backwards | JB |
| Super Jump | D-U |
| Super Jump Forward | D-UF |
| Super Jump Backwards | D-UB |
| Dash Forward | FF |
| Dash Backwards | BB |
| Quarter Circle Forward | QCF |
| Quarter Circle Backwards | QCB |
| Half Circle Backwards | HCB |
| Forward, Down, Down-Forward | F, D, DF / DP |
| Back, Down, Down-Backwards | B, D, DB |
| Guard (High) | B when enemy is attacking |
| Guard (Low) | DB when enemy is attacking |
| Parry (High) | Tap F when about to take a hit |
| Parry (Low) | Tap D when about to take a hit |
| Parry (Air) | Tap F in air when about to take a hit |
| Red Parry | Execute parry after blocking a hit in a combo |
| Punch (Any) | P |
| Kick (Any) | K |
| 2 Punches | PP |
| 2 Kicks | KK |
| 3 Punches | PPP |
| 3 Kicks | KKK |
| Jab | LP |
| Strong | MP |
| Fierce | HP |
| Short | LK |
| Forward | MK |
| Roundhouse | HK |
| Universal Overhead | UOH |
Normal Moves
| Move | Motion |
| Jab | LP |
| Strong | MP |
| Fierce | HP |
| Close Jab | (Close to opponent) LP |
| Close Strong | (Close to opponent) MP |
| Close Fierce | (Close to opponent) HP |
| Short | LK |
| Forward | MK |
| Roundhouse | HK |
| Close Forward | (Close to opponent) MK |
| Close Roundhouse | (Close to opponent) HK |
| Jumping Jab | (Air) LP |
| Jumping Strong | (Air) MP |
| Jumping Fierce | (Air) HP |
| Neutral Jumping Fierce | (Air) HP |
| Jumping Short | (Air) LK |
| Jumping Forward | (Air) MK |
| Neutral Jumping Forward | (Air) MK |
| Jumping Roundhouse | (Air) HK |
| Neutral Jumping Roundhouse | (Air) HK |
| Overhead | MP MK |
| Taunt | HP HK |
Throws
| Move Name | Motion |
| Seoi Nage | LP LK or F LP LK |
| Tomoe Nage | B LP LK |
Command Normals
| Move Name | Motion |
| Zugai Hasatsu | F MP |
| Crouching Jab | D LP |
| Crouching Strong | D MP |
| Crouching Fierce | D HP |
| Crouching Short | D LK |
| Crouching Forward | D MK |
| Crouching Roundhouse | D HK |
| Tenma Kuujin Kyaku | Jump Forward, D MK |
Target Combos
- close standing MP -> HP
Special Moves
| Move Name | Motion |
| Gou Hadouken | QCF P |
| Zankuu Hadouken | (Air) QCF P |
| Shakunestu Hadouken | HCB P |
| Tatsumaki Zankuukyaku | QCB K |
| Tatsumaki Zankuukyaku (Air) | (Air) QCB K |
| Gou Shoryuken | F, D, DF P |
| Hyakki Shuu | F, D, DF K |
| Hyakki Gouzan | During F, D, DF K (No input) |
| Hyakki Goushou | During F, D, DF K, press P |
| Hyakki Goujin | During F, D, DF K, press K |
| Hyakki Gousai | During F, D, DF K, press LP LK when directly on top of opponent |
| Ashura Senkuu | F, D, DF KK or F, D, DF KKK |
| Ashura Senkuu | F, D, DF PP or F, D, DF PPP |
| Ashura Senkuu | B ,D ,DB KK or B ,D ,DB KKK |
| Ashura Senkuu | B ,D ,DB PP or B ,D ,DB PPP |
EX Moves
Akuma has no EX moves.
Super Arts
| Num. | Super Art Name | Motion | Super Bars |
| I | Messatsu Gou Hadou | QCF QCF P | 2 stocks |
| I | Tenma Gou Zankuu | (Air) QCF QCF P | 2 stocks |
| II | Messatsu Gou Shoryuu | QCF QCF P | 2 stocks |
| III | Messatsu Gou Rasen | QCF QCF K | 2 stocks |
| III | Messatsu Gou Senpuu | (Air) QCF QCF K | 2 stocks |
| any | Shun Goku Satsu | LP LP F LK HP | MAX required |
| any | Kongou Kokuretsu Zan | DDD PP or DDD PPP | MAX required |
Move Analisys
- All those sprites are taken from the site http://www.zweifuss.com/index.htm
- All Framedatas in "Move Analisys" section are taken from Game Restaurant
Please note that the images show in this section are for the 1st frame it hits, so this means the opponent is taking the hit in the image shown on the move. I use the 1st frame of every move (except taunt, dash, jump, wakeup and 2nd throw image sprites) because you will see the maximum range of every attack (mostly of the attacks). Note also that those images are ACCURATE, they are exactly the first frame it hits, so enemy takes damage but they still dont make the "pain" frame.
General
- Move: Move name
- Motion: What you must do to execute the move
- Damage: Damage it does (in pixels)
- Stun Damage: Stun Damage it does (in pixels)
- Chains into itself: If you can combo into the same movement
- Special Cancel: If you can cancel the move into a Special Move
- Super Cancel: If you can cancel the move into a Super Art
- Throw Range: Range of the throw (in pixels)
- Num.: Super Art number
- Super Art: Super Art name
- Super Art Stock: Number of Gauge Bars the Super Art have, also the lenght of each bar (in pixels)
Frame Data
- Startup: Number of frames it takes to start the move
- Hit: Number of frames that can hit the opponent
- Recovery: Number of frames it takes to recover from the move
- Blocked Advantage: Number of frames you are in advantage/disvantage after opponent have been blocked the hit
- Hit Advantage: Number of frames you are in advantage/disvantage after opponent have been take the hit
- Crouching Hit Advantage: Number of frames you are in advantage/disvantage after opponent have been take the hit while he's crouching
- # : You have # frames of advantage
- - # : You have # frames of disvantage
- # ~ # : Advantage/disvantage can vary from # to #
- Down: Enemy gets knocked down
- Guard: How opponent must guard the move, High (H), Low (L) or both (HL)
- Parry: How opponent must parry the move, High (H), Low (L) or both (HL)
Gauge Increase
- Miss: Gauge you gain if you miss the move (in pixels)
- Blocked: Gauge you gain if the move gets blocked (in pixels)
- Hit: Gauge you gain if you hit the opponent with the move (in pixels)
- Parry: Gauge opponent gains when he parry the move (in pixels)
Basic Moves
| Move | Start-up frames | In ground frames | In air frames | Recovery frames | Total frames |
|---|---|---|---|---|---|
| Dash Forward | 2 | 8 | - | 6 (4) | 16 (14) |
Comments here
| Move | Start-up frames | In ground frames | In air frames | Recovery frames | Total frames |
|---|---|---|---|---|---|
| Dash Backwards | 4 | 4 | - | 6 | 14 |
Comments here
| Move | Motion | Startup Frames |
| Jump | BU or U or FU | 3 |
Comments here
| Move | Motion | Startup Frames |
| Super Jump | DBU or DU or DFU | 5 |
Comments here
| Move | Motion | Frames |
| Normal Wakeup | - | 77 |
Comments here
| Move | Motion | Frames |
| Tech Wakeup | Tap D when hitting the ground | 50 |
Comments here
| Move | Motion | Frames | Gauge Increase |
| Taunt | HP HK | 66 | 4(6) |
Comments here
| Move | Motion |
| Parry (High) | Tap F when about taking a hit |
| Parry (Low) | Tap D when about taking a hit |
| Parry (Air) | Tap F in air when about taking a hit |
Frame Data
| Move | Frames you're frozen | Frames opponent is frozen | Frame Advantage when parry is successful | Frames before you can try another parry |
| Parry (High) | 16 | 20 | 4(LP/LK) 3(MP/MK) 2(HP/HK) 0(Special/Super) -16(Fireball) | 24(19 when attack comes from the air)*,** |
| Parry (Low) | 16 | 20? | 4(LP/LK) 3(MP/MK) 2(HP/HK) 0(Special/Super) -16(Fireball) | 24(19 when attack comes from the air)*,** |
| Parry (Air) | 16 | 20? | 4(LP/LK) 3(MP/MK) 2(HP/HK) 0(Special/Super) -16(Fireball) | 21(19 when attack comes from the air)*,** |
| * (If a parry attempt is successful, the 19/21/24 frame restriction is taken away and you can attempt another parry immediately) |
| ** (If another attack connects within 2 frames of your parry, it will automatically be parried) |
Gauge Increase
| Move | Gauge Increase |
| Parry (High) | 4*** |
| Parry (Low) | 4*** |
| Parry (Air) | 4*** |
| *** (You gain 4 of gauge for whatever attack parried, and for whatever hit you parry during multihit attack) |
You can buffer any motion during High or Low parry, but NOT during Air parry.
- Parry information is taken from Shoryuken Forums, more exactly, from user JinraiPVC. Thanks for this information dude
Normal Moves
| Move | Motion | Damage | Stun Damage | Chains into itself | Special Cancel | Super Cancel |
| Far Jab | LP | 20 | 3 | Yes | Yes | Yes |
Frame Data
| Startup | Hit | Recovery | Blocked Advantage | Hit Advantage | Crouching Hit Advantage | Guard | Parry |
| 4 | 3 | 4 | 4 | 4 | 4 | HL | HL |
Gauge Increase
| Miss | Blocked | Hit | Parry (Gauge for opponent) |
| 0 | 1 | 2 | 4 |
Comments here
| Move | Motion | Damage | Stun Damage | Chains into itself | Special Cancel | Super Cancel |
| Far Strong | MP | 105 | 11 | No | Yes | Yes |
Frame Data
| Startup | Hit | Recovery | Blocked Advantage | Hit Advantage | Crouching Hit Advantage | Guard | Parry |
| 5 | 4 | 9 | 4 | 5 | 5 | HL | H |
Gauge Increase
| Miss | Blocked | Hit | Parry (Gauge for opponent) |
| 2 | 4 | 8 | 4 |
Comments here
| Move | Motion | Damage | Stun Damage | Chains into itself | Special Cancel | Super Cancel |
| Far Fierce | HP | 140 | 15 | No | No | No |
Frame Data
| Startup | Hit | Recovery | Blocked Advantage | Hit Advantage | Crouching Hit Advantage | Guard | Parry |
| 8 | 5 | 22 | -6 | -4 | -2 | HL | H |
Gauge Increase
| Miss | Blocked | Hit | Parry (Gauge for opponent) |
| 3 | 6 | 14 | 4 |
Comments here
| Move | Motion | Damage | Stun Damage | Chains into itself | Special Cancel | Super Cancel |
| Close Jab | (Close to opponent) LP | 30 | 3 | No | Yes | Yes |
Frame Data
| Startup | Hit | Recovery | Blocked Advantage | Hit Advantage | Crouching Hit Advantage | Guard | Parry |
| 3 | 3 | 5 | 3 | 3 | 3 | HL | HL |
Gauge Increase
| Miss | Blocked | Hit | Parry (Gauge for opponent) |
| 0 | 1 | 2 | 4 |
Comments here
| Move | Motion | Damage | Stun Damage | Chains into itself | Special Cancel | Super Cancel |
| Close Strong | (Close to opponent) MP | 115 | 7 | No | Yes | Yes |
Frame Data
| Startup | Hit | Recovery | Blocked Advantage | Hit Advantage | Crouching Hit Advantage | Guard | Parry |
| 5 | 4 | 10 | 1 | 2 | 3 | HL | H |
Gauge Increase
| Miss | Blocked | Hit | Parry (Gauge for opponent) |
| 2 | 4 | 8 | 4 |
Comments here
| Move | Motion | Damage | Stun Damage | Chains into itself | Special Cancel | Super Cancel |
| Close Fierce | (Close to opponent) HP | 135 | 15 | No | Yes | Yes |
Frame Data
| Startup | Hit | Recovery | Blocked Advantage | Hit Advantage | Crouching Hit Advantage | Guard | Parry |
| 4 | 4 | 17 | -4 | -2 | 0 | HL | H |
Gauge Increase
| Miss | Blocked | Hit | Parry (Gauge for opponent) |
| 3 | 6 | 14 | 4 |
Comments here
| Move | Motion | Damage | Stun Damage | Chains into itself | Special Cancel | Super Cancel |
| Short | LK | 40 | 3 | No | No | No |
Frame Data
| Startup | Hit | Recovery | Blocked Advantage | Hit Advantage | Crouching Hit Advantage | Guard | Parry |
| 4 | 4 | 7 | 2 | 2 | 2 | HL | HL |
Gauge Increase
| Miss | Blocked | Hit | Parry (Gauge for opponent) |
| 0 | 1 | 2 | 4 |
Comments here
| Move | Motion | Damage | Stun Damage | Chains into itself | Special Cancel | Super Cancel |
| Far Forward | MK | 95 | 7 | No | No | No |
Frame Data
| Startup | Hit | Recovery | Blocked Advantage | Hit Advantage | Crouching Hit Advantage | Guard | Parry |
| 5 | 5 | 17 | -7 | -6 | -5 | HL | H |
Gauge Increase
| Miss | Blocked | Hit | Parry (Gauge for opponent) |
| 2 | 4 | 8 | 4 |
Comments here
| Move | Motion | Damage | Stun Damage | Chains into itself | Special Cancel | Super Cancel |
| Far Roundhouse | HK | 145 | 11 | No | No | No |
Frame Data
| Startup | Hit | Recovery | Blocked Advantage | Hit Advantage | Crouching Hit Advantage | Guard | Parry |
| 9 | 5 | 20 | -7 | -5 | -3 | HL | H |
Gauge Increase
| Miss | Blocked | Hit | Parry (Gauge for opponent) |
| 3 | 6 | 14 | 4 |
Comments here
| Move | Motion | Damage | Stun Damage | Chains into itself | Special Cancel | Super Cancel |
| Close Forward | (Close to opponent) MK | 115 | 9 | No | Yes | Yes |
Frame Data
| Startup | Hit | Recovery | Blocked Advantage | Hit Advantage | Crouching Hit Advantage | Guard | Parry |
| 4 | 5 | 11 | 2 | 4 | 6 | HL | H |
Gauge Increase
| Miss | Blocked | Hit | Parry (Gauge for opponent) |
| 2 | 4 | 8 | 4 |
Comments here
| Move | Motion | Damage | Stun Damage | Chains into itself | Special Cancel | Super Cancel |
| Close Roundhouse | (Close to opponent) HK | 120 80(40) | 13 11(7) | No | No | No |
Frame Data
| Startup | Hit | Recovery | Blocked Advantage | Hit Advantage | Crouching Hit Advantage | Guard | Parry |
| 5/7 | 3/5 | 19 | -6 | -4 | -2 | H/L | H/L |
Gauge Increase
| Miss | Blocked | Hit | Parry (Gauge for opponent) |
| 4 | 8 | 16 | 8(4 4) |
Comments here
| Move | Motion | Damage | Stun Damage | Chains into itself | Special Cancel | Super Cancel |
| Jump Jab | (Air) LP | 40(50 if neutral jump) | 7 | No | No | No |
Frame Data
| Startup | Hit | Recovery | Blocked Advantage | Hit Advantage | Crouching Hit Advantage | Guard | Parry |
| 4 | Until landing | - | - | - | - | H | H |
Gauge Increase
| Miss | Blocked | Hit | Parry (Gauge for opponent) |
| 0 | 1 | 2 | 4 |
Comments here
| Move | Motion | Damage | Stun Damage | Chains into itself | Special Cancel | Super Cancel |
| Jump Strong | (Air) MP | 90 | 9 | No | No | No |
Frame Data
| Startup | Hit | Recovery | Blocked Advantage | Hit Advantage | Crouching Hit Advantage | Guard | Parry |
| 5 | 5 | - | - | - | - | H | H |
Gauge Increase
| Miss | Blocked | Hit | Parry (Gauge for opponent) |
| 2 | 4 | 8 | 4 |
Comments here
| Move | Motion | Damage | Stun Damage | Chains into itself | Special Cancel | Super Cancel |
| Jump Fierce | (Air) HP | 130 | 13 | No | No | No |
Frame Data
| Startup | Hit | Recovery | Blocked Advantage | Hit Advantage | Crouching Hit Advantage | Guard | Parry |
| 6 | 4 | - | - | - | - | H | H |
Gauge Increase
| Miss | Blocked | Hit | Parry (Gauge for opponent) |
| 3 | 6 | 14 | 4 |
Comments here
| Move | Motion | Damage | Stun Damage | Chains into itself | Special Cancel | Super Cancel |
| Neutral Jump Fierce | (Air) HP | 130 | 13 | No | No | No |
Frame Data
| Startup | Hit | Recovery | Blocked Advantage | Hit Advantage | Crouching Hit Advantage | Guard | Parry |
| 6 | 3 | - | - | - | - | H | H |
Gauge Increase
| Miss | Blocked | Hit | Parry (Gauge for opponent) |
| 3 | 6 | 14 | 4 |
Comments here
| Move | Motion | Damage | Stun Damage | Chains into itself | Special Cancel | Super Cancel |
| Jump Short | (Air) LK | 40 | 5 | No | No | No |
Frame Data
| Startup | Hit | Recovery | Blocked Advantage | Hit Advantage | Crouching Hit Advantage | Guard | Parry |
| 4 | 10(19 if neutral jump) | - | - | - | - | H | H |
Gauge Increase
| Miss | Blocked | Hit | Parry (Gauge for opponent) |
| 0 | 1 | 2 | 4 |
Comments here
| Move | Motion | Damage | Stun Damage | Chains into itself | Special Cancel | Super Cancel |
| Jump Forward | (Air) MK | 80 | 7 | No | No | No |
Frame Data
| Startup | Hit | Recovery | Blocked Advantage | Hit Advantage | Crouching Hit Advantage | Guard | Parry |
| 5 | 6 | - | - | - | - | H | H |
Gauge Increase
| Miss | Blocked | Hit | Parry (Gauge for opponent) |
| 2 | 4 | 8 | 4 |
Comments here
| Move | Motion | Damage | Stun Damage | Chains into itself | Special Cancel | Super Cancel |
| Neutral Jump Forward | (Air) MK | 80 | 7 | No | No | No |
Frame Data
| Startup | Hit | Recovery | Blocked Advantage | Hit Advantage | Crouching Hit Advantage | Guard | Parry |
| 5 | 6 | - | - | - | - | H | H |
Gauge Increase
| Miss | Blocked | Hit | Parry (Gauge for opponent) |
| 2 | 4 | 8 | 4 |
Comments here
| Move | Motion | Damage | Stun Damage | Chains into itself | Special Cancel | Super Cancel |
| Jump Roundhouse | (Air) HK | 120 | 11 | No | No | No |
Frame Data
| Startup | Hit | Recovery | Blocked Advantage | Hit Advantage | Crouching Hit Advantage | Guard | Parry |
| 6 | 4 | - | - | - | - | H | H |
Gauge Increase
| Miss | Blocked | Hit | Parry (Gauge for opponent) |
| 3 | 6 | 14 | 4 |
Comments here
| Move | Motion | Damage | Stun Damage | Chains into itself | Special Cancel | Super Cancel |
| Neutral Jump Roundhouse | (Air) HK | 120 | 11 | No | No | No |
Frame Data
| Startup | Hit | Recovery | Blocked Advantage | Hit Advantage | Crouching Hit Advantage | Guard | Parry |
| 6 | 5 | - | - | - | - | H | H |
Gauge Increase
| Miss | Blocked | Hit | Parry (Gauge for opponent) |
| 3 | 6 | 14 | 4 |
Comments here
| Move | Motion | Damage | Stun Damage | Chains into itself | Special Cancel | Super Cancel |
| Universal Overhead | MP MK | 40 | 3 | No | No | No |
Frame Data
| Startup | Hit | Recovery | Blocked Advantage | Hit Advantage | Crouching Hit Advantage | Guard | Parry |
| 15 | 8 | 7 | -5~ 7 | 0~ 8 | 1~ 9 | H | H |
Gauge Increase
| Miss | Blocked | Hit | Parry (Gauge for opponent) |
| 0 | 1 | 2 | 4 |
Comments here
Throws
| Move | Motion | Damage | Stun Damage | Throw Range |
| Seoi Nage | LP LK or F LP LK | 110 | 9 | 24 |
Frame Data
| Startup | Hit | Recovery | Blocked Advantage | Hit Advantage | Crouching Hit Advantage | Guard | Parry |
| 2 | 1 | 21 | - | - | - | LP LK | - |
Gauge Increase
| Miss | Blocked | Hit |
| 0 | 7 (for the player who blocked) | 7 |
Comments here
| Move | Motion | Damage | Stun Damage | Throw Range |
| Tomoe Nage | B LP LK | 110 | 15 | 24 |
Frame Data
| Startup | Hit | Recovery | Blocked Advantage | Hit Advantage | Crouching Hit Advantage | Guard | Parry |
| 2 | 1 | 21 | - | - | - | LP LK | - |
Gauge Increase
| Miss | Blocked | Hit |
| 0 | 7 (for the player who blocked) | 7 |
Comments here
Command Normals
| Move | Motion | Damage | Stun Damage | Chains into itself | Special Cancel | Super Cancel |
| Zugai Hasatsu | F MP | 40 50 | 9 7 | No | No | No |
Frame Data
| Startup | Hit | Recovery | Blocked Advantage | Hit Advantage | Crouching Hit Advantage | Guard | Parry |
| 14 | 1 | 22 | -1 | 1 | 3 | H/H | H/H |
Gauge Increase
| Miss | Blocked | Hit | Parry (Gauge for opponent) |
| 2 0 | 2 1 | 7 2 | 4 4 |
Comments here
| Move | Motion | Damage | Stun Damage | Chains into itself | Special Cancel | Super Cancel |
| Crouch Jab | D LP | 20 | 3 | No | Yes | Yes |
Frame Data
| Startup | Hit | Recovery | Blocked Advantage | Hit Advantage | Crouching Hit Advantage | Guard | Parry |
| 4 | 3 | 4 | 4 | 4 | 4 | HL | HL |
Gauge Increase
| Miss | Blocked | Hit | Parry (Gauge for opponent) |
| 0 | 1 | 2 | 4 |
Comments here
| Move | Motion | Damage | Stun Damage | Chains into itself | Special Cancel | Super Cancel |
| Crouch Strong | D MP | 95 | 7 | No | Yes | Yes |
Frame Data
| Startup | Hit | Recovery | Blocked Advantage | Hit Advantage | Crouching Hit Advantage | Guard | Parry |
| 5 | 4 | 7 | 3 | 4 | 5 | HL | HL |
Gauge Increase
| Miss | Blocked | Hit | Parry (Gauge for opponent) |
| 2 | 4 | 8 | 4 |
Comments here
| Move | Motion | Damage | Stun Damage | Chains into itself | Special Cancel | Super Cancel |
| Crouch Fierce | D HP | 135 | 11 | No | Yes | Yes |
Frame Data
| Startup | Hit | Recovery | Blocked Advantage | Hit Advantage | Crouching Hit Advantage | Guard | Parry |
| 5 | 5 | 19 | -8 | -6 | -4 | HL | HL |
Gauge Increase
| Miss | Blocked | Hit | Parry (Gauge for opponent) |
| 3 | 6 | 14 | 4 |
Comments here
| Move | Motion | Damage | Stun Damage | Chains into itself | Special Cancel | Super Cancel |
| Crouch Short | D LK | 20 | 3 | Yes | Yes | Yes |
Frame Data
| Startup | Hit | Recovery | Blocked Advantage | Hit Advantage | Crouching Hit Advantage | Guard | Parry |
| 5 | 3 | 7 | 1 | 1 | 1 | L | L |
Gauge Increase
| Miss | Blocked | Hit | Parry (Gauge for opponent) |
| 0 | 1 | 2 | 4 |
Comments here
| Move | Motion | Damage | Stun Damage | Chains into itself | Special Cancel | Super Cancel |
| Crouch Forward | D MK | 90 | 3 | No | Yes | Yes |
Frame Data
| Startup | Hit | Recovery | Blocked Advantage | Hit Advantage | Crouching Hit Advantage | Guard | Parry |
| 6 | 5 | 16 | -3 | -2 | -1 | L | L |
Gauge Increase
| Miss | Blocked | Hit | Parry (Gauge for opponent) |
| 2 | 4 | 8 | 4 |
Comments here
| Move | Motion | Damage | Stun Damage | Chains into itself | Special Cancel | Super Cancel |
| Crouch Roundhouse | D HK | 135 | 3 | No | No | No |
Frame Data
| Startup | Hit | Recovery | Blocked Advantage | Hit Advantage | Crouching Hit Advantage | Guard | Parry |
| 7 | 5 | 25 | -15 | Down | Down | L | L |
Gauge Increase
| Miss | Blocked | Hit | Parry (Gauge for opponent) |
| 3 | 6 | 14 | 4 |
Comments here
| Move | Motion | Damage | Stun Damage | Chains into itself | Special Cancel | Super Cancel |
| Tenma Kuujin Kyaku | (Air) D MK | 90 | 11 | No | No | No |
Frame Data
| Startup | Hit | Recovery | Blocked Advantage | Hit Advantage | Crouching Hit Advantage | Guard | Parry |
| 8 | Until landing | 3 | - | - | - | H | H |
Gauge Increase
| Miss | Blocked | Hit | Parry (Gauge for opponent) |
| 2 | 4 | 8 | 4 |
Comments here
Target Combo
| Move | Motion | Damage | Stun Damage | Chains into itself | Special Cancel | Super Cancel |
| Target Combo | (Close standing) MP->HP | 115 80 | 7 3 | No/No | Yes/No | Yes/No |
Frame Data
| Startup | Hit | Recovery | Blocked Advantage | Hit Advantage | Crouching Hit Advantage | Guard | Parry |
| 5 | - | - | -12 | -10 | -8 | HL/HL | H/H |
Gauge Increase
| Miss | Blocked | Hit | Parry (Gauge for opponent) |
| 2 ? | 4 1 | 8 1 | 4 4 |
Comments here
Special Moves
Please note that in this section you will see mainly 3 images for the special moves, this means the image on the left its done with LP (or LK), the image on the center its done with MP (or MK), and the image on the right its done with HP (or HK). Also its the same "rule" as the sections above, its the 1rst frame it hits for every of the moves.
| Move | Motion | Damage | Blocked Damage | Stun Damage | Super Cancel |
| Gou Hadouken | QCF P | 60 | 4 | 3 | Yes |
Frame Data
| Startup | Hit | Recovery | Blocked Advantage | Hit Advantage | Crouching Hit Advantage | Guard | Parry |
| 7 | 1 | 38 | -11 | -10 | -10 | HL | H |
Gauge Increase
| Miss | Blocked | Hit | Parry (Gauge for opponent) |
| 0 | 1 | 1 | 4 |
Comments here
| Move | Motion | Damage | Blocked Damage | Stun Damage | Super Cancel |
| Zankuu Hadouken | (Air) QCF P | 60 | 4 | 3 | Yes |
Frame Data
| Startup | Hit | Recovery | Blocked Advantage | Hit Advantage | Crouching Hit Advantage | Guard | Parry |
| 11 | 1 | 7 | - | - | - | HL | H |
Gauge Increase
| Miss | Blocked | Hit | Parry (Gauge for opponent) |
| 0 | 1 | 1 | 4 |
Comments here
| Move | Motion | Damage | Blocked Damage | Stun Damage | Super Cancel |
| Shakunetsu Hadouken (Jab) | HCB LP | 50 | 3 | 3 | Yes |
| Shakunetsu Hadouken (Strong) | HCB MP | 100(50 50) | 3 3 | 3 3 | Yes |
| Shakunetsu Hadouken (Fierce) | HCB HP | 150(50 50 50) | 3 3 3 | 3 3 3 | Yes |
Frame Data
| Move | Startup | Hit | Recovery | Blocked Advantage | Hit Advantage | Crouching Hit Advantage | Guard | Parry |
| Shakunetsu Hadouken (Jab) | 13 | 1 | 42 | -23 | Down | Down | HL | H |
| Shakunetsu Hadouken (Strong) | 17 | 1 | 43 | -18 | Down | Down | HL/HL | H/H |
| Shakunetsu Hadouken (Fierce) | 21 | 1 | 44 | -15 | Down | Down | HL/HL/HL | H/H/H |
Gauge Increase
| Move | Miss | Blocked | Hit | Parry (Gauge for opponent) |
| Shakunetsu Hadouken (Jab) | 0 | 1 | 1 | 4 |
| Shakunetsu Hadouken (Strong) | 0 | 2(1 1) | 2(1 1) | 8(4 4) |
| Shakunetsu Hadouken (Fierce) | 0 | 3(1 1 1) | 3(1 1 1) | 12(4 4 4) |
Comments here
| Move | Motion | Damage | Blocked Damage | Stun Damage | Super Cancel |
| Tatsumaki Zankuukyaku (Short) | QCB LK | 100 | 6 | 7 | Yes |
| Tatsumaki Zankuukyaku (Forward) | QCB MK | 120(90 30) | 15(11 2) | 10(7 3) | Yes/No |
| Tatsumaki Zankuukyaku (Roundhouse) | QCB HK | 150(90 30 30) | 17(11 2 2) | 13(7 3 3) | Yes/No/No |
Frame Data
| Move | Startup | Hit | Recovery | Blocked Advantage | Hit Advantage | Crouching Hit Advantage | Guard | Parry |
| Tatsumaki Zankuukyaku (Short) | 11 | 2 | 17 | -12 | Down | Down | HL | H |
| Tatsumaki Zankuukyaku (Forward) | 2 | 2 | 16 | -8 | Down | Down | HL | H |
| Tatsumaki Zankuukyaku (Roundhouse) | 2 | 2 | 10 | -5 | Down | Down | HL | H |
Gauge Increase
| Move | Miss | Blocked | Hit | Parry (Gauge for opponent) |
| Tatsumaki Zankuukyaku (Short) | 3 | 8 | 13 | 4 |
| Tatsumaki Zankuukyaku (Forward) | 3 | 9(8 1) | 15(13 2) | 8(4 4) |
| Tatsumaki Zankuukyaku (Roundhouse) | 3 | 10(8 1 1) | 17(13 2 2) | 12(4 4 4) |
Comments here
| Move | Motion | Damage | Blocked Damage | Stun Damage | Super Cancel |
| Air Tatsumaki Zankuukyaku (Short) | (Air) QCB LK | 80 | 5 | 3 | Yes |
| Air Tatsumaki Zankuukyaku (Forward) | (Air) QCB MK | 160(80 80) | 5* | 8(3 5) | Yes |
| Air Tatsumaki Zankuukyaku (Roundhouse) | (Air) QCB HK | 240(80 80 80) | 5* | 11(3 5 3) | Yes |
| (*) Blocked damage is for 1 hit only, its not possible to block more hits |
Frame Data
| Move | Startup | Hit | Recovery | Blocked Advantage | Hit Advantage | Crouching Hit Advantage | Guard | Parry |
| Air Tatsumaki Zankuukyaku (Short) | 5 | 2 | 9 | - | Down | Down | HL | H |
| Air Tatsumaki Zankuukyaku (Forward) | 5 | 2 | 9 | - | Down | Down | HL | H |
| Air Tatsumaki Zankuukyaku (Roundhouse) | 5 | 2 | 9 | - | Down | Down | HL | H |
Gauge Increase
| Move | Miss | Blocked | Hit | Parry (Gauge for opponent) |
| Air Tatsumaki Zankuukyaku (Short) | 1 | 1 | 7 | 4 |
| Air Tatsumaki Zankuukyaku (Forward) | 2 | 1* | 9(7 2) | 8(4 4) |
| Air Tatsumaki Zankuukyaku (Roundhouse) | 4 | 1* | 16(7 2 7) | 12(4 4 4) |
| (*) Gauge increase for blocked hit is for 1 hit only, its not possible to block more hits |
Comments here
| Move | Motion | Damage | Blocked Damage | Stun Damage | Super Cancel |
| Gou Shoryuken (Jab) | F, D, DF LP | 130(100) | 16(13) | 11(9) | Yes |
| Gou Shoryuken (Strong) | F, D, DF MP | 150(100 50) | 19(13 6) | 14(11 3) | Yes/No |
| Gou Shoryuken (Fierce) | F, D, DF HP | 180(60x3) | 24(8x3) | 15(11 3 3) | Yes/Yes/No |
Frame Data
| Move | Startup | Hit | Recovery | Blocked Advantage | Hit Advantage | Crouching Hit Advantage | Guard | Parry |
| Gou Shoryuken (Jab) | 3 | 14 | 26 | -24 | Down | Down | HL | HL |
| Gou Shoryuken (Strong) | 2 | 2/5 | 41 | -30 | Down | Down | HL/HL | HL/HL |
| Gou Shoryuken (Fierce) | 1 | 2/2/19 | 35 | -34 | Down | Down | HL/HL/HL | HL/HL/HL |
Gauge Increase
| Move | Miss | Blocked | Hit | Parry (Gauge for opponent) |
| Gou Shoryuken (Jab) | 3 | 10 | 15 | 4 |
| Gou Shoryuken (Strong) | 3 | 11(10 1) | 17(15 2) | 8(4 4) |
| Gou Shoryuken (Fierce) | 3 | 12(10 1 1) | 19(15 2 2) | 12(4 4 4) |
Comments here
| Move | Motion | Damage | Blocked Damage | Stun Damage | Super Cancel |
| Hyakki Shuu | F, D, DF K | - | - | - | No |
Frame Data
| Startup | Hit | Recovery | Blocked Advantage | Hit Advantage | Crouching Hit Advantage | Guard | Parry |
| - | 36 | - | - | - | - | - | - |
Gauge Increase
| Miss | Blocked | Hit | Parry (Gauge for opponent) |
| - | - | - | - |
Comments here
| Move | Motion | Damage | Blocked Damage | Stun Damage | Super Cancel |
| Hyakki Gouzan | During F, D, DF K (No Input) | 100 | 13 | 3 | No |
Frame Data
| Startup | Hit | Recovery | Blocked Advantage | Hit Advantage | Crouching Hit Advantage | Guard | Parry |
| 41 | 15 | 13 | -11 | Down | Down | L | L |
Gauge Increase
| Miss | Blocked | Hit | Parry (Gauge for opponent) |
| 3 | 6 | 14 | 4 |
Comments here
| Move | Motion | Damage | Blocked Damage | Stun Damage | Super Cancel |
| Hyakki Goushou | During F, D, DF K press P | 130 | 16 | 13 | No |
Frame Data
| Startup | Hit | Recovery | Blocked Advantage | Hit Advantage | Crouching Hit Advantage | Guard | Parry |
| 10 | 3 | 17 | - | Down | Down | H | H |
Gauge Increase
| Miss | Blocked | Hit | Parry (Gauge for opponent) |
| 3 | 6 | 14 | 4 |
Comments here
| Move | Motion | Damage | Blocked Damage | Stun Damage | Super Cancel |
| Hyakki Goujin | During F, D, DF K press K | 100 | 13 | 11 | No |
Frame Data
| Startup | Hit | Recovery | Blocked Advantage | Hit Advantage | Crouching Hit Advantage | Guard | Parry |
| 9 | Until landing | 3 | - | - | - | HL | H |
Gauge Increase
| Miss | Blocked | Hit | Parry (Gauge for opponent) |
| 3 | 6 | 14 | 4 |
Comments here
| Move | Motion | Damage | Blocked Damage | Stun Damage | Super Cancel |
| Hyakki Gousai | During F, D, DF K press LP LK | 110 | - | 15 | No |
Frame Data
| Startup | Hit | Recovery | Blocked Advantage | Hit Advantage | Crouching Hit Advantage | Guard | Parry |
| 3 | 2 | 17 | - | Down | Down | Impossible | Impossible |
Gauge Increase
| Miss | Blocked | Hit | Parry (Gauge for opponent) |
| 0 | - | 7 | - |
Comments here
| Move | Motion | Damage | Blocked Damage | Stun Damage | Super Cancel |
| Ashura Senkuu (PP) | F, D, DF PP | - | - | - | No |
| Ashura Senkuu (KK) | F, D, DF KK | - | - | - | No |
Frame Data
| Move | Startup | Hit | Recovery | Blocked Advantage | Hit Advantage | Crouching Hit Advantage | Guard | Parry |
| Ashura Senkuu (PP) | 20 | 46 | 9 | - | - | - | - | - |
| Ashura Senkuu (KK) | 20 | 30 | 9 | - | - | - | - | - |
Gauge Increase
| Move | Miss | Blocked | Hit | Parry (Gauge for opponent) |
| Ashura Senkuu (PP) | - | - | - | - |
| Ashura Senkuu (KK) | - | - | - | - |
Travels forward, and as you can see it in the "Frame Data", (PP) travels further than (KK)
| Move | Motion | Damage | Blocked Damage | Stun Damage | Super Cancel |
| Ashura Senkuu (PP) | B, D, DB PP | - | - | - | No |
| Ashura Senkuu (KK) | B, D, DB KK | - | - | - | No |
Frame Data
| Move | Startup | Hit | Recovery | Blocked Advantage | Hit Advantage | Crouching Hit Advantage | Guard | Parry |
| Ashura Senkuu (PP) | 20 | 46 | 9 | - | - | - | - | - |
| Ashura Senkuu (KK) | 20 | 30 | 9 | - | - | - | - | - |
Gauge Increase
| Move | Miss | Blocked | Hit | Parry (Gauge for opponent) |
| Ashura Senkuu (PP) | - | - | - | - |
| Ashura Senkuu (KK) | - | - | - | - |
Travels backwards, and as you can see it in the "Frame Data", (PP) travels further than (KK)
Super Arts
| Super Art | Super Art Name | Super Art Stock | Motion | Damage | Blocked Damage | Stun Damage |
| I | Messatsu Gou Hadou | 2 bars (112 each bar) | QCF QCF P | 290* | 19** | 0 |
| * (55x5) 60 Damage is when all hits connect. |
| ** (3x5) 4 Damage is when all hits connect. |
Frame Data
| Startup | Hit | Recovery | Blocked Advantage | Hit Advantage | Crouching Hit Advantage | Guard | Parry |
| 2 | 1 | 49 | -13 | Down | Down | HLx6 | Hx6 |
Comments here
| Super Art | Super Art Name | Super Art Stock | Motion | Damage | Blocked Damage | Stun Damage |
| I | Tenma Gou Zankuu | 2 bars (112 each bar) | (Air) QCF QCF P | 320* | 25** | 0 |
| * (60x5) 80 Damage is when all hits connect. |
| ** (4x5) 5 Damage is when all hits connect. |
Frame Data
| Startup | Hit | Recovery | Blocked Advantage | Hit Advantage | Crouching Hit Advantage | Guard | Parry |
| 7 | 1 | 13 | -49 | Down | Down | HLx6 | Hx6 |
Comments here
| Super Art | Super Art Name | Super Art Stock | Motion | Damage | Blocked Damage | Stun Damage |
| II | Messatsu Gou Shoryu | 2 bars (112 each bar) | QCF QCF P | 390* | 44** | 14*** |
| * (40x3) 50 120 110 100 Damage is when all hits connect. |
| ** (5 3)x2 15 7 6 Damage is when all hits connect. |
| *** (0 3)x2 9 5 5 Damage is when all hits connect. |
Frame Data
| Startup | Hit | Recovery | Blocked Advantage | Hit Advantage | Crouching Hit Advantage | Guard | Parry |
| 1 | 2 | 37 | -25 | Down | Down | HLx7 | HLx7 |
Comments here
| Super Art | Super Art Name | Super Art Stock | Motion | Damage | Blocked Damage | Stun Damage |
| III | Messatsu Gou Rasen | 2 bars (112 each bar) | QCF QCF K | 390* | 15** | 0 |
| * 70 (40x9) 130 Damage is when all hits connect. |
| ** This damage is when only 3 hits are blocked. Full blocked damage is 9 (3x9) 8 but its not possible to block more than 3 hits of this Super Art. |
Frame Data
| Startup | Hit | Recovery | Blocked Advantage | Hit Advantage | Crouching Hit Advantage | Guard | Parry |
| 4 | 2 | 51 | -35 | Down | Down | HLx1~4 | Hx1~11 |
Comments here
| Super Art | Super Art Name | Super Art Stock | Motion | Damage | Blocked Damage | Stun Damage |
| III | Messatsu Gou Senpuu | 2 bars (112 each) | (Air) QCF QCF K | 405* | 15** | 0 |
| * 60 (55x3) 70 (40x4) 130 Damage is when all hits connect. |
| ** This damage is only when 2 hits are blocked. Full blocked damage is 8 (7x3) 9 (3x4) 8 but its not possible to block more than 2 hits of this Super Art. |
Frame Data
| Startup | Hit | Recovery | Blocked Advantage | Hit Advantage | Crouching Hit Advantage | Guard | Parry |
| 9 | 1 | 51 | -35 | Down | Down | HLx1~3 | Hx1~10 |
Comments here
| Super Art | Super Art Name | Super Art Stock | Motion | Damage | Blocked Damage | Stun Damage | Throw Range |
| any | Shun Goku Satsu | Requieres MAX gauge (2 full bars/224) | LP LP F LK HP | 490 | - | 0 | 12 |
Frame Data
| Startup | Hit | Recovery | Blocked Advantage | Hit Advantage | Crouching Hit Advantage | Guard | Parry |
| 1 | 38 | 2 | - | Down | Down | Impossible | Impossible |
Comments here
| Super Art | Super Art Name | Super Art Stock | Motion | Damage | Blocked Damage | Stun Damage |
| any | Kongou Kokuretsu Zan | Requieres MAX gauge (2 full bars/224) | DDD PPP | 640* | 126** | 26*** |
| * 370(300) (55x2) 40 (55x2) (40x4) Damage is when all hits connect. |
| ** This damage is only when 6 hits are blocked. Full damage is ¿(7x2) 5 (7x2) (5x4)? |
| *** 15(15) (3x9) Damage is when all hits connect. |
Frame Data
| Startup | Hit | Recovery | Blocked Advantage | Hit Advantage | Crouching Hit Advantage | Guard | Parry |
| 16 | 6 | 58 | -26 | Down | Down | HLx9 | Impossible/HLx8 |
Please note that the "Blocked Damage" cannot be correct, i've checked something, and you take 10 hits if you are blocking the full Super Art, and in the website where i take the information, only shows damage for 6 hits...
Meaties:
- S.MK
- S.MP
- C.LK
- UOH
- F MP
- Air Hadouken
Combos
Midscreen
You may add some moves such as; Dive Kick, J HP, J Tatsu, J Hadou, etc. before these combos for more damage/hits.
Everyone
| 1st Move | 2nd Move | 3rd Move | 4th Move | Damage | Stun Damage |
| Crouch MK | Gou Shoryuken (HP) | - | - | 253 (22%) | 17 |
| Close HP | Tatsumaki Zankuukyaku (HK) | - | - | 265 (23%) | 22 |
| Close HP | Gou Shoryuken (HP) | - | - | 288 (25%) | 28 |
| Crouch MK | Tatsumaki Zankuukyaku (LK) | Close LP | Tatsumaki Zankuukyaku (HK) | 311 (27%) | 13 |
| Crouch MK | Tatsumaki Zankuukyaku (LK) | Gou Shoryuken (HP) | - | 345 (30%) | 20 |
- MP HP (Target Combo)
- C MK, LK-Tatsu, Shoryu
- S HP, LK-Tatsu, Shoryu
- C MK, MK-Tatsu, MP-Shoryu (Does not work on Hugo)
Specific to:
Chun-Li, Makoto, Q, Alex, Necro, Twelve, and Elena
- C MK, MK-Tatsu, HP-Shoryu
Hit Confirms
- C.LK, C.LK xx SA1 (Also C.LK, C.LP, C.LK or C.LK x3 on some characters)
- Close S.MK, SA1
- Dive Kick, SA1
- Dive Kick, HP Dragon Punch
Super Art 1
| 1st Move | 2nd Move | 3rd Move | 4th Move | Damage | Stun Damage |
| Gou Shoryuken (HP) (2hits) | Super Art 1 (Ground) | - | - | 265 (23%) | 12 |
| Crouch LK | Crouch LK | Super Art 1 (Ground) | - | 322 (28%) | 3 |
| Crouch MK | Super Art 1 (Ground) | - | - | 357 (31%) | 3 |
| Close MK | Super Art 1 (Ground) | - | - | 380 (33%) | 8 |
| Crouch MK | Tatsumaki Zankuukyaku (LK) | Gou Shoryuken (LP) | Super Art 1 (Ground) | 449 (39%) | 15 |
It does more damage if you Super Cancel an early Shoryuken LP into SA1 than Super Cancel with a Shoruyken HP
Super Art 2
| 1st Move | 2nd Move | 3rd Move | 4th Move | Damage | Stun Damage |
| Gou Shoryuken (HP) | Super Art 2 | - | - | 334 (29%) | 22 |
| Crouch LK | Crouch LK | Super Art 2 | - | 414 (36%) | 14 |
| Crouch MK | Super Art 2 | - | - | 449 (39%) | 14 |
| Close MP | Super Art 2 | - | - | 460 (40%) | 18 |
| Crouch HP | Gou Shoryuken (MP) | Super Art 2 | - | ??? (??%) | ?? |
| Crouch MK | Gou Shoryuken (MP) | Super Art 2 | - | ??? (??%) | ?? |
Super Art 3
| 1st Move | 2nd Move | 3rd Move | 4th Move | Damage | Stun Damage |
| Close HP | Gou Shoryuken (HP) (1hit) | Super Art 3 (Ground) | - | ??? (??%) | ? |
| Crouch MK | Super Art 3 (Ground) | - | - | ??? (??%) | ? |
| Crouch MK | Tatsumaki Zankuukyaku (LK) | Super Art 3 (Ground) | - | 449 (39%) | 5 |
Shun Goku Satsu
| 1st Move | 2nd Move | 3rd Move | 4th Move | Damage | Stun Damage |
| Far HK | Shun Goku Satsu | - | - | ??? (??%) | ? |
Kongou Kokuretzu Zan
| 1st Move | 2nd Move | 3rd Move | 4th Move | Damage | Stun Damage |
| Tatsumaki Zankuukyaku (LK) | Close LP | Kongou Kokuretzu Zan | - | ??? (??%) | ? |
| Crouch MK | Tatsumaki Zankuukyaku (LK) | Close LP | Kongou Kokuretzu Zan | ??? (??%) | ? |
Corner
You can add Akuma's dive kick or a J HP before these combos for more damage.
- C MK, Tatsu, Shoryu xx SA1, Shoryu
- C MK, Tatsu, Shoryu xx SA1, SA1, Shoryu
Frame Data
- All Framedatas in this section are taken from [http://ensabahnur.free.fr/Baston/index.php?page=gameChars


