Callmeanewb (talk | contribs) |
Callmeanewb (talk | contribs) |
||
| Line 146: | Line 146: | ||
Yuri <br> | Yuri <br> | ||
Billy <br> | Billy <br> | ||
Benimaru <br> | |||
Angel <br> | |||
''Characters that play well in last position:'' | ''Characters that play well in last position:'' | ||
Revision as of 11:10, 13 July 2006
Introduction
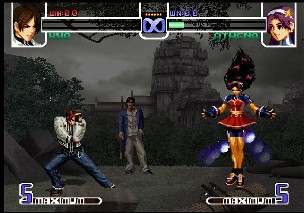
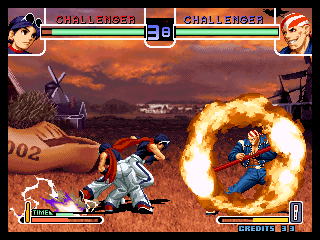
Following the conclusion to their latest King of Fighters saga (The NEST Chapter, comprising KoF '99-2001), SNK (with the help of EOLITH Co.) once again released a "dream match" King of Fighters game as the 2002 tournament. As usual, a "dream match" meant that the roster could be drawn from any era of King of Fighters regardless of what the storyline was presently. As such, KoF 2002 saw the return of the characters from the Orochi saga such as Yashiro and Vice (and the game's final boss was Omega Rugal). Joining them were characters featured in the NEST saga such as Angel and May Lee. As for the gameplay, the "Striker" assist system was removed in this game so the fights returned to the traditional 3-on-3 team system.
Game Mechanics
Notation and Terms
Input
u = 8 = up
d = 2 = down
f = 6 = forward
b = 4 = backwards
uf = 9 = upforwards
ub = 7 = upback
df = 3 = down forward
db = 1 = down back
qcf = quarter circle forward (d, df, f = 236 motion)
qcb = quarter circle back (d, db, b = 214 motion)
hcf = half circle forward (b, db, d, df, f = 41236 motion)
hcb = half circle back (f, df, d, db, b = 63214 motion)
A LP
B LK
C HP
D HK
c. = crouching
sf. = standing far
sc. = standing close
j. = jumping
sj. = super jump
XY = X+Y
_X - means to charge. Thus, _X Y means charge X, then Y
Abbreviations
BC = max mode
DM = desperation move
SDM = super desperation
HSDM = hidden super desperation move
Terms
Free cancelling: Another word for maxmode cancelling. A free cancellable move, means you can max mode cancel it into something else.
Battery: Someone who can build meter quickly and effectively
Knockdown: A move that knocks the opponent down but gives the opponent an opportunity to recovery roll.
Hard knockdown: A knockdown move that cannot be recovery rolled. When the opponent falls, there is either a small yellow animation of impact, a large yellow animation (which looks like Angel's qcb+P stomp), or no animation at all. All moves that have the animation that looks like Angel's stomp, or no animation, are hard knockdowns, although there are some moves that use the other animation and are also hard knockdowns.
Combo Notation
(S) - the previous move is super cancelled
(C) - the previous move is maxmode cancelled
(number) - the most number of hits of that attack allowed such that you can still cancel into the next one and the combo to still work. For example, C(1), f+A for Kula means that the combo requires her to cancel the C on the first hit. She can also cancel the C on the second hit, but some of her combos do not work right depending on when you cancel the C. If there is no number after an attack, it means you can cancel it on any hit
(move) - groups moves together when there are multiple alternatives. For example, C, f+B/(qcf+B, dp+B) means you can do C, then either a f+B, or qcf+B followed by dp+B, but not f+B followed by dp+B.
/ - means there is an alternative move you can do. For example, the attack string C, f+A/f+B, qcb+A/(qcf+B, dp+B) means after the C, you can do either f+A or f+B, and after either of those, you can do either qcb+A, or qcf+B, dp+B.
~move - optional, can be omitted for easier input or if distancing is an issue.
Buffer: - this means that the attack motion can be buffered such that it can still be done with a less complex motion. For example, take the combo C, qcb+P, qcb hcf+K. Since there is an overlapping motion of qcb, one of them can be removed. Thus, the buffered version of the same combo is C, qcb+P, hcf+K. This can be further buffered since there is an overlapping back direction in this combo. Therefore, a further buffered version of this combo is C, qcb+P, qcf+K. Thus, this combo will be listed as C, qcb+P, qcb hcf+K(Buffer:qcf+K), which means you can do the combo how it is listed until you reach the Buffer part, in which case you use that motion instead of the full motion of the move.
Basics
In King of Fighters, there are several system basics. These will be covered first.
Run: f_f puts your character in run animation. Startup and speed is character dependent, moving from run to block has very little lag (if any).
Backdash: bb puts your character into backdash animation, it has no invulnerability. Backdashes are technically considered jumping and are very useful for retreating quickly. A common technique for characters possessing an air command move, is to cancel the back dash into it increasing its fall time and extending the dash distance.
Hop: For people starting this game, hopping is one of the most fundemental differences between street fighter and king of fighters. It is a much safer way of mixing up an overhead and advancing on your opponent than regular jumping. Hopping is performed by tapping 8 quickly and then letting go. It produces a short jump that rises and falls much slower, but at a much smaller height. Punishable, but much safer.
Super Jump: The super jump is performed by pressing 27 or 29 very quickly. This allows your character to travel further, faster, and higher than a regular jump. It is very effective for travelling the entire screen for certain characters (Choi).
Hyper Hop: Performed by tapping down before hopping, it resembles a hop with super jump properties. Basically a hop that travels further and faster. Like the superjump, you can't hyper hop straight up.
Roll: b+AB or f+AB. Pressing AB in neutral defaults to a forward roll. Rolling is an interesting technique. It forces you "roll" or "slide" for a specific duration of time. It is invincible for most the roll, losing to meaty attacks near the end and throws at any point. Sweeps tend to beat it 100%.
Super Bar: Sorta fundemental to 2D fighters these days, You start off with 0 meter, but the potential to build up 3 stocks with your first character. When your first character gets knocked out, your bar capacity moves up to 4 stock (meaning he can store an extra stock). When your second character gets knocked out, the third (and last) character has the potential for 5 bars.
Super meter is only built when you are hit, when you connect (when you attack and the attack actually hits or is blocked by the opponent), or use a special move. The exception to this rule is fireballs and counters, fireballs and counters build no meter for being used, but still build meter for connecting.
Techniques
King of Fighters 2002 has several system specific techniques, as follows.
Falling Roll Recovery: Tap AB between falling and landing. This will give a safer faster recovery than a fall. It is very handy for escaping things like Daimon's Pickup off c.D. However, with a falling roll recovery, you are denied the 1 sec. wakeup invincibility to throws as you would normally receive during normal fall recovery. Note: there are a variety of moves that have a hard knockdown property, preventing you from doing a roll recovery.
Guard Cancel Roll: During block stun you can press AB to roll out of whatever attack is hitting you at the moment. This is a generally safe way of getting out of chip damage. It costs 1 stock. Note that the roll is still a roll, and you are vulnerable near the end of it. This is a useful technique for punishing attacks with long animations or long block strings. Roll through at the beginning then punsish your opponents whiffed attack.
Attack Cancel Roll: If you connect an attack with your opponent, you can cancel it, if it's a normal or command attack (or command attack chained from a normal) attack with a roll. This also uses a stock. The roll is always forward, but you can vary the distance travelled with directional input.
CD guard cancel (alpha counter): Press CD during blockstun to perform a knockdown on your opponent. Does less damage than a regular CD attack. Uses 1 stock.
Max mode: BC puts you in "max mode" this mode reduces the damage you do on every attack by 25%, however it will let you cancel certain special moves into other special moves during specific frames. This let's many character create max mode loops. Max mode is also required to perform SDM (super desperation moves) and HSDM. During max mode you may use a DM at any time at no additional cost, a SDM costs you an additional bar and HSDM requires an additional bar and that you be at low life.
BC cancelling: This costs 2 stocks, one to cancel and a second for the max mode. It lets you cancel any normal attack into max mode, often letting you extend combos.
Super Cancelling: This feature lets you cancel specials into supers. The cancel itself costs you 1 stock, in addition to the stock cost of your super. Therefore there's a minimum 2 stock cost. Often the damage isn't worth it, except perhaps at the end of a very long max mode combo.
Counter Wire: Certain moves, if they connect on counter hit cause your opponent to bounce off the wall, leaving them vulnerable on the way down for extra damage.
Basic Strategy
CD "alpha" counter application:
For characters who have weak, unreliable or no anti air or no reliable reversal, blocking jumpins is often the safest option. This can lead to problems though, as with the heavy stun of j.Ds Cs and CDs, your opponent can land freely and force mixups on you, something you often want to avoid. For this reason, it's ideal to CD counter the attack.
CD countering this attack is also guaranteed damage (not much, but it's there) and your opponent cannot pressure you afterwards. Well timed CD counters in this way can often swing the match in your favour, turning poor situations into strong ones, as after the counter you can run and pressure your opponent.
Teams
Aside from choosing the characters you play the best, it's ideal to have a semi-balanced team to handle potential problems. While you might be an excellent grappler player, a team of Daimon, Shermie and Clark may come across a single Leona player and get knocked out by the excellent advantage that Leona has over grapplers. This is why it's ideal to have a decent range of strengths and versatility in characters in your team.
Likewise can be said for meter hungry characters. If your team is Vanessa, Kyo and Yamazaki, you will either be forced to play a character without their strengths as a battery (Kyo for instance, who is actually a reasonable battery but only devastating with meter).
Thus, when picking your characters, unless you're extremely limited in your choices (you only know 3 characters really well, and the rest not at all), try and choose a team with someone who can play battery, someone who can play runaway/keep-out/turtle and someone who can has the strength of your other two characters' weakness.
Team Order
After choosing your team, there's a general guideline to follow for picking your order. This is ignoring counter character second guessing to match you're opponents team.
Ideally, you pick the character that either builds meter really well and/or doesn't use/need meter very much first. This let's you play against your opponent without disadvantage. For instance, I would never choose Vanessa first, as her only good reversal is qcbhcf+P super. Without that threat, your opponent can pressure you without fear and force you into guessing games that are in his favor. Also, Vanessa will be without her biggest threat: 90% damage BC combos that require minimum 1, usually 2 and occasionally 3 bars.
The second character in your team should be one that can use the stock you received from your first character and and hopefully gain 1 back to give to your third, should you need it. Just about any character can play 2nd without disadvantage, but it's also important to consider efficiency. For instance, I would never pick Ralf in 2nd position. Ralf has a very hard time landing either of his supers. Unless you have the godliest hit confirming skills on the planet, to effectively land your supers you'll be need at least 2 bars (punishment aside).
Your last character, who should start with and can store the most stock, should be able to use it maximally. Again, most characters gain much and lose little as last character, almost every character in the game is more dangerous with stock. For this reason, a lot of players choose the character they're most capable with as last character. Personally though, I would never pick Choi as last character. He's one of my strongest characters (and arguably the best in the game to boot), but Choi actually loses one of his advantages as last character. He cannot play an effective runaway game. If Choi is running away, the opponent may find it difficult to deal any significant damage to Choi, but so will the Choi player. The extra bars quite possibly might go to waste, as Choi's only use for it is his qcfhcb+BD SDM. Choi has no easy way to land relevant BC combos and no reasonable chip use for his bar (hcbx2+P is highly highly punishable).
Characters that play well in 1st position:
Ralf
Iori
Yuri
Billy
Benimaru
Angel
Characters that play well in last position:
Leona
Yamazaki
Kyo
Iori
Vanessa
Advanced Strategy
Alternating Guard: This is a bug that, when executed, results in the opponent being unable to throw you. To make this work, you must first block some attack, so that you are in block stun. Next, rapidly alternate between high and low block. While you are quickly alternating, all command throws will whiff, and normal f+C/f+D throws will come out as close C and close D. You should have more than enough time to punish the opponent after they whiff.
This bug is very advantageous since it allows you to escape tick throw situation/combo mixups, such as Clark's crouch A, then dp+K tick throw, or f+B into hcf+K combo. Since you are guarding while executing the bug, you will be able to avoid the throw, as well as the combo. The main weakness to this technique is that the opponent can hit you with a low attack, and have it hit if you alternated to high block while the attack hit you low. Also a reminder that this bug only works after you have blocked some attack - you cannot start alternating guard immediately on wakeup.
Counterhit CD Counters: If you know that your CD counter is going to counterhit, you can cancel the CD counter into maxmode (BC), and followup with whatever counterhit combo you'd like. Cancelling a CD counter into maxmode will already waste 3 stocks. The most common thing to do after cancelling to maxmode is a DM or SDM, so this will require 3-4 stocks overall, or maybe even 5 stocks if you can supercancel a move into the SDM. The sheer amount of stocks required for using this technique is pretty large, so it probably isn't very practical. However, it can become useful if the attack string you are trying to block cannot be punished on block or after a guard roll.
A CD counter will counterhit under the following circumstances:
1. When you CD countered the move, it did not finish executing all of it's hits. For example, CD countering a move that does 4 hits, on any hits before the fourth, will result in a counterhit. For some moves, CD countering even on the last hit will result in a counterhit, although it will require experimentation to see which moves counterhit when.
2. Not verified yet - If the opponent is using an attack string, even if all moves are one hit each, and the opponent CD counters a move when the player had already input the next move in the attack string, a counterhit will result.
Game Versions
The Characters
The Tier List:
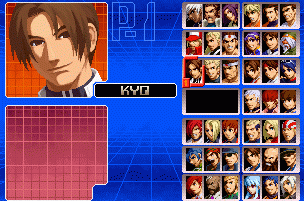
There are 43 playable characters in this game. The tier list sort of looks like follows:
God tier (ABC): Choi, Athena, Billy
High Tier: Leona, Yuri, Iori, Benimaru, Vanessa
Mid Tier: Everybody else
Bottom Tier: Seth, Chin
All combos listed in the character sections are considered bread and butter, the most damaging, efficient combos (some are still quite challenging though).
All sections are still under construction.
Art of Fighting Team
Fatal Fury Team
Team Japan
Korea Team
Women's Team
Team Ikari
Team Psycho Soldier
Team '96
Team '97
Team '98
Team '99
Team '00
Team '01
Team Orochi


