JoJo's Bizarre Adventure: Heritage for the Future/Midler/Movelist: Difference between revisions
(added midler hitboxes) |
(added move descriptions from fandom) |
||
| Line 4: | Line 4: | ||
|image=HFTF_Midler_5a.png | |image=HFTF_Midler_5a.png | ||
|caption= | |caption= | ||
|name= | |name=5A | ||
|data= | |data= | ||
{{AttackData-HFTF | {{AttackData-HFTF | ||
| Line 15: | Line 15: | ||
|cancel= | |cancel= | ||
|properties= | |properties= | ||
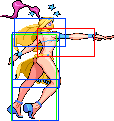
|description= | |description=Midler does a quick jab. Poor range but comes out fairly fast. Sometimes useful as a quick anti-air. | ||
}} | }} | ||
}} | }} | ||
| Line 21: | Line 21: | ||
|image=HFTF_Midler_5b.png | |image=HFTF_Midler_5b.png | ||
|caption= | |caption= | ||
|name= | |name=5B | ||
|data= | |data= | ||
{{AttackData-HFTF | {{AttackData-HFTF | ||
| Line 32: | Line 32: | ||
|cancel= | |cancel= | ||
|properties= | |properties= | ||
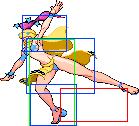
|description= | |description=Midler performs a downwards angled kick. Hits low. Very quick and good inside of combos. | ||
}} | }} | ||
}} | }} | ||
| Line 38: | Line 38: | ||
|image=HFTF_Midler_5c.png | |image=HFTF_Midler_5c.png | ||
|caption= | |caption= | ||
|name= | |name=5C | ||
|data= | |data= | ||
{{AttackData-HFTF | {{AttackData-HFTF | ||
| Line 49: | Line 49: | ||
|cancel= | |cancel= | ||
|properties= | |properties= | ||
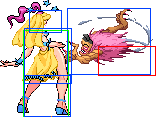
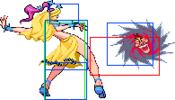
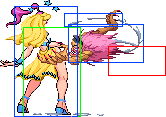
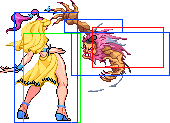
|description= | |description=High Priestess appears and swipes at the opponent. Does high damage and can be used inside of combos. | ||
}} | }} | ||
}} | }} | ||
| Line 55: | Line 55: | ||
|image=HFTF_Midler_2a.png | |image=HFTF_Midler_2a.png | ||
|caption= | |caption= | ||
|name= | |name=2A | ||
|data= | |data= | ||
{{AttackData-HFTF | {{AttackData-HFTF | ||
| Line 66: | Line 66: | ||
|cancel= | |cancel= | ||
|properties= | |properties= | ||
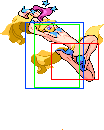
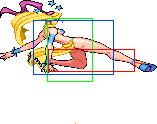
|description= | |description=Midler does a quick low kick. Hits further than her jab and can combo into itself and most of her other normals with the exception of 6B, 5C, and 2C. | ||
}} | }} | ||
}} | }} | ||
| Line 72: | Line 72: | ||
|image=HFTF_Midler_2b.png | |image=HFTF_Midler_2b.png | ||
|caption= | |caption= | ||
|name= | |name=2B | ||
|data= | |data= | ||
{{AttackData-HFTF | {{AttackData-HFTF | ||
| Line 83: | Line 83: | ||
|cancel= | |cancel= | ||
|properties= | |properties= | ||
|description= | |description=High Priestess stabs the opponent with her nails. Good as a fast poke but doesn't combo into many things. | ||
}} | }} | ||
}} | }} | ||
| Line 89: | Line 89: | ||
|image=HFTF_Midler_2c.png | |image=HFTF_Midler_2c.png | ||
|caption= | |caption= | ||
|name= | |name=2C | ||
|data= | |data= | ||
{{AttackData-HFTF | {{AttackData-HFTF | ||
| Line 100: | Line 100: | ||
|cancel= | |cancel= | ||
|properties= | |properties= | ||
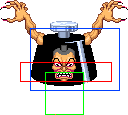
|description= | |description=High Priestess appears as a big head and bites the ground. It's an amazing sweep with high priority, range, and damage. Works best as a meaty and can combo off jumping attacks. | ||
}} | }} | ||
}} | }} | ||
| Line 106: | Line 106: | ||
|image=HFTF_Midler_jA.png | |image=HFTF_Midler_jA.png | ||
|caption= | |caption= | ||
|name= | |name=j.A | ||
|data= | |data= | ||
{{AttackData-HFTF | {{AttackData-HFTF | ||
| Line 117: | Line 117: | ||
|cancel= | |cancel= | ||
|properties= | |properties= | ||
|description= | |description=Midler does a quick kick with her knee. Works great as an instant overhead. | ||
}} | }} | ||
}} | }} | ||
| Line 123: | Line 123: | ||
|image=HFTF_Midler_jB.png | |image=HFTF_Midler_jB.png | ||
|caption= | |caption= | ||
|name= | |name=j.B | ||
|data= | |data= | ||
{{AttackData-HFTF | {{AttackData-HFTF | ||
| Line 134: | Line 134: | ||
|cancel= | |cancel= | ||
|properties= | |properties= | ||
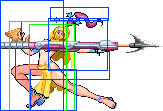
|description= | |description=Midler does a far-reaching horizontal kick. Good air-to-air and can crossup the opponent. | ||
}} | }} | ||
}} | }} | ||
| Line 140: | Line 140: | ||
|image=HFTF_Midler_jC.png | |image=HFTF_Midler_jC.png | ||
|caption= | |caption= | ||
|name= | |name=j.C | ||
|data= | |data= | ||
{{AttackData-HFTF | {{AttackData-HFTF | ||
| Line 151: | Line 151: | ||
|cancel= | |cancel= | ||
|properties= | |properties= | ||
|description= | |description=High Priestess appears and performs a slashing attack in midair. Covers a very long range though you will have a hard time hitting some crouching opponents with it. Amazing air-to-air due to high priority. | ||
}} | }} | ||
}} | }} | ||
| Line 158: | Line 158: | ||
|image=HFTF_Midler_66x.png | |image=HFTF_Midler_66x.png | ||
|caption= | |caption= | ||
|name= | |name=d.5A/5B/5C | ||
|data= | |data= | ||
{{AttackData-HFTF | {{AttackData-HFTF | ||
| Line 169: | Line 169: | ||
|cancel= | |cancel= | ||
|properties= | |properties= | ||
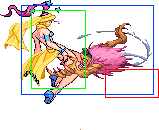
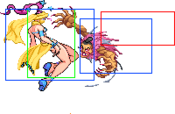
|description= | |description=Midler does a magical flip in midair that hits the opponent twice. This move becomes risky as it is unsafe when opponent pushblocks the first hit. On hit, it can lead to a tick grab or you can cancel it into 236A/B/C/S for a combo/frame trap. | ||
}} | }} | ||
}} | }} | ||
| Line 175: | Line 175: | ||
|image=HFTF_Midler_2a.png | |image=HFTF_Midler_2a.png | ||
|caption= | |caption= | ||
|name= | |name=d.2A | ||
|data= | |data= | ||
{{AttackData-HFTF | {{AttackData-HFTF | ||
| Line 186: | Line 186: | ||
|cancel= | |cancel= | ||
|properties= | |properties= | ||
|description= | |description=Minimally slower startup but the same amount of recovery as 2A, which turns it into an amazing combo starter. | ||
}} | }} | ||
}} | }} | ||
| Line 192: | Line 192: | ||
|image=HFTF_Midler_2b.png | |image=HFTF_Midler_2b.png | ||
|caption= | |caption= | ||
|name= | |name=d.2B | ||
|data= | |data= | ||
{{AttackData-HFTF | {{AttackData-HFTF | ||
| Line 203: | Line 203: | ||
|cancel= | |cancel= | ||
|properties= | |properties= | ||
|description= | |description=Visually the same as 2B. | ||
}} | }} | ||
}} | }} | ||
| Line 209: | Line 209: | ||
|image=HFTF_Midler_2c.png | |image=HFTF_Midler_2c.png | ||
|caption= | |caption= | ||
|name= | |name=d.2C | ||
|data= | |data= | ||
{{AttackData-HFTF | {{AttackData-HFTF | ||
| Line 220: | Line 220: | ||
|cancel= | |cancel= | ||
|properties= | |properties= | ||
|description= | |description=Visually the same as 2C. Long range plus the speed from dash allow this move to travel a long distance which makes it incredibly useful. | ||
}} | }} | ||
}} | }} | ||
| Line 238: | Line 238: | ||
|cancel= | |cancel= | ||
|properties= | |properties= | ||
|description= | |description=High Priestess enters the opponents body and smashes them on the floor 3 times. One of the better grabs in the game as it does slightly higher damage compared to other grabs and leads to okizeme. | ||
}} | }} | ||
}} | }} | ||
| Line 244: | Line 244: | ||
|image=HFTF_Midler_6b.png | |image=HFTF_Midler_6b.png | ||
|caption= | |caption= | ||
|name= | |name=6B | ||
|data= | |data= | ||
{{AttackData-HFTF | {{AttackData-HFTF | ||
| Line 255: | Line 255: | ||
|cancel= | |cancel= | ||
|properties= | |properties= | ||
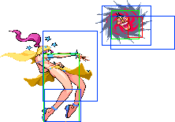
|description= | |description=High Priestess turns into a spinning saw in front of Midler while she poses in place, hitting once. Pretty useless. | ||
}} | }} | ||
}} | }} | ||
| Line 261: | Line 261: | ||
|image=HFTF_Midler_3b.png | |image=HFTF_Midler_3b.png | ||
|caption= | |caption= | ||
|name= | |name=3B | ||
|data= | |data= | ||
{{AttackData-HFTF | {{AttackData-HFTF | ||
| Line 272: | Line 272: | ||
|cancel= | |cancel= | ||
|properties= | |properties= | ||
|description= | |description=Same kick animation as 2A but it's slower and moves her forward while kicking. Can be used as a replacement for 5B in some combos. | ||
}} | }} | ||
}} | }} | ||
| Line 279: | Line 279: | ||
|image2=HFTF_Midler_j2c_recovery.png | |image2=HFTF_Midler_j2c_recovery.png | ||
|caption= | |caption= | ||
|name= | |name=j.2C | ||
|data= | |data= | ||
{{AttackData-HFTF | {{AttackData-HFTF | ||
| Line 290: | Line 290: | ||
|cancel= | |cancel= | ||
|properties= | |properties= | ||
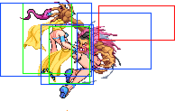
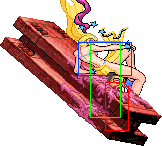
|description= | |description=A dropkick style move. Midler stops all air momentum and High Priestess transforms into a steel beam that slams into the opponent at roughly 45° angle. Once the attack hits the ground, Midler backflips away, which makes the recovery very long. Quite a risky move to use, though it's good at beating opponents midair and can serve as a quick overhead. By hitting the opponent at a very specific angle, this move can be occasionally canceled into special/super moves, which allows you to combo after the move or at least make it safer on block. | ||
}} | }} | ||
}} | }} | ||
| Line 307: | Line 307: | ||
|cancel= | |cancel= | ||
|properties= | |properties= | ||
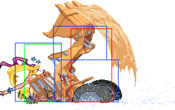
|description= | |description=High Priestess turns into an excavator and performs a quick version of s.2C. Quick Guard Cancel that covers a fairly decent range, though it's much shorter than it appears. Launches opponent away on hit. | ||
}} | }} | ||
}} | }} | ||
| Line 315: | Line 315: | ||
|image2=HFTF_Midler_s4a,_s5a_autocombo_ender.png | |image2=HFTF_Midler_s4a,_s5a_autocombo_ender.png | ||
|caption= | |caption= | ||
|name= | |caption2=Last hit in autocombo | ||
|name=s.5A | |||
|data= | |data= | ||
{{AttackData-HFTF | {{AttackData-HFTF | ||
| Line 326: | Line 327: | ||
|cancel= | |cancel= | ||
|properties= | |properties= | ||
|description= | |description=High Priestess does a fast slashing attack. Becomes a quick 4 hit auto combo if mashed. | ||
}} | }} | ||
}} | }} | ||
| Line 332: | Line 333: | ||
|image=HFTF_Midler_s5b.png | |image=HFTF_Midler_s5b.png | ||
|caption= | |caption= | ||
|name= | |name=s.5B | ||
|data= | |data= | ||
{{AttackData-HFTF | {{AttackData-HFTF | ||
| Line 343: | Line 344: | ||
|cancel= | |cancel= | ||
|properties= | |properties= | ||
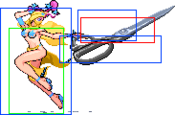
|description= | |description=High Priestess transforms into scissors that cut towards the opponent head. Fast poke, although it whiffs against most crouching opponents. Can cancel into itself up to 2 times. Useful for meter building. | ||
}} | }} | ||
}} | }} | ||
| Line 349: | Line 350: | ||
|image=HFTF_Midler_s5c.png | |image=HFTF_Midler_s5c.png | ||
|caption= | |caption= | ||
|name= | |name=s.5C | ||
|data= | |data= | ||
{{AttackData-HFTF | {{AttackData-HFTF | ||
| Line 360: | Line 361: | ||
|cancel= | |cancel= | ||
|properties= | |properties= | ||
|description= | |description=High Priestess transforms into a spinning saw that moves forwards. Good priority, can be used as a meaty. Hits 3 times. Note that if Midler is hit while performing this move, she'll take increased damage as if she was in the remote mode. | ||
}} | }} | ||
}} | }} | ||
| Line 367: | Line 368: | ||
|image2=HFTF_Midler_s.2aaaa.png | |image2=HFTF_Midler_s.2aaaa.png | ||
|caption= | |caption= | ||
|name= | |caption2=Last hit in autocombo | ||
|name=s.2A | |||
|data= | |data= | ||
{{AttackData-HFTF | {{AttackData-HFTF | ||
| Line 378: | Line 380: | ||
|cancel= | |cancel= | ||
|properties= | |properties= | ||
|description= | |description=High Priestess stabs the opponent with her nails quickly. Becomes a quick 4 hit auto combo if mashed. Hits high except for the last hit, which hits low. | ||
}} | }} | ||
}} | }} | ||
| Line 384: | Line 386: | ||
|image=HFTF_Midler_s2b.png | |image=HFTF_Midler_s2b.png | ||
|caption= | |caption= | ||
|name= | |name=s.2B | ||
|data= | |data= | ||
{{AttackData-HFTF | {{AttackData-HFTF | ||
| Line 395: | Line 397: | ||
|cancel= | |cancel= | ||
|properties= | |properties= | ||
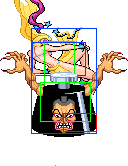
|description= | |description=High Priestess appears as a big head and bites the ground. Faster than 2C but doesn't sweep the opponent. Hits low. | ||
}} | }} | ||
}} | }} | ||
| Line 401: | Line 403: | ||
|image=HFTF_Midler_s2c.png | |image=HFTF_Midler_s2c.png | ||
|caption= | |caption= | ||
|name= | |name=s.2C | ||
|data= | |data= | ||
{{AttackData-HFTF | {{AttackData-HFTF | ||
| Line 412: | Line 414: | ||
|cancel= | |cancel= | ||
|properties= | |properties= | ||
|description= | |description=High Priestess turns into an excavator and quickly swipes upwards. Launches on hit. Can be used as a mediocre anti-air, but the hitbox is smaller than it appears. | ||
}} | }} | ||
}} | }} | ||
| Line 418: | Line 420: | ||
|image=HFTF_Midler_sjA.png | |image=HFTF_Midler_sjA.png | ||
|caption= | |caption= | ||
|name= | |name=s.j.A | ||
|data= | |data= | ||
{{AttackData-HFTF | {{AttackData-HFTF | ||
| Line 429: | Line 431: | ||
|cancel= | |cancel= | ||
|properties= | |properties= | ||
|description= | |description=High Priestess does a horizontal slash. Solid range all around. | ||
}} | }} | ||
}} | }} | ||
| Line 435: | Line 437: | ||
|image=HFTF_Midler_sjA.png | |image=HFTF_Midler_sjA.png | ||
|caption= | |caption= | ||
|name=s. | |name=s.j.B | ||
|data= | |data= | ||
{{AttackData-HFTF | {{AttackData-HFTF | ||
| Line 446: | Line 448: | ||
|cancel= | |cancel= | ||
|properties= | |properties= | ||
|description= | |description=Same as j.s.A but does way more damage. | ||
}} | }} | ||
}} | }} | ||
| Line 452: | Line 454: | ||
|image=HFTF_Midler_sjC.png | |image=HFTF_Midler_sjC.png | ||
|caption= | |caption= | ||
|name= | |name=s.j.C | ||
|data= | |data= | ||
{{AttackData-HFTF | {{AttackData-HFTF | ||
| Line 463: | Line 465: | ||
|cancel= | |cancel= | ||
|properties= | |properties= | ||
|description= | |description=Very similar move to j.C but has a slightly longer hitbox. It can be hard to hit crouching characters with it. | ||
}} | }} | ||
}} | }} | ||
| Line 481: | Line 483: | ||
|cancel= | |cancel= | ||
|properties= | |properties= | ||
|description= | |description=Same as s.2B but does less damage. Very useless. Hits low. | ||
}} | }} | ||
}} | }} | ||
| Line 498: | Line 500: | ||
|cancel= | |cancel= | ||
|properties= | |properties= | ||
|description= | |description=Same as s.2B. Quite useless. Hits low. | ||
}} | }} | ||
}} | }} | ||
| Line 515: | Line 517: | ||
|cancel= | |cancel= | ||
|properties= | |properties= | ||
|description= | |description=Though it has the appearance of s.2A, it functions just like d.s.5A. Hits low. Just as useless as the rest. | ||
}} | }} | ||
}} | }} | ||
| Line 532: | Line 534: | ||
|cancel= | |cancel= | ||
|properties= | |properties= | ||
|description= | |description=Significantly slower version of s.2C. Avoid using it. | ||
}} | }} | ||
}} | }} | ||
| Line 550: | Line 552: | ||
|cancel= | |cancel= | ||
|properties= | |properties= | ||
|description= | |description=Same as the Stand Off grab. Just as useful. | ||
}} | }} | ||
}} | }} | ||
| Line 567: | Line 569: | ||
|cancel= | |cancel= | ||
|properties= | |properties= | ||
|description= | |description=High Priestess does a quick upwards slash which covers a slightly longer distance but is also slower. Just like s.5A, it can turn into a 4 hit auto combo. | ||
}} | }} | ||
}} | }} | ||
| Line 573: | Line 575: | ||
|image=HFTF_Midler_s6c.png | |image=HFTF_Midler_s6c.png | ||
|caption= | |caption= | ||
|name= | |name=s.6C | ||
|data= | |data= | ||
{{AttackData-HFTF | {{AttackData-HFTF | ||
| Line 584: | Line 586: | ||
|cancel= | |cancel= | ||
|properties= | |properties= | ||
|description= | |description=High Priestess turns into a spinning saw that goes forward in a downwards angled curve. Hits 3 times. Note that if Midler is hit while performing this move, she'll take increased damage as if she was in the remote mode. | ||
}} | }} | ||
}} | }} | ||
| Line 590: | Line 592: | ||
|image=HFTF_Midler_s4c.png | |image=HFTF_Midler_s4c.png | ||
|caption= | |caption= | ||
|name= | |name=s.4C | ||
|data= | |data= | ||
{{AttackData-HFTF | {{AttackData-HFTF | ||
| Line 601: | Line 603: | ||
|cancel= | |cancel= | ||
|properties= | |properties= | ||
|description= | |description=High Priestess turns into a spinning saw that goes upwards instead of forward. Hits 3 times. It doesn't make a good anti-air but can sometimes connect with opponents launched by 236S or 2C. Note that if Midler is hit while performing this move, she'll take increased damage as if she was in the remote mode. | ||
}} | |||
}} | |||
{{MoveData | |||
|image=HFTF_Midler_Stand_-_j2c_-_1.png | |||
|image2=HFTF_Midler_Stand_-_j2c_-_2.png | |||
|caption= | |||
|name=s.4C | |||
|data= | |||
{{AttackData-HFTF | |||
|startup= | |||
|active= | |||
|recovery= | |||
|hit= | |||
|block/pushblock= | |||
|damage= | |||
|cancel= | |||
|properties= | |||
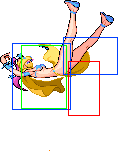
|description=Midler stops all air momentum while High Priestess turns into a weight and falls straight down. Horrible, horrible move. AVOID USING IT AT ALL COSTS. Hits 2 times, but only knocks down on second hit. Has horrible hitbox. While it can still cross up the opponent, it's unsafe on block and the second hit often misses anyway. | |||
}} | }} | ||
}} | }} | ||
| Line 618: | Line 638: | ||
|cancel= | |cancel= | ||
|properties= | |properties= | ||
|description= | |description=High Priestess turns into an excavator and performs a quick version of s.2C. Quick Guard Cancel that covers a fairly decent range, though it's much shorter than it appears. Launches opponent away on hit. | ||
}} | }} | ||
}} | }} | ||
| Line 637: | Line 657: | ||
|cancel= | |cancel= | ||
|properties= | |properties= | ||
|description= | |description=High Priestess turns into a harpoon launcher and fires straight towards the opponent. | ||
A fast projectile special. Low damage but can easily catch the opponent off guard. Due to the projectile's speed, this move can be very effective during projectile wars and can easily interrupt opponents. Can be canceled into from 5A, 2A, 5B, 3B, and 5C. Depending on the button pressed, the projectile's speed changes minimally, with C version being the fastest and by far the most useful one. | |||
Stand On version is almost the same except the recovery is faster. Good for applying pressure from fullscreen. | |||
}} | }} | ||
}} | }} | ||
| Line 656: | Line 680: | ||
|cancel= | |cancel= | ||
|properties= | |properties= | ||
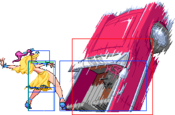
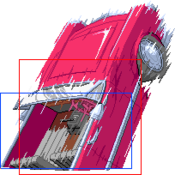
|description= | |description=High Priestess turns into a car that depending on the button pressed, comes out of the ground and launches the opponent on hit. | ||
After deploying High Priestess to attack, Midler can freely move during this attack. It's a great move that can be used for zoning, applying pressure, and it makes one of the best anti-airs in the game since it cannot be blocked midair. You can also use it for frame traps against opponents that respect you too much or pushblock a ton, especially after 2C. Depending on the button pressed, the car will appear at different distances. | |||
A - In front of Midler | |||
B - A bit further from Midler | |||
C - Furthest away from Midler, almost fullscreen. (Fullscreen on indoor stages that do not zoom out while characters are in the corners.) | |||
Note that while this move is happening you lose the ability to block. Sometimes rolling is the safest option to follow up with. | |||
The Stand On version functions in exactly the same way, however, Midler is unable to move while the attack is happening and will receive increased damage if she's punished. It's best to avoid using this move because it's just not worth the risk. | |||
}} | }} | ||
}} | }} | ||
| Line 674: | Line 709: | ||
|cancel= | |cancel= | ||
|properties= | |properties= | ||
|description= | |description=Midler summons High Priestess as a Weight that stomps down in front of her. | ||
Can be used as an overhead in between attacks but it's really not worth the hassle. It doesn't do high damage and High Priestess is punishable even on hit unless Midler follows up with an attack of her own, which in some situations isn't even possible. Avoid using it unless you're about to KO the opponent and need a quick mixup. | |||
The Stand On version has Midler recover the same amount of time as High Priestess, making this move even more useless. | |||
}} | }} | ||
}} | }} | ||
| Line 691: | Line 730: | ||
|cancel= | |cancel= | ||
|properties= | |properties= | ||
|description= | |description=High Priestess appears and slashes upwards, launching the opponent on hit. Uses the same animation as j.C and covers a good distance. Can confirm out of all of Midler's normals, making it a simple combo ender. | ||
}} | }} | ||
}} | }} | ||
| Line 710: | Line 749: | ||
|cancel= | |cancel= | ||
|properties= | |properties= | ||
|description= | |description=High Priestess turns into a harpoon launcher and fires straight towards the opponent. Upon impact, the harpoon pins the opponent to the wall as Midler summons multiple other harpoons and launches them towards the opponent. | ||
Harpoon can pass through other projectiles, making it a good move against zoners. Has good invincibility frame but unfortunately low damage. After the last hit the opponent is launched up where you can follow up with another move before they recover. If whiffed, Midler takes a long while to recover, so make sure this move connects with the opponent at the very least. | |||
The Stand On version is pretty much exactly the same. | |||
}} | }} | ||
}} | }} | ||
| Line 727: | Line 770: | ||
|cancel= | |cancel= | ||
|properties= | |properties= | ||
|description= | |description=Midler summons a barrage of Cars that strike from the ground one after another in different colors. | ||
Each car launches on hit and is air-unblockable, making it a great reversal tool. Though the startup is very slow making it impossible to combo into this super by any normal means, it's fully invincible, and if it hits, it will cause hard knockdown. If opponent blocks this super, you can attempt to mix them up, however, remember to not hit the opponent with your normals as the super is hitting them because that gives them a window to tech out or just fall out of range of the next car. This super does generally high damage, but if it hits a midair opponent, not all cars might connect. You can attempt okizeme after the super is done or attacks the opponent before they hit the ground. | |||
Midler is unable to move while performing this super in Stand On, making it not only much more risky to do, but also makes you unable to perform mixups as it happens. Avoid using the Stand On version as it's not worth the risk. Also, you will receive increased damage if you're punished. | |||
}} | }} | ||
}} | }} | ||
| Line 745: | Line 792: | ||
|cancel= | |cancel= | ||
|properties= | |properties= | ||
|description= | |description=Midler crouches down and High Priestess appears as a big mouth under the opponent. If jumped into or not jumped out of, the opponent falls down into the mouth of High Priestess, getting chomped down for massive damage. | ||
While it doesn't have as many invincibility frames as her other supers, it can be used as a long distance punish, which is especially useful versus zoners. You can hit some characters after they fly out from High Priestess' mouth with some normals, though sometimes it's better to just leave them alone as you can perform okizeme after they land. If the super misses and Midler is punished before she recovers, she'll take increased damage even in Stand Off. | |||
The Stand On version is the same as the Stand Off one. | |||
}} | |||
}} | |||
{{MoveData | |||
|image= | |||
|caption=Tandem Attack | |||
|name=214S or s.214S | |||
|data= | |||
{{AttackData-HFTF | |||
|startup= | |||
|active= | |||
|recovery= | |||
|hit= | |||
|block/pushblock= | |||
|damage= | |||
|cancel= | |||
|properties= | |||
|description=Midler does a tandem attack | |||
}} | }} | ||
}} | }} | ||
Revision as of 12:29, 25 March 2021
Stand OFF
Normals
| Startup | Active | Recovery | Damage | Guard | ||||
|---|---|---|---|---|---|---|---|---|
| - | - | - | - | - | ||||
| Hit Adv. | Block Adv. | Pushblock Adv. | Cancel | Properties | ||||
| - | {{{block}}} | - | - | - | ||||
|
Midler does a quick jab. Poor range but comes out fairly fast. Sometimes useful as a quick anti-air. | ||||||||
| Startup | Active | Recovery | Damage | Guard | ||||
|---|---|---|---|---|---|---|---|---|
| - | - | - | - | - | ||||
| Hit Adv. | Block Adv. | Pushblock Adv. | Cancel | Properties | ||||
| - | {{{block}}} | - | - | - | ||||
|
Midler performs a downwards angled kick. Hits low. Very quick and good inside of combos. | ||||||||
| Startup | Active | Recovery | Damage | Guard | ||||
|---|---|---|---|---|---|---|---|---|
| - | - | - | - | - | ||||
| Hit Adv. | Block Adv. | Pushblock Adv. | Cancel | Properties | ||||
| - | {{{block}}} | - | - | - | ||||
|
High Priestess appears and swipes at the opponent. Does high damage and can be used inside of combos. | ||||||||
| Startup | Active | Recovery | Damage | Guard | ||||
|---|---|---|---|---|---|---|---|---|
| - | - | - | - | - | ||||
| Hit Adv. | Block Adv. | Pushblock Adv. | Cancel | Properties | ||||
| - | {{{block}}} | - | - | - | ||||
|
Midler does a quick low kick. Hits further than her jab and can combo into itself and most of her other normals with the exception of 6B, 5C, and 2C. | ||||||||
| Startup | Active | Recovery | Damage | Guard | ||||
|---|---|---|---|---|---|---|---|---|
| - | - | - | - | - | ||||
| Hit Adv. | Block Adv. | Pushblock Adv. | Cancel | Properties | ||||
| - | {{{block}}} | - | - | - | ||||
|
High Priestess stabs the opponent with her nails. Good as a fast poke but doesn't combo into many things. | ||||||||
| Startup | Active | Recovery | Damage | Guard | ||||
|---|---|---|---|---|---|---|---|---|
| - | - | - | - | - | ||||
| Hit Adv. | Block Adv. | Pushblock Adv. | Cancel | Properties | ||||
| - | {{{block}}} | - | - | - | ||||
|
High Priestess appears as a big head and bites the ground. It's an amazing sweep with high priority, range, and damage. Works best as a meaty and can combo off jumping attacks. | ||||||||
| Startup | Active | Recovery | Damage | Guard | ||||
|---|---|---|---|---|---|---|---|---|
| - | - | - | - | - | ||||
| Hit Adv. | Block Adv. | Pushblock Adv. | Cancel | Properties | ||||
| - | {{{block}}} | - | - | - | ||||
|
Midler does a quick kick with her knee. Works great as an instant overhead. | ||||||||
| Startup | Active | Recovery | Damage | Guard | ||||
|---|---|---|---|---|---|---|---|---|
| - | - | - | - | - | ||||
| Hit Adv. | Block Adv. | Pushblock Adv. | Cancel | Properties | ||||
| - | {{{block}}} | - | - | - | ||||
|
Midler does a far-reaching horizontal kick. Good air-to-air and can crossup the opponent. | ||||||||
| Startup | Active | Recovery | Damage | Guard | ||||
|---|---|---|---|---|---|---|---|---|
| - | - | - | - | - | ||||
| Hit Adv. | Block Adv. | Pushblock Adv. | Cancel | Properties | ||||
| - | {{{block}}} | - | - | - | ||||
|
High Priestess appears and performs a slashing attack in midair. Covers a very long range though you will have a hard time hitting some crouching opponents with it. Amazing air-to-air due to high priority. | ||||||||
Dashing Normals
| Startup | Active | Recovery | Damage | Guard | ||||
|---|---|---|---|---|---|---|---|---|
| - | - | - | - | - | ||||
| Hit Adv. | Block Adv. | Pushblock Adv. | Cancel | Properties | ||||
| - | {{{block}}} | - | - | - | ||||
|
Midler does a magical flip in midair that hits the opponent twice. This move becomes risky as it is unsafe when opponent pushblocks the first hit. On hit, it can lead to a tick grab or you can cancel it into 236A/B/C/S for a combo/frame trap. | ||||||||
| Startup | Active | Recovery | Damage | Guard | ||||
|---|---|---|---|---|---|---|---|---|
| - | - | - | - | - | ||||
| Hit Adv. | Block Adv. | Pushblock Adv. | Cancel | Properties | ||||
| - | {{{block}}} | - | - | - | ||||
|
Minimally slower startup but the same amount of recovery as 2A, which turns it into an amazing combo starter. | ||||||||
| Startup | Active | Recovery | Damage | Guard | ||||
|---|---|---|---|---|---|---|---|---|
| - | - | - | - | - | ||||
| Hit Adv. | Block Adv. | Pushblock Adv. | Cancel | Properties | ||||
| - | {{{block}}} | - | - | - | ||||
|
Visually the same as 2B. | ||||||||
| Startup | Active | Recovery | Damage | Guard | ||||
|---|---|---|---|---|---|---|---|---|
| - | - | - | - | - | ||||
| Hit Adv. | Block Adv. | Pushblock Adv. | Cancel | Properties | ||||
| - | {{{block}}} | - | - | - | ||||
|
Visually the same as 2C. Long range plus the speed from dash allow this move to travel a long distance which makes it incredibly useful. | ||||||||
Command Normals
| Startup | Active | Recovery | Damage | Guard | ||||
|---|---|---|---|---|---|---|---|---|
| - | - | - | - | - | ||||
| Hit Adv. | Block Adv. | Pushblock Adv. | Cancel | Properties | ||||
| - | {{{block}}} | - | - | - | ||||
|
High Priestess enters the opponents body and smashes them on the floor 3 times. One of the better grabs in the game as it does slightly higher damage compared to other grabs and leads to okizeme. | ||||||||
| Startup | Active | Recovery | Damage | Guard | ||||
|---|---|---|---|---|---|---|---|---|
| - | - | - | - | - | ||||
| Hit Adv. | Block Adv. | Pushblock Adv. | Cancel | Properties | ||||
| - | {{{block}}} | - | - | - | ||||
|
High Priestess turns into a spinning saw in front of Midler while she poses in place, hitting once. Pretty useless. | ||||||||
| Startup | Active | Recovery | Damage | Guard | ||||
|---|---|---|---|---|---|---|---|---|
| - | - | - | - | - | ||||
| Hit Adv. | Block Adv. | Pushblock Adv. | Cancel | Properties | ||||
| - | {{{block}}} | - | - | - | ||||
|
Same kick animation as 2A but it's slower and moves her forward while kicking. Can be used as a replacement for 5B in some combos. | ||||||||
| Startup | Active | Recovery | Damage | Guard | ||||
|---|---|---|---|---|---|---|---|---|
| - | - | - | - | - | ||||
| Hit Adv. | Block Adv. | Pushblock Adv. | Cancel | Properties | ||||
| - | {{{block}}} | - | - | - | ||||
|
A dropkick style move. Midler stops all air momentum and High Priestess transforms into a steel beam that slams into the opponent at roughly 45° angle. Once the attack hits the ground, Midler backflips away, which makes the recovery very long. Quite a risky move to use, though it's good at beating opponents midair and can serve as a quick overhead. By hitting the opponent at a very specific angle, this move can be occasionally canceled into special/super moves, which allows you to combo after the move or at least make it safer on block. | ||||||||
| Startup | Active | Recovery | Damage | Guard | ||||
|---|---|---|---|---|---|---|---|---|
| - | - | - | - | - | ||||
| Hit Adv. | Block Adv. | Pushblock Adv. | Cancel | Properties | ||||
| - | {{{block}}} | - | - | - | ||||
|
High Priestess turns into an excavator and performs a quick version of s.2C. Quick Guard Cancel that covers a fairly decent range, though it's much shorter than it appears. Launches opponent away on hit. | ||||||||
Stand ON
| Startup | Active | Recovery | Damage | Guard | ||||
|---|---|---|---|---|---|---|---|---|
| - | - | - | - | - | ||||
| Hit Adv. | Block Adv. | Pushblock Adv. | Cancel | Properties | ||||
| - | {{{block}}} | - | - | - | ||||
|
High Priestess does a fast slashing attack. Becomes a quick 4 hit auto combo if mashed. | ||||||||
| Startup | Active | Recovery | Damage | Guard | ||||
|---|---|---|---|---|---|---|---|---|
| - | - | - | - | - | ||||
| Hit Adv. | Block Adv. | Pushblock Adv. | Cancel | Properties | ||||
| - | {{{block}}} | - | - | - | ||||
|
High Priestess transforms into scissors that cut towards the opponent head. Fast poke, although it whiffs against most crouching opponents. Can cancel into itself up to 2 times. Useful for meter building. | ||||||||
| Startup | Active | Recovery | Damage | Guard | ||||
|---|---|---|---|---|---|---|---|---|
| - | - | - | - | - | ||||
| Hit Adv. | Block Adv. | Pushblock Adv. | Cancel | Properties | ||||
| - | {{{block}}} | - | - | - | ||||
|
High Priestess transforms into a spinning saw that moves forwards. Good priority, can be used as a meaty. Hits 3 times. Note that if Midler is hit while performing this move, she'll take increased damage as if she was in the remote mode. | ||||||||
| Startup | Active | Recovery | Damage | Guard | ||||
|---|---|---|---|---|---|---|---|---|
| - | - | - | - | - | ||||
| Hit Adv. | Block Adv. | Pushblock Adv. | Cancel | Properties | ||||
| - | {{{block}}} | - | - | - | ||||
|
High Priestess stabs the opponent with her nails quickly. Becomes a quick 4 hit auto combo if mashed. Hits high except for the last hit, which hits low. | ||||||||
| Startup | Active | Recovery | Damage | Guard | ||||
|---|---|---|---|---|---|---|---|---|
| - | - | - | - | - | ||||
| Hit Adv. | Block Adv. | Pushblock Adv. | Cancel | Properties | ||||
| - | {{{block}}} | - | - | - | ||||
|
High Priestess appears as a big head and bites the ground. Faster than 2C but doesn't sweep the opponent. Hits low. | ||||||||
| Startup | Active | Recovery | Damage | Guard | ||||
|---|---|---|---|---|---|---|---|---|
| - | - | - | - | - | ||||
| Hit Adv. | Block Adv. | Pushblock Adv. | Cancel | Properties | ||||
| - | {{{block}}} | - | - | - | ||||
|
High Priestess turns into an excavator and quickly swipes upwards. Launches on hit. Can be used as a mediocre anti-air, but the hitbox is smaller than it appears. | ||||||||
| Startup | Active | Recovery | Damage | Guard | ||||
|---|---|---|---|---|---|---|---|---|
| - | - | - | - | - | ||||
| Hit Adv. | Block Adv. | Pushblock Adv. | Cancel | Properties | ||||
| - | {{{block}}} | - | - | - | ||||
|
High Priestess does a horizontal slash. Solid range all around. | ||||||||
| Startup | Active | Recovery | Damage | Guard | ||||
|---|---|---|---|---|---|---|---|---|
| - | - | - | - | - | ||||
| Hit Adv. | Block Adv. | Pushblock Adv. | Cancel | Properties | ||||
| - | {{{block}}} | - | - | - | ||||
|
Same as j.s.A but does way more damage. | ||||||||
| Startup | Active | Recovery | Damage | Guard | ||||
|---|---|---|---|---|---|---|---|---|
| - | - | - | - | - | ||||
| Hit Adv. | Block Adv. | Pushblock Adv. | Cancel | Properties | ||||
| - | {{{block}}} | - | - | - | ||||
|
Very similar move to j.C but has a slightly longer hitbox. It can be hard to hit crouching characters with it. | ||||||||
Dashing Normals
| Startup | Active | Recovery | Damage | Guard | ||||
|---|---|---|---|---|---|---|---|---|
| - | - | - | - | - | ||||
| Hit Adv. | Block Adv. | Pushblock Adv. | Cancel | Properties | ||||
| - | {{{block}}} | - | - | - | ||||
|
Same as s.2B but does less damage. Very useless. Hits low. | ||||||||
| Startup | Active | Recovery | Damage | Guard | ||||
|---|---|---|---|---|---|---|---|---|
| - | - | - | - | - | ||||
| Hit Adv. | Block Adv. | Pushblock Adv. | Cancel | Properties | ||||
| - | {{{block}}} | - | - | - | ||||
|
Same as s.2B. Quite useless. Hits low. | ||||||||
| Startup | Active | Recovery | Damage | Guard | ||||
|---|---|---|---|---|---|---|---|---|
| - | - | - | - | - | ||||
| Hit Adv. | Block Adv. | Pushblock Adv. | Cancel | Properties | ||||
| - | {{{block}}} | - | - | - | ||||
|
Though it has the appearance of s.2A, it functions just like d.s.5A. Hits low. Just as useless as the rest. | ||||||||
| Startup | Active | Recovery | Damage | Guard | ||||
|---|---|---|---|---|---|---|---|---|
| - | - | - | - | - | ||||
| Hit Adv. | Block Adv. | Pushblock Adv. | Cancel | Properties | ||||
| - | {{{block}}} | - | - | - | ||||
|
Significantly slower version of s.2C. Avoid using it. | ||||||||
Command Normals
| Startup | Active | Recovery | Damage | Guard | ||||
|---|---|---|---|---|---|---|---|---|
| - | - | - | - | - | ||||
| Hit Adv. | Block Adv. | Pushblock Adv. | Cancel | Properties | ||||
| - | {{{block}}} | - | - | - | ||||
|
Same as the Stand Off grab. Just as useful. | ||||||||
| Startup | Active | Recovery | Damage | Guard | ||||
|---|---|---|---|---|---|---|---|---|
| - | - | - | - | - | ||||
| Hit Adv. | Block Adv. | Pushblock Adv. | Cancel | Properties | ||||
| - | {{{block}}} | - | - | - | ||||
|
High Priestess does a quick upwards slash which covers a slightly longer distance but is also slower. Just like s.5A, it can turn into a 4 hit auto combo. | ||||||||
| Startup | Active | Recovery | Damage | Guard | ||||
|---|---|---|---|---|---|---|---|---|
| - | - | - | - | - | ||||
| Hit Adv. | Block Adv. | Pushblock Adv. | Cancel | Properties | ||||
| - | {{{block}}} | - | - | - | ||||
|
High Priestess turns into a spinning saw that goes forward in a downwards angled curve. Hits 3 times. Note that if Midler is hit while performing this move, she'll take increased damage as if she was in the remote mode. | ||||||||
| Startup | Active | Recovery | Damage | Guard | ||||
|---|---|---|---|---|---|---|---|---|
| - | - | - | - | - | ||||
| Hit Adv. | Block Adv. | Pushblock Adv. | Cancel | Properties | ||||
| - | {{{block}}} | - | - | - | ||||
|
High Priestess turns into a spinning saw that goes upwards instead of forward. Hits 3 times. It doesn't make a good anti-air but can sometimes connect with opponents launched by 236S or 2C. Note that if Midler is hit while performing this move, she'll take increased damage as if she was in the remote mode. | ||||||||
| Startup | Active | Recovery | Damage | Guard | ||||
|---|---|---|---|---|---|---|---|---|
| - | - | - | - | - | ||||
| Hit Adv. | Block Adv. | Pushblock Adv. | Cancel | Properties | ||||
| - | {{{block}}} | - | - | - | ||||
|
Midler stops all air momentum while High Priestess turns into a weight and falls straight down. Horrible, horrible move. AVOID USING IT AT ALL COSTS. Hits 2 times, but only knocks down on second hit. Has horrible hitbox. While it can still cross up the opponent, it's unsafe on block and the second hit often misses anyway. | ||||||||
| Startup | Active | Recovery | Damage | Guard | ||||
|---|---|---|---|---|---|---|---|---|
| - | - | - | - | - | ||||
| Hit Adv. | Block Adv. | Pushblock Adv. | Cancel | Properties | ||||
| - | {{{block}}} | - | - | - | ||||
|
High Priestess turns into an excavator and performs a quick version of s.2C. Quick Guard Cancel that covers a fairly decent range, though it's much shorter than it appears. Launches opponent away on hit. | ||||||||
Special Moves
| Startup | Active | Recovery | Damage | Guard | ||||
|---|---|---|---|---|---|---|---|---|
| - | - | - | - | - | ||||
| Hit Adv. | Block Adv. | Pushblock Adv. | Cancel | Properties | ||||
| - | {{{block}}} | - | - | - | ||||
|
High Priestess turns into a harpoon launcher and fires straight towards the opponent. A fast projectile special. Low damage but can easily catch the opponent off guard. Due to the projectile's speed, this move can be very effective during projectile wars and can easily interrupt opponents. Can be canceled into from 5A, 2A, 5B, 3B, and 5C. Depending on the button pressed, the projectile's speed changes minimally, with C version being the fastest and by far the most useful one. Stand On version is almost the same except the recovery is faster. Good for applying pressure from fullscreen. | ||||||||
| Startup | Active | Recovery | Damage | Guard | ||||
|---|---|---|---|---|---|---|---|---|
| - | - | - | - | - | ||||
| Hit Adv. | Block Adv. | Pushblock Adv. | Cancel | Properties | ||||
| - | {{{block}}} | - | - | - | ||||
|
High Priestess turns into a car that depending on the button pressed, comes out of the ground and launches the opponent on hit. After deploying High Priestess to attack, Midler can freely move during this attack. It's a great move that can be used for zoning, applying pressure, and it makes one of the best anti-airs in the game since it cannot be blocked midair. You can also use it for frame traps against opponents that respect you too much or pushblock a ton, especially after 2C. Depending on the button pressed, the car will appear at different distances. A - In front of Midler B - A bit further from Midler C - Furthest away from Midler, almost fullscreen. (Fullscreen on indoor stages that do not zoom out while characters are in the corners.) Note that while this move is happening you lose the ability to block. Sometimes rolling is the safest option to follow up with. The Stand On version functions in exactly the same way, however, Midler is unable to move while the attack is happening and will receive increased damage if she's punished. It's best to avoid using this move because it's just not worth the risk. | ||||||||
| Startup | Active | Recovery | Damage | Guard | ||||
|---|---|---|---|---|---|---|---|---|
| - | - | - | - | - | ||||
| Hit Adv. | Block Adv. | Pushblock Adv. | Cancel | Properties | ||||
| - | {{{block}}} | - | - | - | ||||
|
Midler summons High Priestess as a Weight that stomps down in front of her. Can be used as an overhead in between attacks but it's really not worth the hassle. It doesn't do high damage and High Priestess is punishable even on hit unless Midler follows up with an attack of her own, which in some situations isn't even possible. Avoid using it unless you're about to KO the opponent and need a quick mixup. The Stand On version has Midler recover the same amount of time as High Priestess, making this move even more useless. | ||||||||
| Startup | Active | Recovery | Damage | Guard | ||||
|---|---|---|---|---|---|---|---|---|
| - | - | - | - | - | ||||
| Hit Adv. | Block Adv. | Pushblock Adv. | Cancel | Properties | ||||
| - | {{{block}}} | - | - | - | ||||
|
High Priestess appears and slashes upwards, launching the opponent on hit. Uses the same animation as j.C and covers a good distance. Can confirm out of all of Midler's normals, making it a simple combo ender. | ||||||||
Super Moves
| Startup | Active | Recovery | Damage | Guard | ||||
|---|---|---|---|---|---|---|---|---|
| - | - | - | - | - | ||||
| Hit Adv. | Block Adv. | Pushblock Adv. | Cancel | Properties | ||||
| - | {{{block}}} | - | - | - | ||||
|
High Priestess turns into a harpoon launcher and fires straight towards the opponent. Upon impact, the harpoon pins the opponent to the wall as Midler summons multiple other harpoons and launches them towards the opponent. Harpoon can pass through other projectiles, making it a good move against zoners. Has good invincibility frame but unfortunately low damage. After the last hit the opponent is launched up where you can follow up with another move before they recover. If whiffed, Midler takes a long while to recover, so make sure this move connects with the opponent at the very least. The Stand On version is pretty much exactly the same. | ||||||||
| Startup | Active | Recovery | Damage | Guard | ||||
|---|---|---|---|---|---|---|---|---|
| - | - | - | - | - | ||||
| Hit Adv. | Block Adv. | Pushblock Adv. | Cancel | Properties | ||||
| - | {{{block}}} | - | - | - | ||||
|
Midler summons a barrage of Cars that strike from the ground one after another in different colors. Each car launches on hit and is air-unblockable, making it a great reversal tool. Though the startup is very slow making it impossible to combo into this super by any normal means, it's fully invincible, and if it hits, it will cause hard knockdown. If opponent blocks this super, you can attempt to mix them up, however, remember to not hit the opponent with your normals as the super is hitting them because that gives them a window to tech out or just fall out of range of the next car. This super does generally high damage, but if it hits a midair opponent, not all cars might connect. You can attempt okizeme after the super is done or attacks the opponent before they hit the ground. Midler is unable to move while performing this super in Stand On, making it not only much more risky to do, but also makes you unable to perform mixups as it happens. Avoid using the Stand On version as it's not worth the risk. Also, you will receive increased damage if you're punished. | ||||||||
| Startup | Active | Recovery | Damage | Guard | ||||
|---|---|---|---|---|---|---|---|---|
| - | - | - | - | - | ||||
| Hit Adv. | Block Adv. | Pushblock Adv. | Cancel | Properties | ||||
| - | {{{block}}} | - | - | - | ||||
|
Midler crouches down and High Priestess appears as a big mouth under the opponent. If jumped into or not jumped out of, the opponent falls down into the mouth of High Priestess, getting chomped down for massive damage. While it doesn't have as many invincibility frames as her other supers, it can be used as a long distance punish, which is especially useful versus zoners. You can hit some characters after they fly out from High Priestess' mouth with some normals, though sometimes it's better to just leave them alone as you can perform okizeme after they land. If the super misses and Midler is punished before she recovers, she'll take increased damage even in Stand Off. The Stand On version is the same as the Stand Off one. | ||||||||
| Startup | Active | Recovery | Damage | Guard | ||||
|---|---|---|---|---|---|---|---|---|
| - | - | - | - | - | ||||
| Hit Adv. | Block Adv. | Pushblock Adv. | Cancel | Properties | ||||
| - | {{{block}}} | - | - | - | ||||
|
Midler does a tandem attack | ||||||||
