mNo edit summary |
m (→HPHK) |
||
| (43 intermediate revisions by the same user not shown) | |||
| Line 46: | Line 46: | ||
* Cancel options: self sp su | * Cancel options: self sp su | ||
A fairly standard jab, | A fairly standard jab, tends to whiff on crouchers and is low parriable so has little use in confirms and pressure. Best used as a counter to jumpin parry attempts or as a post-parry anti-air. | ||
{{3S Button FAT|link=https://fullmeter.com/fatonline/#/framedata/movedetail/3S/Yang/normal/Stand%20LP}} | {{3S Button FAT|link=https://fullmeter.com/fatonline/#/framedata/movedetail/3S/Yang/normal/Stand%20LP}} | ||
}} | }} | ||
| Line 74: | Line 74: | ||
* Opponent meter gain: Whiff: 0, Hit: 2, Block: 0 | * Opponent meter gain: Whiff: 0, Hit: 2, Block: 0 | ||
Fast, plus on block, high-parry-only attack with decent links after. Generally used for anti-parry mixups, where it can confirm/link into 5LK (cancels to EX rekkas), SA2, or f.MP/2MP if you'd want to do that for some reason, while being plus. It's also | Fast, plus on block, high-parry-only attack with decent links after. Generally used for anti-parry mixups, where it can confirm/link into 5LK (cancels to EX rekkas), SA2, or f.MP/2MP if you'd want to do that for some reason, while being plus. It's also optimal in jumpin combos into rekka, and has a target combo from it, which is generally Yang's best way to confirm SA2 beyond the aforementioned link. | ||
{{3S Button FAT|link=https://fullmeter.com/fatonline/#/framedata/movedetail/3S/Yang/normal/Close%20MP}} | {{3S Button FAT|link=https://fullmeter.com/fatonline/#/framedata/movedetail/3S/Yang/normal/Close%20MP}} | ||
}} | }} | ||
| Line 152: | Line 152: | ||
* Opponent meter gain: Whiff: 0, Hit: 4, Block: 0. | * Opponent meter gain: Whiff: 0, Hit: 4, Block: 0. | ||
{{3S Button FAT|link=https://fullmeter.com/fatonline/#/framedata/movedetail/3S/Yang/normal/Far%20HP}} | {{3S Button FAT|link=https://fullmeter.com/fatonline/#/framedata/movedetail/3S/Yang/normal/Far%20HP}} | ||
Long range poke; hits quite hard, actually. It tends to whiff on crouchers at further ranges (the only place you need it to land) and is unrewarding on hit due to no special or super cancels, or significant frame advantage. Is the juggle ender of choice from corner palm, the stun output of these combos is very high. | |||
}} | }} | ||
}} | }} | ||
| Line 176: | Line 178: | ||
* 10 kara range | * 10 kara range | ||
{{3S Button FAT|link=https://fullmeter.com/fatonline/#/framedata/movedetail/3S/Yang/normal/Stand%20LK}} | {{3S Button FAT|link=https://fullmeter.com/fatonline/#/framedata/movedetail/3S/Yang/normal/Stand%20LK}} | ||
Yang's main linking normal, being frame 4 means it can be done after c.MP, a meaty UOH, and is the most consistent after jumpins and divekicks. Has a Target combo from it but generally should be cancelled into EX Rekka instead. | |||
}} | }} | ||
}} | }} | ||
| Line 201: | Line 205: | ||
* Opponent meter gain: Whiff: 0, Hit: 2, Block: 0. | * Opponent meter gain: Whiff: 0, Hit: 2, Block: 0. | ||
{{3S Button FAT|link=https://fullmeter.com/fatonline/#/framedata/movedetail/3S/Yang/normal/Close%20MK}} | {{3S Button FAT|link=https://fullmeter.com/fatonline/#/framedata/movedetail/3S/Yang/normal/Close%20MK}} | ||
Launcher. Basically identical to Yun's: super jump cancellable on hit or block, has a good anti air hitbox and is rewarding as one, followed up by 236K usually, but it's a proximity normal, which leaves it as most consistent after parries. Additionally, c.MK > sjc > j.HK works after Yang's command grab on some characters, where it does high stun and damage, and resets the opponent into a strike/throw mixup where yang can go into c.MK, or command grab, then c.MK to loop the situation. This is a very potent sequence that can be worth using, when the opportunity arises. | |||
}} | }} | ||
}} | }} | ||
| Line 225: | Line 231: | ||
* Opponent meter gain: Whiff: 0, Hit: 2, Block: 0. | * Opponent meter gain: Whiff: 0, Hit: 2, Block: 0. | ||
{{3S Button FAT|link=https://fullmeter.com/fatonline/#/framedata/movedetail/3S/Yang/normal/Far%20MK%20}} | {{3S Button FAT|link=https://fullmeter.com/fatonline/#/framedata/movedetail/3S/Yang/normal/Far%20MK%20}} | ||
A long range poke with an anti-air hitbox: not the most incredible long-range AA ever created but it gets the job done. Unrewarding and inconsistent as a grounded poke, but it can still be used to whiff punish higher hurtboxes. | |||
}} | }} | ||
}} | }} | ||
| Line 250: | Line 258: | ||
* Opponent meter gain: Whiff: 0, Hit: 4, Block: 0. | * Opponent meter gain: Whiff: 0, Hit: 4, Block: 0. | ||
{{3S Button FAT|link=https://fullmeter.com/fatonline/#/framedata/movedetail/3S/Yang/normal/Stand%20HK}} | {{3S Button FAT|link=https://fullmeter.com/fatonline/#/framedata/movedetail/3S/Yang/normal/Stand%20HK}} | ||
Similar to f.MK, but is more horizontal and hits lower. Annoyingly, it still whiffs on some crouching characters at range on top of it being unrewarding, so its usage as a poke is relatively niche. Generally, it's more used as a kara throw with decent range. | |||
}} | }} | ||
}} | }} | ||
| Line 255: | Line 265: | ||
<br> | <br> | ||
<br> | <br> | ||
==== Command Normals ==== | ==== Command Normals ==== | ||
=====<font style="visibility:hidden; float:right">6MK</font>===== | =====<font style="visibility:hidden; float:right">6MK</font>===== | ||
| Line 303: | Line 314: | ||
* Identical to far 5HP. | * Identical to far 5HP. | ||
{{3S Button FAT|link=https://fullmeter.com/fatonline/#/framedata/movedetail/3S/Yang/normal/Far%20HP}} | {{3S Button FAT|link=https://fullmeter.com/fatonline/#/framedata/movedetail/3S/Yang/normal/Far%20HP}} | ||
A command normal identical to f.HP only in place to make it available when close to the opponent. I did not even know this normal existed and most people probably don't either. | |||
}} | }} | ||
}} | }} | ||
| Line 330: | Line 343: | ||
* Cancel options: self sp su | * Cancel options: self sp su | ||
{{3S Button FAT|link=https://fullmeter.com/fatonline/#/framedata/movedetail/3S/Yang/normal/Crouch%20LP}} | {{3S Button FAT|link=https://fullmeter.com/fatonline/#/framedata/movedetail/3S/Yang/normal/Crouch%20LP}} | ||
Chainable jabs that cancel into super or specials. 2LP cam be parried in any direction, but it can make for a decent punish on -3 moves when you don't have super, and it can hit up to 3 times when chained before pushing the opponent out, so it's a very easy confirm into EX Rekka or Supers. | |||
}} | }} | ||
}} | }} | ||
| Line 354: | Line 370: | ||
* Opponent meter gain: Whiff: 0, Hit: 2, Block: 0. | * Opponent meter gain: Whiff: 0, Hit: 2, Block: 0. | ||
{{3S Button FAT|link=https://fullmeter.com/fatonline/#/framedata/movedetail/3S/Yang/normal/Crouch%20MP}} | {{3S Button FAT|link=https://fullmeter.com/fatonline/#/framedata/movedetail/3S/Yang/normal/Crouch%20MP}} | ||
A weird 2MP. Unlike most of its kind, it hits low, which is neat, but it trades almost all combo options for that, only having a point blank confirm to SA2 available due to having 0 cancel options. Its hitbox and range aren't great, and thanks to its the early extension and late retraction of its hurtbox, it's prone to getting counterpoked or whiff punished. It serves as Yang's most rewarding standalone low meaty, but not much else. | |||
}} | }} | ||
}} | }} | ||
| Line 378: | Line 396: | ||
* Opponent meter gain: Whiff: 0, Hit: 3, Block: 0. | * Opponent meter gain: Whiff: 0, Hit: 3, Block: 0. | ||
{{3S Button FAT|link=https://fullmeter.com/fatonline/#/framedata/movedetail/3S/Yang/normal/Crouch%20HP}} | {{3S Button FAT|link=https://fullmeter.com/fatonline/#/framedata/movedetail/3S/Yang/normal/Crouch%20HP}} | ||
A very unique normal with an initial poking hitbox that transitions into a second hit that anti airs. Due to its very bizarre nature, it's not the most reliable anti air, but it can work especially after parries where it covers a huge area in front of and above Yang. Doesn't see much usage beyond that however, as it's easy to parry and has no cancel or followup options. | |||
}} | }} | ||
}} | }} | ||
| Line 401: | Line 421: | ||
* Cancel options: self sp su | * Cancel options: self sp su | ||
{{3S Button FAT|link=https://fullmeter.com/fatonline/#/framedata/movedetail/3S/Yang/normal/Crouch%20LK}} | {{3S Button FAT|link=https://fullmeter.com/fatonline/#/framedata/movedetail/3S/Yang/normal/Crouch%20LK}} | ||
Yang's primary low mixup tool. It can chain into itself or cancel to specials or supers, giving Yang a two-hit confirm into either SA2 or EX Rekka, which greatly helps his high/low and anti-parry mixup. | |||
}} | }} | ||
}} | }} | ||
| Line 426: | Line 448: | ||
* Opponent meter gain: Whiff: 0, Hit: 2, Block: 0. | * Opponent meter gain: Whiff: 0, Hit: 2, Block: 0. | ||
{{3S Button FAT|link=https://fullmeter.com/fatonline/#/framedata/movedetail/3S/Yang/normal/Crouch%20MK}} | {{3S Button FAT|link=https://fullmeter.com/fatonline/#/framedata/movedetail/3S/Yang/normal/Crouch%20MK}} | ||
Yang's primary poke and one of his best buttons overall. Used to fish for hits in neutral or as a low meaty, which aren't confirms by any means but are usually riskless, however as Yang's cancels here are restricted, with rekka and palm being the only ones you'd ever use, many players will look for low parry into high parry against him, and he has no cancellable mid poke to complement it in footsies, besides rekka itself. On top of that, it also has an extended hurtbox for most of its recovery, more than usual for this kind of poke, making it prone to getting whiff punished. This button is amazing but don't overuse it. | |||
}} | }} | ||
}} | }} | ||
| Line 450: | Line 474: | ||
* Opponent meter gain: Whiff: 0, Hit: 4, Block: 0. | * Opponent meter gain: Whiff: 0, Hit: 4, Block: 0. | ||
{{3S Button FAT|link=https://fullmeter.com/fatonline/#/framedata/movedetail/3S/Yang/normal/Crouch%20HK}} | {{3S Button FAT|link=https://fullmeter.com/fatonline/#/framedata/movedetail/3S/Yang/normal/Crouch%20HK}} | ||
A good sweep. Frame 11 means it'll punish other sweeps, but at -7 it's very problematic to punish for most characters without a parry. Has relatively low recovery, and its extended hurtbox retracts after around 4 frames post-actives, making it harder to whiff punish and an overall decent poke. | |||
}} | }} | ||
}} | }} | ||
| Line 455: | Line 481: | ||
<br> | <br> | ||
<br> | <br> | ||
==== Jumping Normals ==== | ==== Jumping Normals ==== | ||
=====<font style="visibility:hidden; float:right">j.LP</font>===== | =====<font style="visibility:hidden; float:right">j.LP</font>===== | ||
| Line 683: | Line 710: | ||
* Shallow angle (long distance) | * Shallow angle (long distance) | ||
{{3S Button FAT|link=https://fullmeter.com/fatonline/#/framedata/movedetail/3S/Yang/normal/HK%20Raigeki%20Shuu}} | {{3S Button FAT|link=https://fullmeter.com/fatonline/#/framedata/movedetail/3S/Yang/normal/HK%20Raigeki%20Shuu}} | ||
A divekick so stupid it would make ST Dhalsim blush. Generally hard to punish even when horrendeously misspaced, but is still plus a good 80% of the time. That being said, it's not uncommon to have no combo actually come from the attack, as its hitstun is often not enough to combo, or at least not easily. All divekicks move very fast, especially the HK version, which makes it good at clearing screen distances in tandem with the Twins' superjumps, while the light or medium versions are good at doing steep divekicks to bait anti-airs or land and throw during pressure. Neutral jump into divekick is annoying enough to deal with, but while they can't be done from a backjump, neutral superjump actually takes the twins backwards and still allows for a divekick, which is just as much of a nuisance. Additionally, they hit crossup (most useful in the corner) on most of the cast, because of course they do. | |||
}} | }} | ||
}} | }} | ||
| Line 691: | Line 720: | ||
==== Target Combos ==== | ==== Target Combos ==== | ||
< | =====<font style="visibility:hidden; float:right">MPHP4HP</font>===== | ||
< | {{MoveData | ||
< | |name=Target Combo 1 | ||
|input={{mp}}>{{hp}}>{{b}}+{{hp}} | |||
|image= | |||
|data= | |||
{{AttackData-3S | |||
|startup=4(close MP)/5(far MP) | |||
|active= | |||
|recovery= | |||
|attackLevel=Mid>Mid>Mid | |||
|onHit= | |||
|onHitCrouch= | |||
|damage= | |||
|stun= | |||
|description= | |||
Two normals into a palm, can be done after either close or far MP, but far tends to fall out during the palm. Has a huge delay window for its hits, which can be good to apply pressure similar to rekkkas. The Palm is super-cancellable, and is one of Yang's main confirms into SA2. | |||
}} | |||
}} | |||
=====<font style="visibility:hidden; float:right">LKMKHK</font>===== | |||
{{MoveData | |||
|name=Target Combo 2 | |||
|input={{lk}}>{{mk}}>{{hk}} | |||
|image= | |||
|data= | |||
{{AttackData-3S | |||
|startup= | |||
|active= | |||
|recovery= | |||
|attackLevel=Mid>Mid>Mid | |||
|onHit= | |||
|onHitCrouch= | |||
|damage= | |||
|stun= | |||
|description= | |||
Three standing kicks in quick succession, the c.MK does not launch. The closest thing Yang has to a meterless light ender, but due to the second hit's range it tends to not work in links, and is also generally unrewarding with its low damage and no knockdown unlike SF4. Mostly used as a get-off-me-tool to mash when you're looking to create space during to defense. | |||
}} | |||
}} | |||
=====<font style="visibility:hidden; float:right">j.MKj.3MK</font>===== | |||
{{MoveData | |||
|name=Target Combo 3 | |||
|input={{mk}}>{{df}}+{{mk}} (air) | |||
|image= | |||
|data= | |||
{{AttackData-3S | |||
|startup= | |||
|active= | |||
|recovery= | |||
|attackLevel=Overhead>Overhead | |||
|onHit= | |||
|onHitCrouch= | |||
|damage= | |||
|stun= | |||
|description= | |||
Probably the best TC Yang has. It can be used to mess with people attempting parries on your jumpin, can combo as an anir-to-air, and is safe when the second hit whiffs due to the downwards momentum. It also works as just a raw jumpin, since it applies a strangely large amount of hitstun and blockstun, giving Yang consistent combos or plus frames. | |||
}} | |||
}} | |||
==== Throws ==== | ==== Throws ==== | ||
| Line 804: | Line 892: | ||
* Opponent meter gain: Whiff: 0, Hit: 2, Block: 0. | * Opponent meter gain: Whiff: 0, Hit: 2, Block: 0. | ||
{{3S Button FAT|link=https://fullmeter.com/fatonline/#/framedata/movedetail/3S/Yang/normal/Kami%20Kakiage}} | {{3S Button FAT|link=https://fullmeter.com/fatonline/#/framedata/movedetail/3S/Yang/normal/Kami%20Kakiage}} | ||
Yang brushes his anime protagonist hair and gains a damage boost for his next hit or combo. Can be done after SA2 or a stun (which Yang gets a lot) so it's very practical ingame. It also has a hitbox which can be used to end rounds, and subsequently, friendships. | |||
}} | }} | ||
}} | }} | ||
| Line 809: | Line 899: | ||
<br> | <br> | ||
<br> | <br> | ||
==== Special Moves ==== | ==== Special Moves ==== | ||
=====<font style="visibility:hidden; float:right">236P</font>===== | =====<font style="visibility:hidden; float:right">236P</font>===== | ||
| Line 885: | Line 976: | ||
* Self meter gain: Whiff: -40, Hit: -40, Block: -40. | * Self meter gain: Whiff: -40, Hit: -40, Block: -40. | ||
* Opponent meter gain: Whiff: 0, Hit: 0, Block: 0. | * Opponent meter gain: Whiff: 0, Hit: 0, Block: 0. | ||
THE rekkas. The meterless versions have good corner carry, are easily confirmable, and the light version is mostly safe at -1 and -4 on its first two hits, so they're good for pressure and buffered cancels (Yang can also change between the meterless versions with each hit). EX rekka on the other hand is one of the best EX moves in the entire game: while not as safe as light, its 5 staggered hits make punishes difficult in most situations. It's faster, reaches further, while its damage, knockdown and corner carry are better than the meterless ones', and most notably it has very high stun, which Yang appreciates to offset his low damage output. All versions are high parry only, which can be useful to dissuade low parry in footsies range, but even in pressure, being predictable can still get punished by some supers or red parries even on the light version, so be mindful. | |||
{{3S Button FAT|link=https://fullmeter.com/fatonline/#/framedata/movedetail/3S/Yang/normal/EX%20Tourou%20Zan}} | {{3S Button FAT|link=https://fullmeter.com/fatonline/#/framedata/movedetail/3S/Yang/normal/EX%20Tourou%20Zan}} | ||
}} | }} | ||
| Line 965: | Line 1,060: | ||
* Opponent meter gain: Whiff: 0, Hit: 0, Block: 0. | * Opponent meter gain: Whiff: 0, Hit: 0, Block: 0. | ||
{{3S Button FAT|link=https://fullmeter.com/fatonline/#/framedata/movedetail/3S/Yang/normal/EX%20Senkyuutai}} | {{3S Button FAT|link=https://fullmeter.com/fatonline/#/framedata/movedetail/3S/Yang/normal/EX%20Senkyuutai}} | ||
Kind of a strange move. Yang rolls a set distance depending on version, or until he reaches the opponent, where he kicks them in the air. It's really difficult to consistently use this move outside of following up c.MK's launch, and possibly some post-parry anti-airing, where it's outclassed anyway. It has low profile once Yang is fully rolling, which can counter fireballs, though this is rather niche in 3s. Gives better oki than rekkas when available, but the corner carry on rekkas is usually more worth it. If the opponent can't parry it, its EX version has 3 rapid hits which can chip them out at low health. | |||
}} | }} | ||
}} | }} | ||
| Line 990: | Line 1,087: | ||
* Opponent meter gain: Whiff: 0, Hit: 3, Block: 0. | * Opponent meter gain: Whiff: 0, Hit: 3, Block: 0. | ||
{{3S Button FAT|link=https://fullmeter.com/fatonline/#/framedata/movedetail/3S/Yang/normal/Byakko%20Soushouda}} | {{3S Button FAT|link=https://fullmeter.com/fatonline/#/framedata/movedetail/3S/Yang/normal/Byakko%20Soushouda}} | ||
Yang's palm. Is massively disjointed with minimal recovery, so it can be useful to fish for hits in neutral, but is mostly used in pressure/oki as a spacing/frame trap or meaty. Due to how parries work in 3rd Strike, it's absolutely vital to enforce the palm fake, as spamming the real version repeatedly will just get parried on reaction into a punish. This is also Yang's only super-cancelable special; it rarely comes up, but it's worth noting, probably. | |||
}} | }} | ||
}} | }} | ||
| Line 1,002: | Line 1,101: | ||
|description= | |description= | ||
{{3S Button FAT|link=https://fullmeter.com/fatonline/#/framedata/movedetail/3S/Yang/normal/Byakko%20Soushouda%20(Fake)}} | {{3S Button FAT|link=https://fullmeter.com/fatonline/#/framedata/movedetail/3S/Yang/normal/Byakko%20Soushouda%20(Fake)}} | ||
A fake palm with no hitbox. Only really used in Yang's offense to bait a high parry attempt and punish with 2MK or command grab. | |||
}} | }} | ||
}} | }} | ||
| Line 1,035: | Line 1,136: | ||
|description= | |description= | ||
{{3S Button FAT|link=https://fullmeter.com/fatonline/#/framedata/movedetail/3S/Yang/normal/HK%20Kaihou}} | {{3S Button FAT|link=https://fullmeter.com/fatonline/#/framedata/movedetail/3S/Yang/normal/HK%20Kaihou}} | ||
Command dash. The light and medium versions are used to chase knockdowns or as a framekill from air reset normals, while the heavy is much too slow to get away with against quickrise even after rekkas. They have no reliable usage in neutral due to how long they take and their wonky invulnerability. They do look and sound absolutely sick though. | |||
}} | }} | ||
}} | }} | ||
| Line 1,053: | Line 1,156: | ||
* 12 throw range | * 12 throw range | ||
{{3S Button FAT|link=https://fullmeter.com/fatonline/#/framedata/movedetail/3S/Yang/normal/Zenpou%20Tenshin}} | {{3S Button FAT|link=https://fullmeter.com/fatonline/#/framedata/movedetail/3S/Yang/normal/Zenpou%20Tenshin}} | ||
Command grab that swideswitches and allows for a combo, identical to Yun's. Yang has enough time to link 2MK into meterless or EX rekkas. Not very rewarding in terms of damage and stun, but a strong mixup tool to supplement Yang's already good offense nevertheless. | |||
}} | }} | ||
}} | }} | ||
| Line 1,077: | Line 1,182: | ||
|description= | |description= | ||
{{3S Button FAT|link=https://fullmeter.com/fatonline/#/framedata/movedetail/3S/Yang/normal/Raishin%20Mahhaken}} | {{3S Button FAT|link=https://fullmeter.com/fatonline/#/framedata/movedetail/3S/Yang/normal/Raishin%20Mahhaken}} | ||
This super is mostly terrible. It has very high damage on grounded opponents, however its positives kind of end there. In juggles it loses most of its hits leading to a hilariously weak connect (seriously it's like 3 damage), removing Yang's ability to confirm into it with his target combo. Its range is alright, but it's sluggish by super standards at 7 frames, and since this is 3rd Strike, its reactable animation takes it from +1 to punishable against any skilled opponent. You shouldn't pick this super basically ever, even if you just want to spam EX Rekka due to its one bar. | |||
}} | }} | ||
}} | }} | ||
| Line 1,099: | Line 1,206: | ||
|description= | |description= | ||
{{3S Button FAT|link=https://fullmeter.com/fatonline/#/framedata/movedetail/3S/Yang/normal/Tenshin%20Senkyuutai}} | {{3S Button FAT|link=https://fullmeter.com/fatonline/#/framedata/movedetail/3S/Yang/normal/Tenshin%20Senkyuutai}} | ||
Picked by most players in almost every matchup. SA2 is already a lot easier to connect due to short startup at close range, and the fact that it juggles right, granted its damage is rather low for the amount of meter it costs. Confirmable from light normals, c.MP, or target combo, so you actually get a lot of opportunities to land it, and its oki is fantastic with an optional sideswitch and massive advantage while being point blank to the opponent. Regardless, it's really only picked for the fact that it has 2 long bars, which Yang will happily spend on EX rekkas over the super in most cases. Having this much bar gives Yang the ability to quickly accumulate a stun from his various mixups and take a round on a whim, which is something neither of his other Super Art choices really let him do. | |||
}} | }} | ||
}} | }} | ||
| Line 1,112: | Line 1,221: | ||
|description= | |description= | ||
{{3S Button FAT|link=https://fullmeter.com/fatonline/#/framedata/movedetail/3S/Yang/normal/Sei-ei%20Enbu}} | {{3S Button FAT|link=https://fullmeter.com/fatonline/#/framedata/movedetail/3S/Yang/normal/Sei-ei%20Enbu}} | ||
Unlike with Yang's other supers, this version of him is actually very complicated and technical to play. Yang summons multiple shadows that repeat whatever attacks he does with a delay. Naturally this gives him very good corner pressure while the super is active, letting him combo from his overheads, or be + on his normally - or unsafe options. With good execution, this super actually gives Yang access to looping left/right unblockables on many characters that can be hard or impossible to escape. The main issue with SA3 is that it limits Yang down to one EX move's worth of meter, lowering his stun output, which is an issue since SA3 combos are not only low damage, but also can't refund much of the meter like Yun's Genei Jin, limiting his potential from getting hits. On top of that, "imperfect" or mistimed unblockables are easily escapable for a lot of characters with a single parry in either direction, unlike setups by Oro or Urien, limiting his threat further. It has some fun quirks especially when it comes to its tendency to win trades thanks to the shadows, but generally this super is only picked in a few matchups (namely larger characters) by Yang experts, though it can be very fun to experiment with. It's also worth noting that resources on, or footage of, efficient SA3 usage are incredibly scarce (though clips like [https://youtu.be/YmxOO-A3i7w?si=3dGnbeilN_y7Y0nG&t=268 this] exist). | |||
}} | }} | ||
}} | }} | ||
Latest revision as of 17:19, 30 May 2024
Introduction
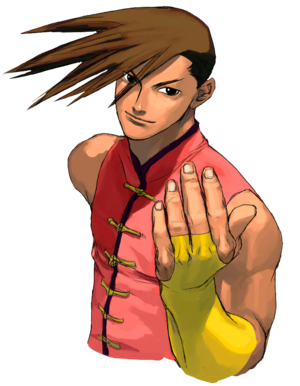
Yang is the younger twin brother of Yun. Yang is an introverted inline skater from Hong Kong. He's skilled in Chinese Kung Fu like his brother. Yang is eager to prove himself, moreso over his brother than anyone else, and can be condescending and sharp mouthed towards his opponents. He first appears in Street Fighter III: New Generation as a palette swap of Yun, before gaining a unique moveset in SF III: 2nd Impact.
Yang has the signature Twins command grab and divekicks, while also having fast walk speed. His pressure is more straightforward than Yun's, using his Rekkas to consolidate his game plan. It can be tough to find an opening out of Yang's pressure as only the final hit of his rekkas are punishable on block. His corner carry is extremely potent, and with his command dash he can create oki situations even if he knocks his opponent far away. He lacks the capability of meterlessly converting off lights, unlike his older brother. Though he has some strong options up close, from a distance he has to commit/gamble more due to slower and punishable ranged options or getting little reward from being unable to convert.
Super Arts
SA1: Raishin Mahhaken
7f startup, fully invincible, single long bar super. It has the same range of Yang's f.HP, deals 74 damage (more than 40%), and is +1 on block. While that sounds nice for a low-damage character like Yang, it's a single bar, meaning you have to avoid using EX slashes if you want the super. It's also slow enough that you can easily parry it after Yang activates, it's difficult to confirm, and loses a hilarious amount of damage in juggles, unlike SA2. The least used super.
SA2: Tenshin Senkyuutai
1f startup, invincible, 2 medium bar super. It deals 53 (around 25%) damage, and has Yang rolling the ground, only starting the attack once an opponent is within nearly point blank range. The super itself is pretty decent - easily confirmable from many different hits, it can be used as a reversal, allows for an optional side switch with great oki either way, etc. The real gold of this super however is the tons of meter you get, giving you more EX slashes to store in the back pocket. Generally the super of choice.
SA3: Sei-ei Enbu
Install super with a very short bar - the shortest bar in the game, in fact. The super's effects are more comparable to Rose's Soul Illusion than Custom Combos - all of Yang's moves are copied by two shadows that follow him around. Unfortunately, this super isn't very good for the most part - the main reason is that it only stores 1 EX slash. Additionally, the damage from Seiei Enbu combos scale fast, it doesn't give his normals super priority, and doesn't have much utility in neutral. So what does Yang get in return? It does give him some nice corner pressure off of repeated high/low mixups that he can convert off of easily, similar to Urien's Aegis Reflector. It also has unblockable setups. If the setup is done properly, a crossup divekick shadow hits one side of the opponent, while Yang hits them with a normal from the other, making it a true left/right unblockable. This is only effective against certain tall/wide characters like Hugo and Alex as other characters can potentially parry once and block to safety. This super radically alters Yang's game plan for better and worse, and its complexity and setups make it the preferred super to choose only in a couple of matchups and only once you have a good handle on his setups.
| Strengths | Weaknesses |
|---|---|
|
|
| Yang #3S_YA | |
|---|---|
| Vitals | |
| Life Points | 1020 |
| Stun Points | 64 |
| Super Art Stock/Size | |
| SA1 | 1/120 |
| SA2 | 2/104 |
| SA3 | 1/64 |
| Ground Movement | |
| Forward Dash duration/distance | 23 (27) (133px) |
| Back Dash duration/distance | 29 (31) (174px) |
| Jumping | |
| Back Jump duration | 39(4+33+2) |
| Neutral Jump duration | 39(4+33+2) |
| Forward Jump duration | 39(4+33+2) |
| Back Super Jump duration | 49(6+41+2) |
| Neutral Super Jump duration | 44(6+36+2) |
| Forward Super Jump duration | 44(6+36+2) |
| Wake up | |
| Wake up duration | 57 |
| Quick rise duration | 41 |
| 3S Frame Data Glossary | |
|---|---|
| Active |
How many frames a move remains active (can hurt opponents) for. Consecutive sets of active frames on a multi-hit move are separated by an asterisk (ex: 3*5). If there is a gap between sets of active frames, the gap is denoted by a number in parentheses (ex: 2(4)2) |
| Attack |
Attack level is L for low attacks (must be blocked crouching), H is for High attacks (which can be blocked high or low) and M for overhead (must be blocked standing). T is for throw attacks (which cannot be blocked). |
| Cancel options |
Available cancel options.
|
| Damage |
Attack damage on hit in life points. Notation may denote multi-hit or "sweet spot" damage values on certain frames. |
| Hit/Block |
These are frame advantage values when the attack hits or is blocked. If the number is positive, then the move will end before the defender can act again. If the number is negative, the defender will be able to act before the attacker and maybe even punish. D refers to knockdown on hit. "Cr. Hit" is an additional frame advantage value denoting if the advantage on hit changes when the defender is being hit while crouching. |
| Kara Range |
Almost all normal attacks can be canceled into a special or a multi-button command within three frames of startup. During that time, some attacks will shift position forward or backward and affect the reach of the special or command accordingly. This is denoted in pixels of range. There are a handful of moves in the game that can be kara-canceled after this initial window and will be denoted as a late kara-cancel. |
| Link |
A combo that is performed by inputting the second move after the first move has completely recovered (as opposed to cancelling the first move's animation). In 3S, the final frame of a move's hitstun allows a character to block a normal or special move, as well as some projectile supers. Therefore, an attack's frame advantage must be 2 frames greater than the followup move's startup in order to link. Ex: a +6 normal can link into a 4f normal/special, or a 5f super. |
| Parry |
This field will show a value of A if the attack can be parried standing or crouching, H if it must be parried standing or L if it must be parried crouching. |
| Recovery |
How many frames it takes for a move to finish after it's been active. |
| Startup |
How many frames it takes before the move becomes 'active' or has a hitbox. 3S uses classic startup notation, which does not include the first active frame. A move with 3 startup becomes active on frame 4. |
| Stun |
Amount of stun added to the opponent's stun bar on hit. |
| Throw range |
Range in pixels from the center of the character to the center of the opponent which allows a grab to connect. |
Frame Data
Standing Normals
5LP
5MP (cl)
5MP (far)
5HP (cl)
5HP (far)
5LK
5MK (cl)
5MK (far)
5HK
Command Normals
6MK
6HP (close)
Crouching Normals
2LP
2MP
2HP
2LK
2MK
2HK
Jumping Normals
j.LP
8MP
j.MP
8HP
j.HP
j.LK
8MK
j.MK
j.HK
j.3K
Target Combos
MPHP4HP
| Startup | Active | Recovery | Hit | Cr. Hit | ||
|---|---|---|---|---|---|---|
| 4(close MP)/5(far MP) | - | - | - | - | ||
| Damage | Stun | Guard | Parry | Block | ||
| - | - | - | - | - | ||
|
Two normals into a palm, can be done after either close or far MP, but far tends to fall out during the palm. Has a huge delay window for its hits, which can be good to apply pressure similar to rekkkas. The Palm is super-cancellable, and is one of Yang's main confirms into SA2. | ||||||
LKMKHK
| Startup | Active | Recovery | Hit | Cr. Hit | ||
|---|---|---|---|---|---|---|
| - | - | - | - | - | ||
| Damage | Stun | Guard | Parry | Block | ||
| - | - | - | - | - | ||
|
Three standing kicks in quick succession, the c.MK does not launch. The closest thing Yang has to a meterless light ender, but due to the second hit's range it tends to not work in links, and is also generally unrewarding with its low damage and no knockdown unlike SF4. Mostly used as a get-off-me-tool to mash when you're looking to create space during to defense. | ||||||
j.MKj.3MK
| Startup | Active | Recovery | Hit | Cr. Hit | ||
|---|---|---|---|---|---|---|
| - | - | - | - | - | ||
| Damage | Stun | Guard | Parry | Block | ||
| - | - | - | - | - | ||
|
Probably the best TC Yang has. It can be used to mess with people attempting parries on your jumpin, can combo as an anir-to-air, and is safe when the second hit whiffs due to the downwards momentum. It also works as just a raw jumpin, since it applies a strangely large amount of hitstun and blockstun, giving Yang consistent combos or plus frames. | ||||||
Throws
LPLK
4LPLK
6LPLK
Universal Overhead
MPMK
Taunt
HPHK
Special Moves
236P
236K
214P
214PP
623K
63214K
Super Arts
236236P (SA1)
236236K (SA2)
236236P (SA3)
| Startup | Active | Recovery | Hit | Cr. Hit | ||
|---|---|---|---|---|---|---|
| 16 | - | - | - | - | ||
| Damage | Stun | Guard | Parry | Block | ||
| - | - | - | - | - | ||
|
Unlike with Yang's other supers, this version of him is actually very complicated and technical to play. Yang summons multiple shadows that repeat whatever attacks he does with a delay. Naturally this gives him very good corner pressure while the super is active, letting him combo from his overheads, or be + on his normally - or unsafe options. With good execution, this super actually gives Yang access to looping left/right unblockables on many characters that can be hard or impossible to escape. The main issue with SA3 is that it limits Yang down to one EX move's worth of meter, lowering his stun output, which is an issue since SA3 combos are not only low damage, but also can't refund much of the meter like Yun's Genei Jin, limiting his potential from getting hits. On top of that, "imperfect" or mistimed unblockables are easily escapable for a lot of characters with a single parry in either direction, unlike setups by Oro or Urien, limiting his threat further. It has some fun quirks especially when it comes to its tendency to win trades thanks to the shadows, but generally this super is only picked in a few matchups (namely larger characters) by Yang experts, though it can be very fun to experiment with. It's also worth noting that resources on, or footage of, efficient SA3 usage are incredibly scarce (though clips like this exist). | ||||||
